oveleon / contao-glossary-bundle
A glossary extension for the Contao Open Source CMS. Glossaries are organized in archives similar to news and events and can be displayed via a list and reader module.
Fund package maintenance!
oveleon
Installs: 4 525
Dependents: 0
Suggesters: 0
Security: 0
Stars: 6
Watchers: 3
Forks: 5
Open Issues: 2
Type:contao-bundle
pkg:composer/oveleon/contao-glossary-bundle
Requires
- php: ^8.3
- ext-json: *
- ext-mbstring: *
- contao/core-bundle: ^5.3
- doctrine/dbal: ^3.3 || ^4.3
- knplabs/knp-menu: ^3.1
- symfony/config: ^6.4 || ^7.0
- symfony/dependency-injection: ^6.4 || ^7.0
- symfony/framework-bundle: ^6.4 || ^7.0
- symfony/http-foundation: ^6.4 || ^7.0
- symfony/http-kernel: ^6.4 || ^7.0
- symfony/routing: ^6.4 || ^7.0
- symfony/security-bundle: ^6.4 || ^7.0
- symfony/string: ^6.4 || ^7.0
- symfony/translation-contracts: ^3.0
Requires (Dev)
- contao/manager-plugin: ^2.3.1
Conflicts
- contao/core: *
- contao/manager-plugin: <2.0 || >=3.0
This package is auto-updated.
Last update: 2026-02-07 06:20:16 UTC
README

A glossary extension for the Contao Open Source CMS. Glossaries are organized in archives similar to news and events and can be displayed via a list and reader module.
Support
If you like this extension, we'd love your support in keeping the open-source spirit alive.
If you think this plugin is useful, please consider sponsoring us to help contribute to our time invested and to further development of this and other open source projects.
Your contributions, whether through coding, testing, providing feedback, or even
a donation, help ensure that we can continue offering free open source software.
Join us in making a difference, and thank you for your support! - Oveleon.
Working with Contao 4.13 and Contao ^5.1 (PHP ^8.1)
Description
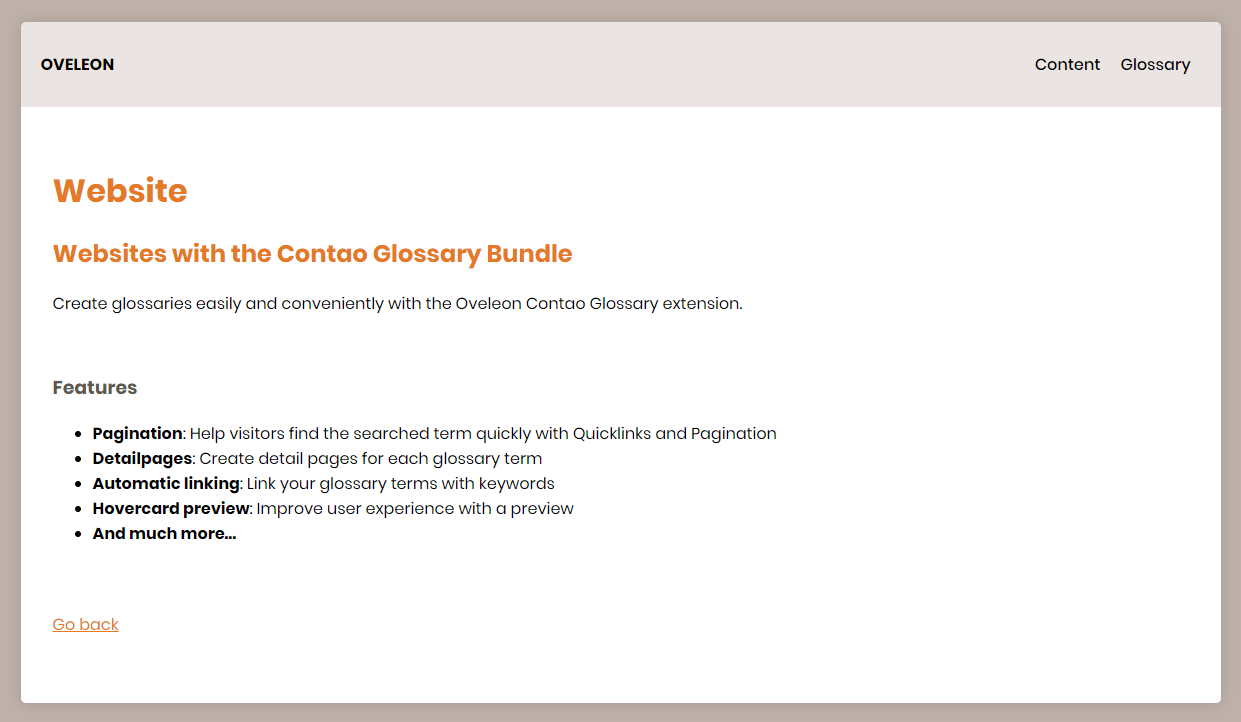
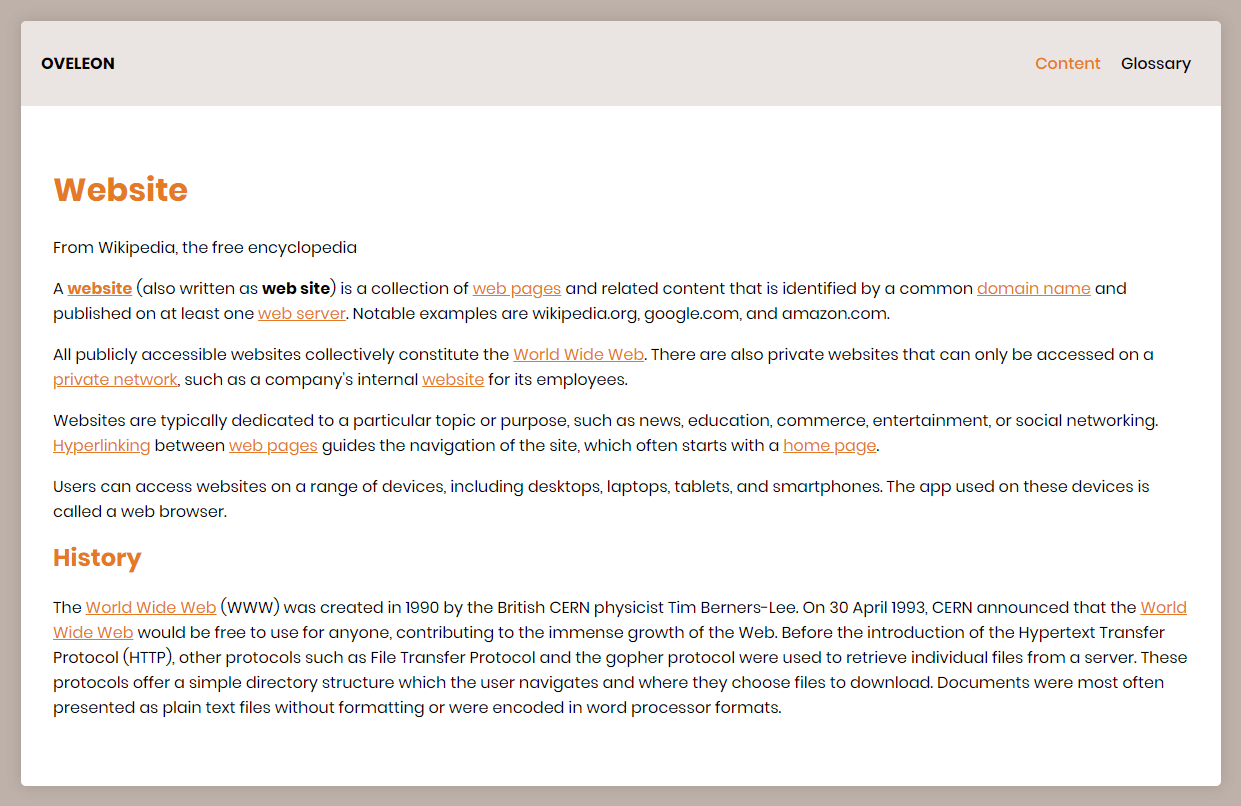
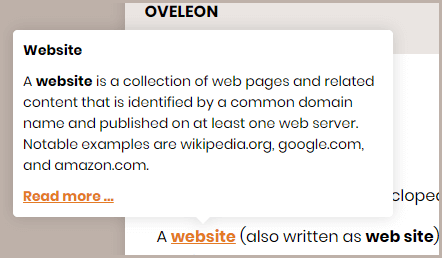
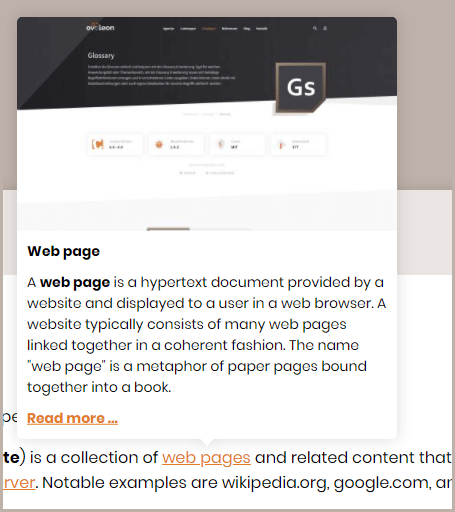
With the Contao Glossary Bundle, you can manage glossary terms in the backend and display them using frontend modules. Each glossary entry can be individually modified and structured with content elements. Terms appearing on your website can be automatically replaced links (or another markup) and a hovercard preview.
- Features
- Installation
- Setup
- Front end modules
- Page & Glossary settings
- Creating links in Contao
- Glossary JavaScript
- Browser Support (JavaScript)
- Frequently asked Questions
- Support
- License
Features
- Compatible with Contao 4.9 and higher versions (PHP 8 Support)
- Possibility to create multiple glossaries
- Frontend- and Backend permissions for glossaries and terms
- Access protection for modules
- Paginated glossary lists
- Quick-links
- Navigation/Pagination grouping for umlauts (UTF8 to ASCII conversion)
- Automatic keyword conversion of glossary terms (markup or link)
- Case sensitivity for keyword conversion
- Hover-card-preview for glossary terms
- Loading animation for hover-cards
- Insert tags
- Link-picker
- Meta title and description for detail pages
- Sitemap-Integration
- Cache invalidation
- Caching for hover-card content (session-storage)
- Caching for abbr descriptions (session-storage)
- can be enabled using the markup feature with 'abbr'
Installation
Upgrading to version 2
After upgrading from version 1 to version 2, make sure to edit your modules (glossary and glossary-reader) and set up the new templates.
Via composer
composer require oveleon/contao-glossary-bundle
Via contao-manager
Search for contao glossary bundle and add it to your extensions.
After installing the contao-glossary-bundle, you need to run a contao install.
Setup
Creating glossaries and terms
The Contao Glossary Bundle uses archives (glossaries) and glossary items (terms) similar to the Contao-News-Bundle.
-
Set up a redirect page for glossary items
-
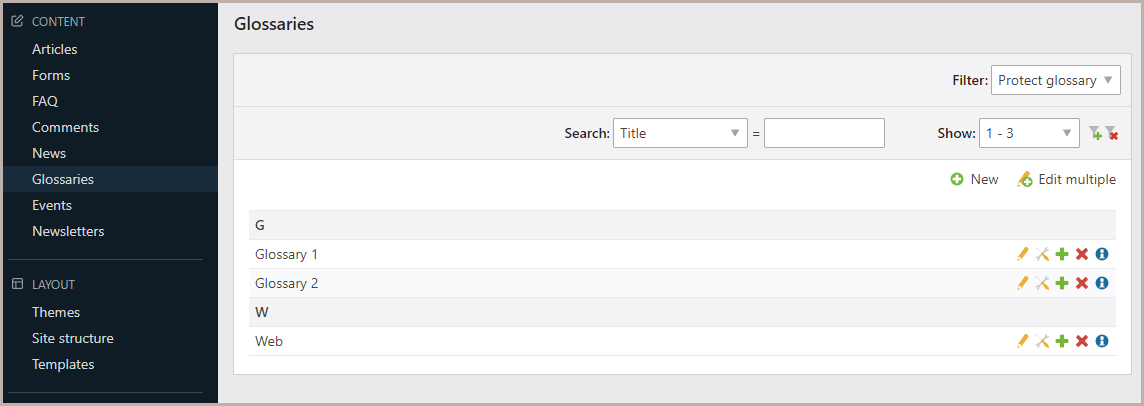
Create a new glossary archive in Glossaries
-
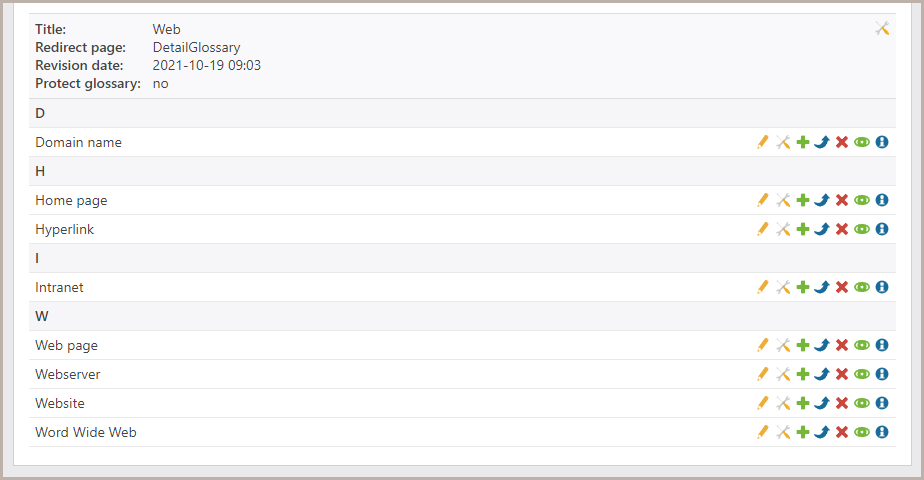
Edit ✎ the new glossary to add new glossary items (terms)
-
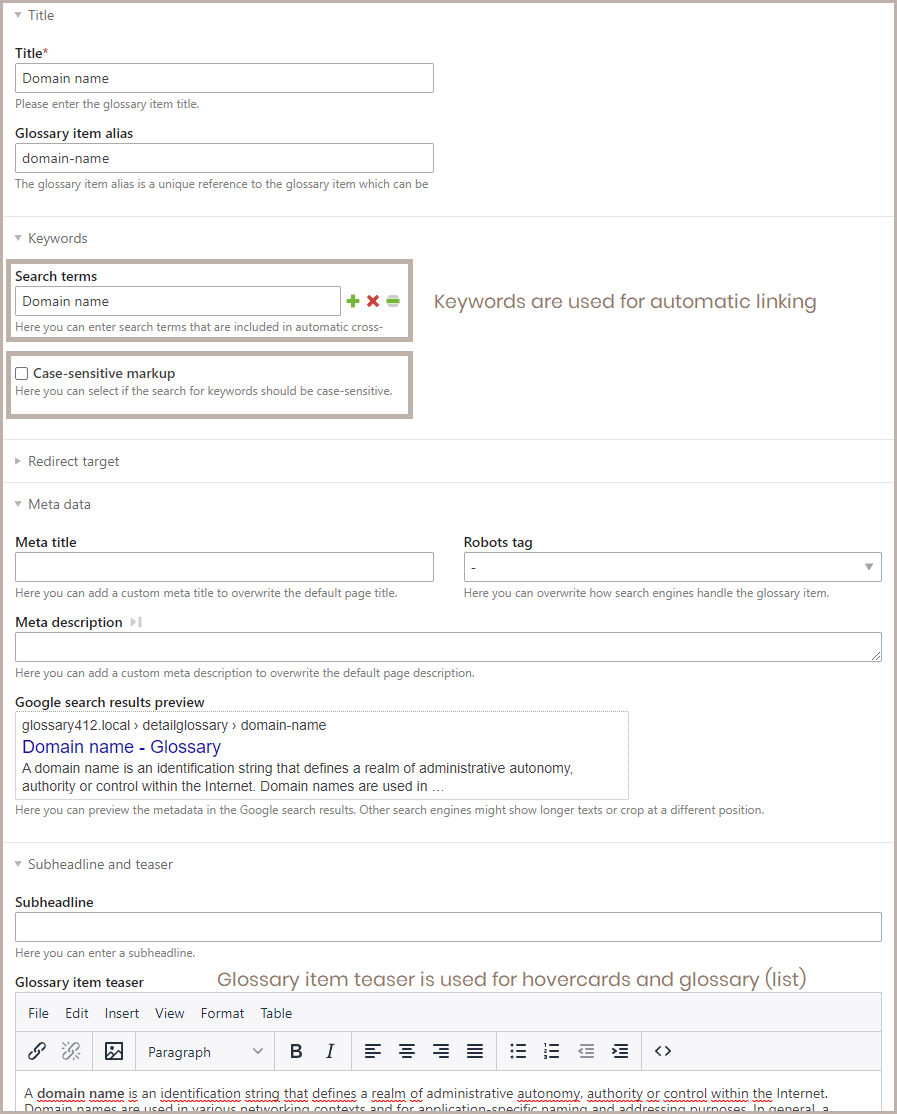
Create a new glossary item:
- Title = Glossary term
- (Search terms = keywords for automatic conversion)
- Glossary item teaser = teaser text for glossary overview etc.
- Publish item
-
(Additionally, you are able to create content elements for detail pages - Similar to contao news)
Publishing your glossaries to your website
To display your glossaries and glossary terms, you have to create two front end modules:
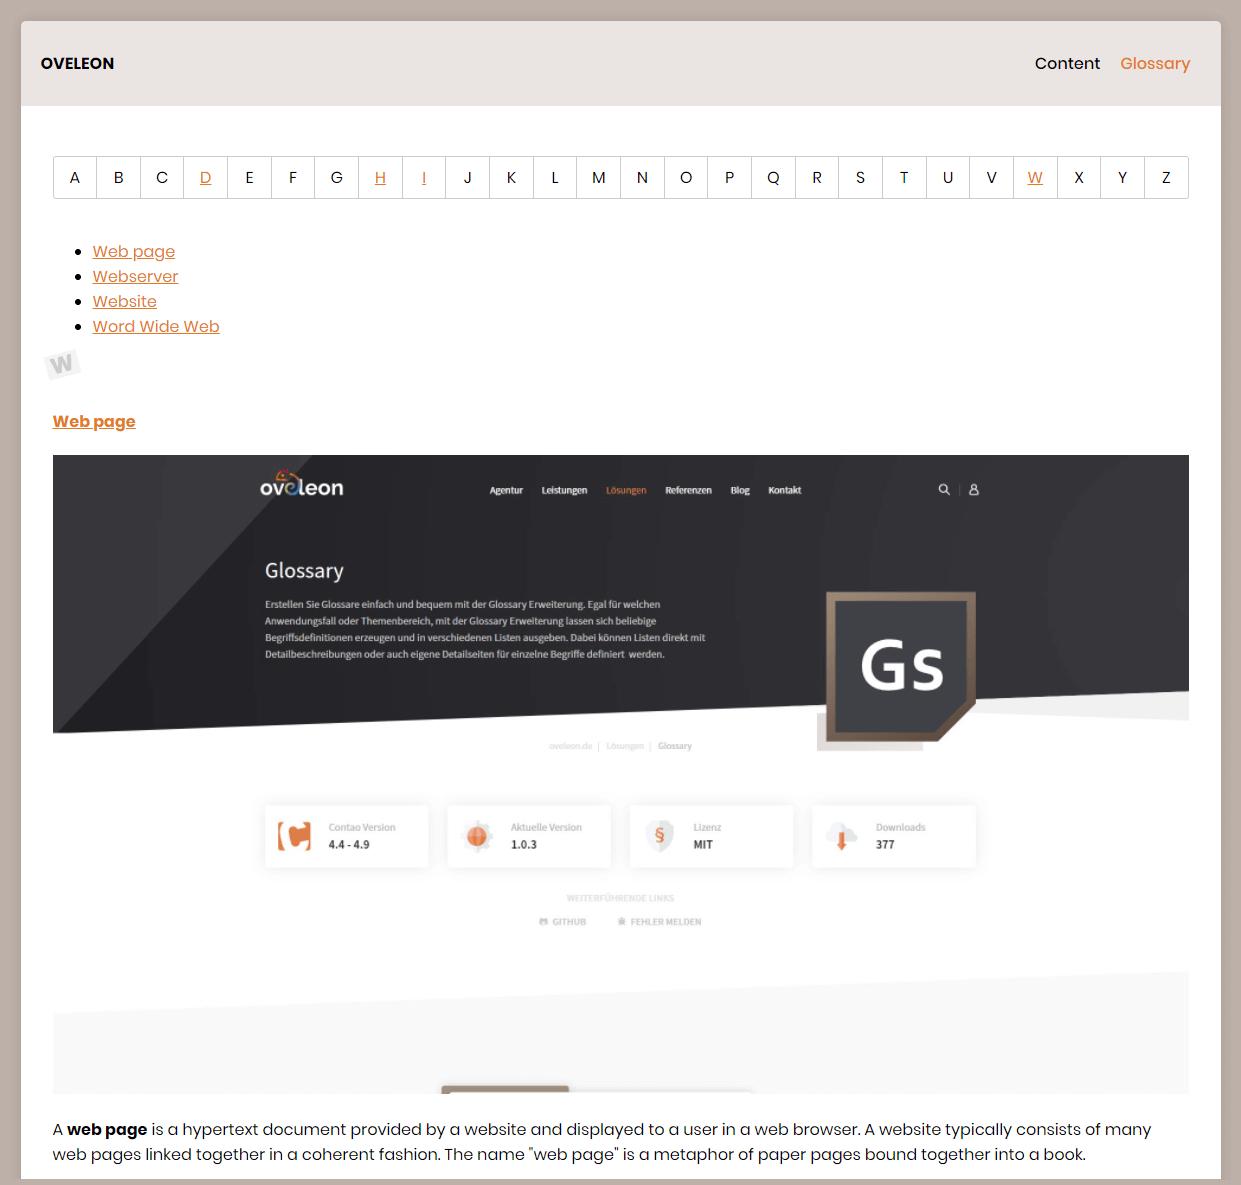
Glossary overview
-
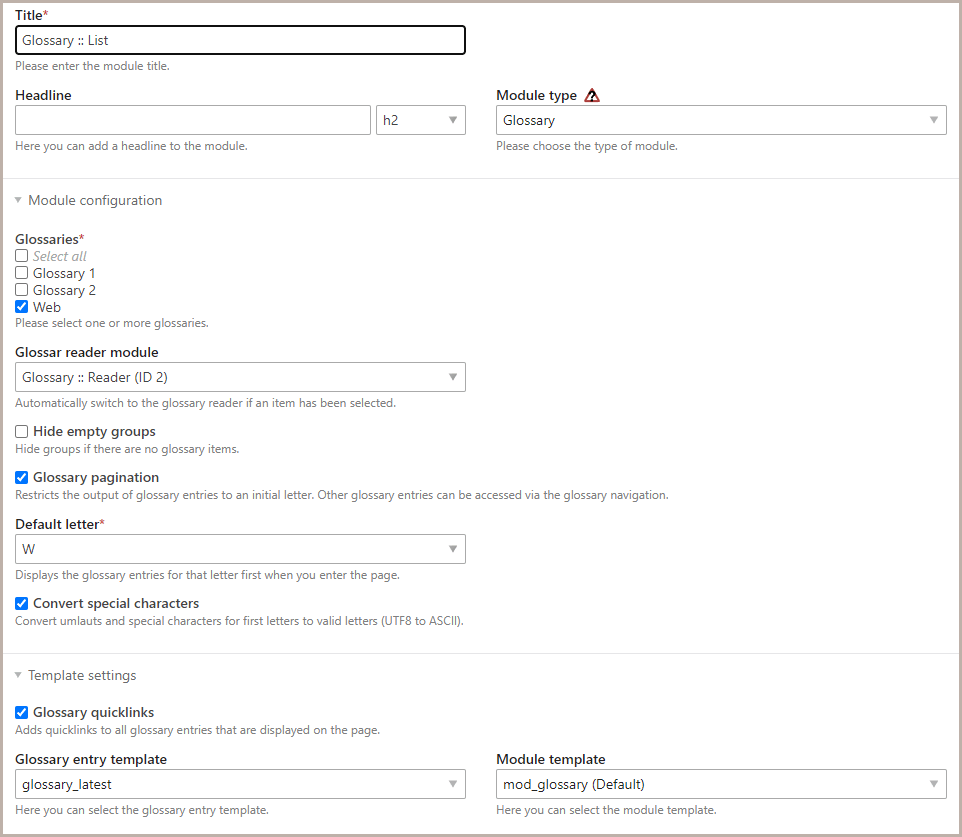
Create the front end module Glossary
-
Select your glossary/glossaries and configure the module
-
Embed the module in a page
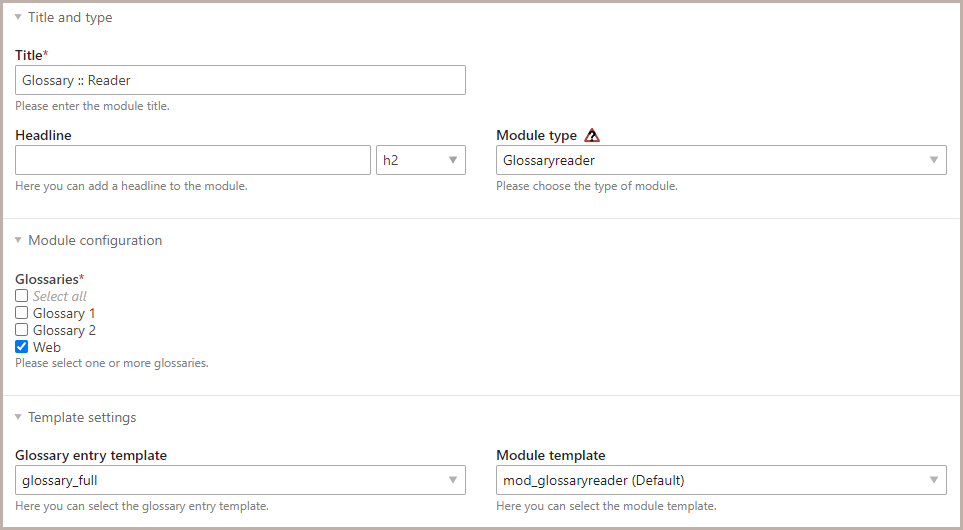
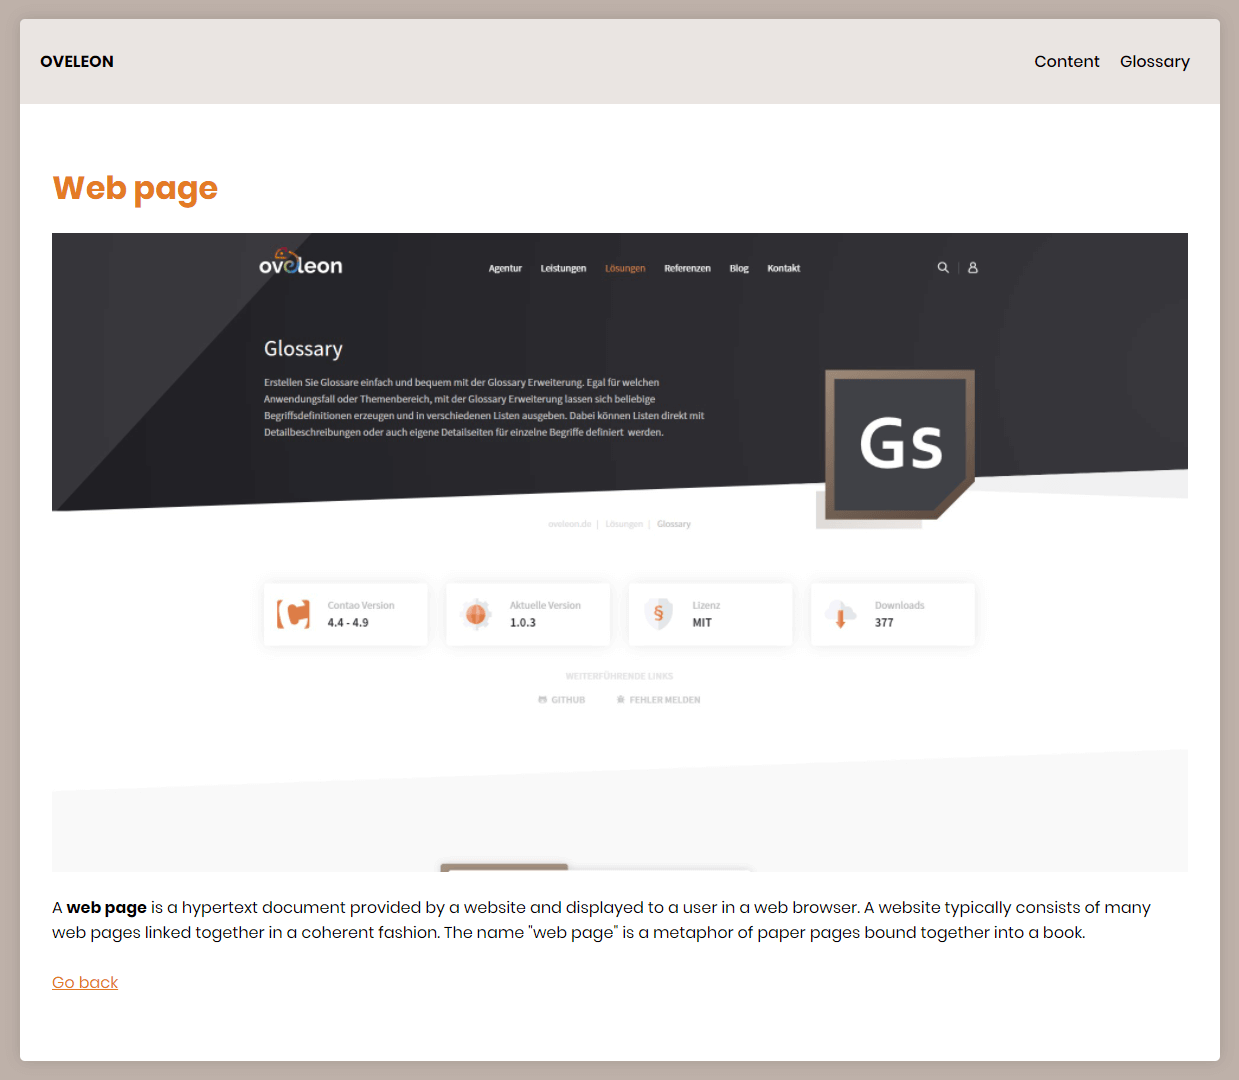
Glossary reader
-
Create the front-end module Glossary-reader
-
Select your glossary/glossaries
-
Embed the module in your redirect-page (for your archive)
Automatic keyword conversion and hovercards
-
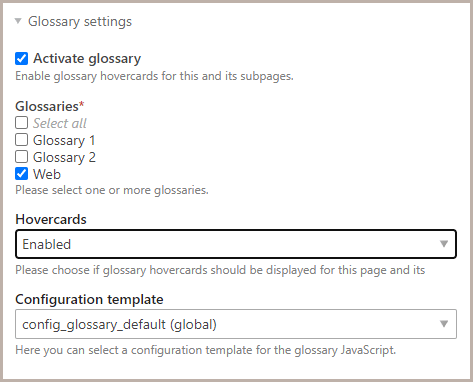
Go to your website root and "activate glossary" under glossary settings
-
Select your glossary/glossaries
-
(Enable hovercards if needed)
Only search terms within glossary items are taken into account. Not the keyword itself
You are able to add multiple keywords to a term. The glossary JavaScript does an exact search; thus spaces are allowed as well.
Hint:
You can disable automatic keyword conversion and hovercards within "Expert settings" on regular pages. This option is recommended for glossary pages.
Front end modules
Glossary
The glossary displays published glossary items from selected glossaries.
Settings
| Glossary | |
|---|---|
| Option | Description |
| Glossaries | Here you can select one or more glossaries whose glossary terms should be displayed. |
| Glossary reader | Automatically switch to the glossary reader if an item has been selected. |
| Hide empty groups | Do not show navigation links for letters that do not exist. |
| Glossary pagination | Activates pagination for glossary terms. Other glossary entries can be accessed via glossary navigation. |
| Default letter | Defaul letter when glossary pagination is activated. |
| Convert special characters | Converts UTF8-characters to ASCII for the glossary navigation/pagination. |
| Glossary quicklinks | Adds additional quicklinks to the glossary module. |
| Glossary entry template | Template for glossary items (simple, short, latest, full). |
| Module template | The modules template that is being used. |
| Image settings | Image size for teaser images. |
| Access protection | Show the module for certain member groups only |
Glossaryreader
The glossary displays published glossary items from selected glossaries.
Settings
| Glossary reader | |
|---|---|
| Option | Description |
| Glossaries | Here you can select one or more glossaries that the reader should display. |
| Glossary entry template | Template for the glossary item (simple, short, latest, full). |
| Module template | The modules template that is being used. |
| Image settings | Image size for the teaser image. |
| Access protection | Show the module for certain member groups only |
Page & Glossary settings
Root page settings
The contao glossary bundle extends the
Root page
with additional Glossary Settings.
The settings will work for all subpages for this root page.
| Glossary settings | |
|---|---|
| Option | Description |
| Activate glossary | Enable replacing of keywords for this and its subpages. |
| Glossaries | Keywords (within glossary items) for these glossaries will be converted to links or a chosen markup. |
| Hovercards | Disable/Enables the teaser hovercards for glossary links/markup. |
| Configuration template | The JavaScript configuration template for the Glossary Javascript |
All keywords within glossary items are converted to links by default (You are able to change the markup within the glossary configuration template, see JavaScript Settings)
The hovercard shows a preview of the glossary item
Regular page settings
The Expert settings for regular pages are extended with the following option:
| Expert settings | |
|---|---|
| Option | Description |
| Disable glossary | Disables glossary hovercards and keyword conversion for this page. |
Glossary archive settings
The Glossaries under Glossaries contain extra options for hovercards
| Glossary settings | |
|---|---|
| Option | Description |
| Redirect page | The glossary reader page to which visitors will be redirected when clicking a glossary item. |
| Glossary hovercard template | The template that is used for glossary hovercards. |
| Hovercard image size | Image size for glossary hovercards. |
The teaser images within glossary items are shown in the hovercard
Glossary item settings
Glossary items are terms within your glossaries.
| Glossary item settings | |
|---|---|
| Option | Description |
| Title | The title/keyword of your glossary entry. |
| Glossary item alias | The alias and unique reference for a glossary item. It is used for created pages and insert-tags. |
| Search terms | Here you can enter search terms that are included in automatic cross-references (automatic keyword conversion). |
| Case-sensitive markup | Here you can select if the search for keywords should be case-sensitive. |
| Redirect target | The redirect of a glossary item
|
| Meta title | Here you can add a custom meta title to overwrite the default page title. |
| Robots tag | Here you can overwrite how search engines handle the glossary item.
|
| Meta description | Here you can add a custom meta description to overwrite the default page description. |
| Subheadline | A subheadline within glossary items (Templates: glossary_full) |
| Glossary item teaser | The glossary item teaser can be used in a hovercard or can be shown in a glossary list instead of the full content. |
| Add an image | Adds an image to the glossary item (Templates: glossary_latest, glossary_full, hovercard_glossary_default) |
| CSS class | CSS classes for the glossary item |
| Publish item | Make the glossary item publicly visible on the website. |
Creating links in Contao
Automatic conversion creates links (or another markup) when entering the page through JavaScript. For SEO purposes, you are able to create real links within Contao using the following options:
Using Insert tags
For more information on Insert tags, please visit the
Contao documentation.
Insert tags
You can use insert tags with the glossary id or its alias (aliases are generated and unique).
Example
    {{glossaryitem::430}}
    {{glossaryitem::website}}
| Insert tags | |
|---|---|
| Insert tag | Description |
| {{glossaryitem::*}} | This tag is replaced with a link to a glossary item (replace * with the ID or alias). |
| {{glossaryitem_open::*}} | Is replaced with the opening tag of a link to a glossary item: {{glossaryitem_open::430}}Check out doishub on GitHub{{link_close}}. |
| {{glossaryitem_url::*}} | This tag will be replaced with the URL of a glossary item: <a href="{{glossaryitem_url::430}}">He's an awesome mentor</a>. |
| {{glossaryitem_keyword::*}} | This tag is replaced with the keyword of a glossary item: <a title="{{glossaryitem_keyword::430}}">Follow him :)</a>. |
| {{glossaryitem_teaser::*}} | This tag is replaced with the teaser of a glossary item: {{glossaryitem_teaser::430}}. |
TinyMCE / Link picker
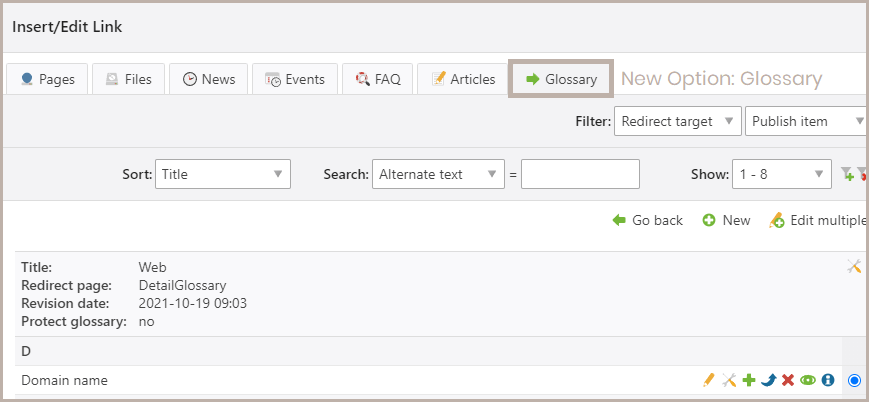
When creating links in TinyMCE in the backend of Contao CMS, you are able to choose a new source "Glossary" in the link picker.
Known limitations
It is currently not possible to add hovercard-events to a link created via link picker through tinyMCE due to security reasons.
To apply a hovercard event to a link, edit the html within your tinymce, and add
data-glossary-id: "your glossary item id"
to your link.
Example
<a href="{{glossaryitem_url::430}}" target="_blank" rel="noopener" data-glossary-id="430">Domain name</a>
Glossary JavaScript
Markup of glossary keywords and behavior for hovercards can be changed by parsing options into the glossary initialization. The Glossary object can be found within the config_glossary_default template. Developers can create a new template with the following prefix: 'config_glossary_', and choose it in the root page settings.
Settings
| Glossary JavaScript | ||
|---|---|---|
| Option | Default | Description |
| entrySelector | '#wrapper' | Selectors for glossary-term search |
| markup | 'a' | Markup attribute for parsed glossary terms (e.g. 'mark', 'span', 'a') |
| markupAttr | null | Markup attribute for created markups:
// For example:
markupAttr: {
    'class': 'class1 class2',
    'data-myattr: 'attr'
}
|
| language | ||
| active | true | Whether the language attribute 'lang' should be parsed |
| lang | '' | Language attribute |
| hovercard | ||
| active | true | Whether the hovercard feature should be enabled or not |
| id | 'gs-hovercard' | Id for the hovercard |
| interactive | true | Enables interaction with the hovercard |
| showLoadingAnimation | true | Show placeholder animation until content is loaded |
| maxWidth | 380 | Maximum width of hovercard (in px) |
| showThreshold | 300 | Minimum time that showEvent has to be triggered to show a hovercard (in ms) |
| leaveThreshold | 200 | Time that hovercard will stay visible after triggering the hideEvent (in ms) |
| Additional settings | ||
| popperOptions | PopperJS options -> check https://popper.js.org/docs/v2/ | |
| includes (array) |
'body', 'div,span,p', 'main,section,article', 'ol,ul,li', 'table,tr,th,tbody,thead,td', 'i,b,em,strong', 'mark,abbr', 'sub,sup' |
Readable nodes for glossary item markup. Elements (and thus it's children) that are not listed within the includes, will not be converted. |
| excludeClasses (array) |
'gl-none' |
Readable nodes matching one or more classes within excludeClasses will not be converted. |
| route: { prefix: suffix: cache: } |
'/api/glossary/item/' '/html' true |
API and glossary term cache settings |
| hovercardBreakpoint | 1024 | Minimum width for hovercard-creation (in px) |
| config | json | The parsed glossary entries for the markup (id, keywords, url, etc.)
// For example:
'config':[
{
    "id": "1", // ID
    "keywords": ["Bar"], // Keywords
    "url": "glossar-detail\/bar.html", // Route
    "cs": 0 // Case-sensitive
},
{
    "id": "3", // ID
    "keywords": ["Foo"], // Keywords
    "url": "glossar-detail\/foo.html", // Route
    "cs": 0 // Case-sensitive
},
{...}
]
|
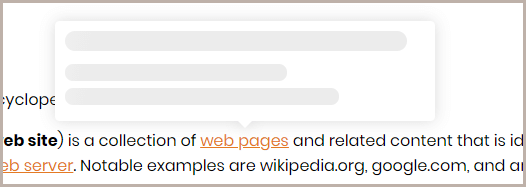
Enabling 'showLoadingAnimation' shows an empty hovercard until content is loaded
Browser Support
The Glossary-JavaScript for automatic keyword conversion was tested in the following browsers:
https://caniuse.com/?search=String.matchAll
Mac (Big Sur, Catalina):
- Safari (14.1, 13.1)
- Google Chrome (94)
- Mozilla Firefox (93)
- Opera (80)
- Microsoft Edge (94)
IPhone and IPad
- Mobile Safari (iOS 14 and iOS 14)
- Chrome Mobile (iOS 14 and iOS 14)
Microsoft Windows
- Google Chrome (94)
- Mozilla Firefox (93)
- Opera (80)
- Microsoft Edge (94)
It will work with every browser that supports String.matchAll
Frequently asked questions
The glossary term markup does not work on my website
- Make sure to check whether the glossary is activated in root page settings
- Make sure to check whether the glossary is not disabled for this subpage
- Check whether there is any JavaScript errors from other sources when opening developer tools
- Make sure to check for an existing
<div id="wrapper">container inside your<body>If you are using a custom theme, you have to adjust the glossary JavaScript within the template
config_glossary_default.html. Here you can add an entry selector for the main content of your page as shown below ( See JavaScript Options):const GN = new Glossary({ 'entrySelector': "#YOUR-CONTENT-SELECTOR",
Not all links are converted on my page
- This only happens for Safari 16.3 and lower and there is no way around this, the simple solution is to buy a new device
- The JavaScript for the markup contains a fallback due to MacOS and Safari not allowing js-regex-lookbehind.
- Keywords with spaces (e.g. "Foo Bar") can not be found, full keywords ("Foobar") will still be taken into account.
I want to style the glossary markup
- In case you need a class, you have to adjust the JavaScript configuration within
config_glossary_default.html - Make sure to check the JavaScript-Settings for more options.
const GN = new Glossary({
  'markupAttr': {
    'class': 'yourclass1 yourclass2'
  },
Support
Important
Feel free to report bugs and feature requests, do not feel entitled to bugs being fixed fast or your feature request being implemented for free. There is no such thing as a free lunch TANSTAAFL.
If you want a feature implemented or your bug fixed ASAP, you can commission it by contacting us via website.
License
This project is licensed under the AGPL-3.0 License — check LICENSE for more details.

