lemurengine / lemurbot
An AIML chatbot and admin portal written for the Laravel framework
Maintainers
Requires
- php: ^8.0.2
- ext-intl: *
- ext-json: *
- ext-simplexml: *
- ext-xml: *
- aws/aws-sdk-php-laravel: ^3.7
- doctrine/dbal: ^3.4
- dyrynda/laravel-cascade-soft-deletes: ^4.2
- fideloper/proxy: ^4.4
- guzzlehttp/guzzle: ^7.5
- intervention/image: ^2.7
- laracasts/flash: ^3.2
- laravel/framework: ^9.0
- laravel/ui: ^4.0
- laravelcollective/html: ^6.3
- laravolt/avatar: ^4.1
- league/flysystem-aws-s3-v3: ^3.2
- spatie/laravel-sluggable: ^3.4
- web64/laravel-cli-colors: ^0.20.0
- willvincent/laravel-rateable: ^3.0
- yajra/laravel-datatables: ^9.0
This package is auto-updated.
Last update: 2026-07-22 10:03:37 UTC
README

lemurengine/lemurbot
An AIML chatbot written for the Laravel Framework. Add a bot to your website and administer it from the portal.
Demo
Docs
Screenshots
Frontend Animated Widget
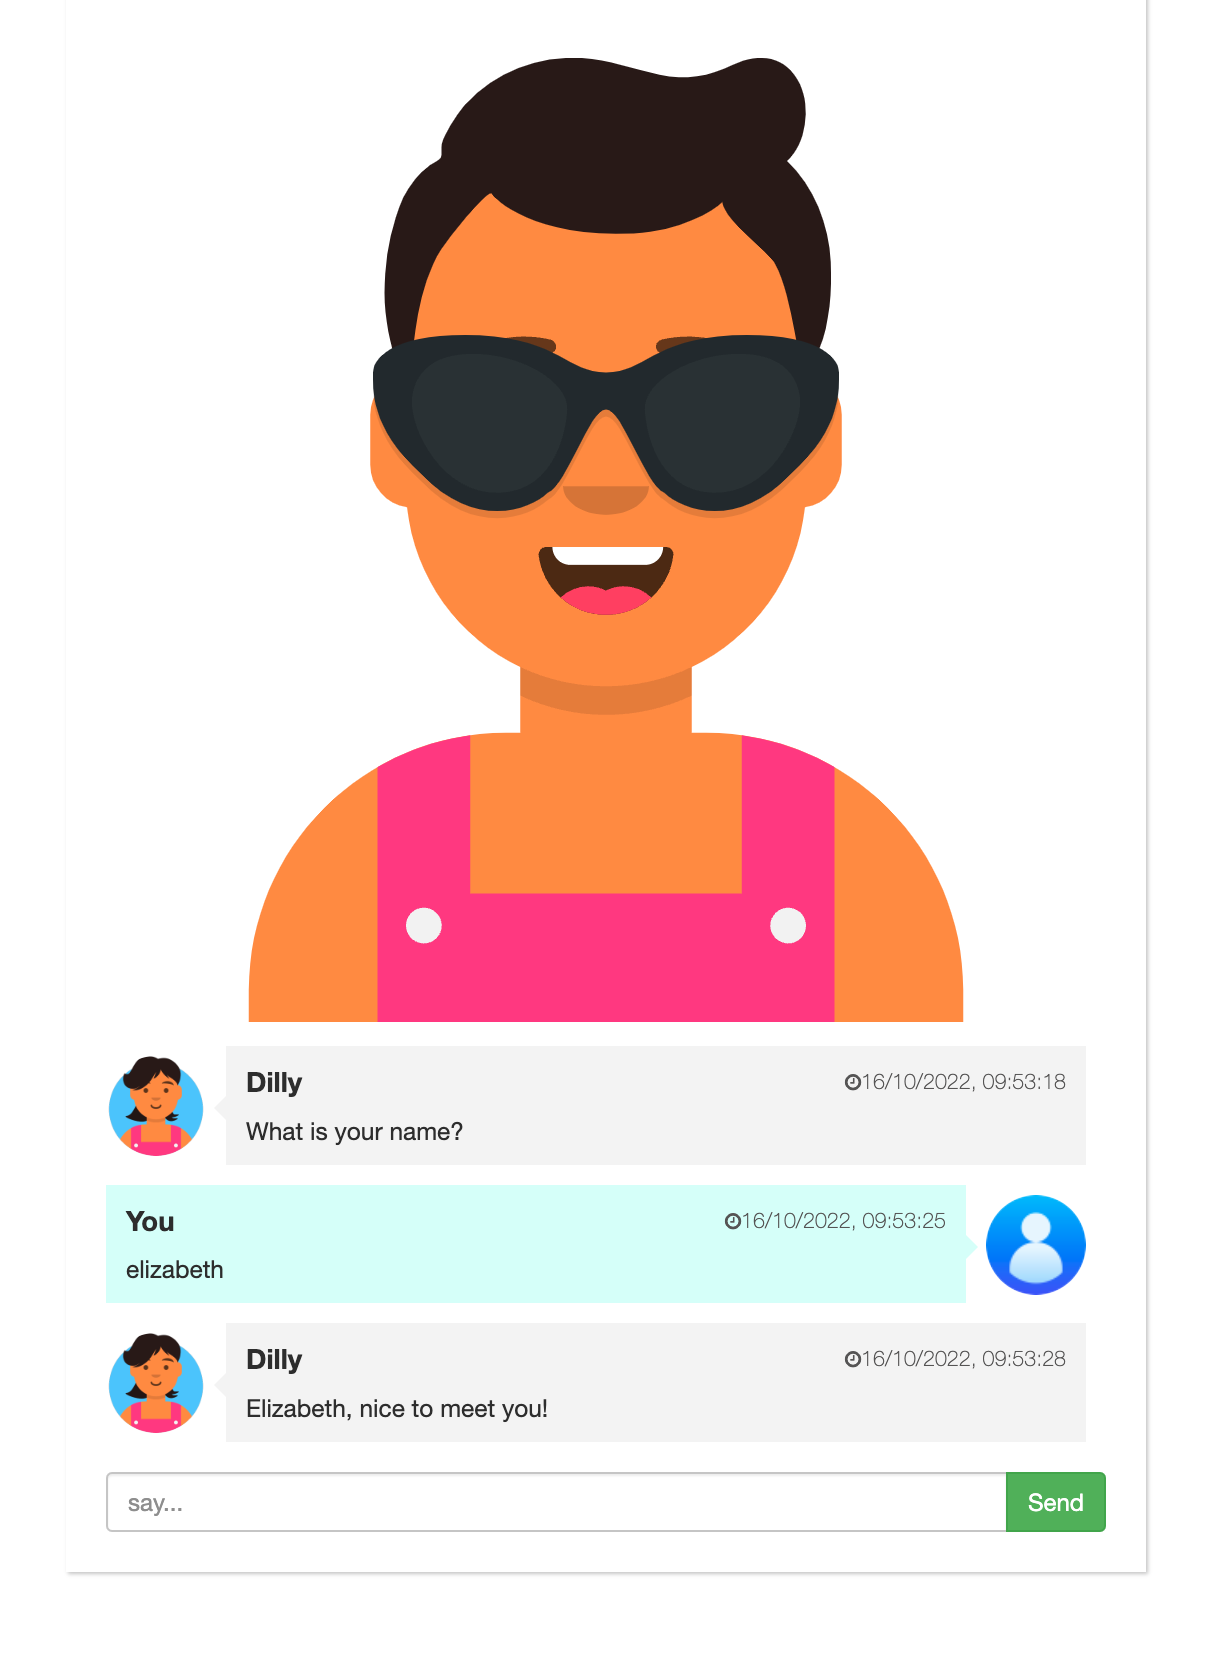
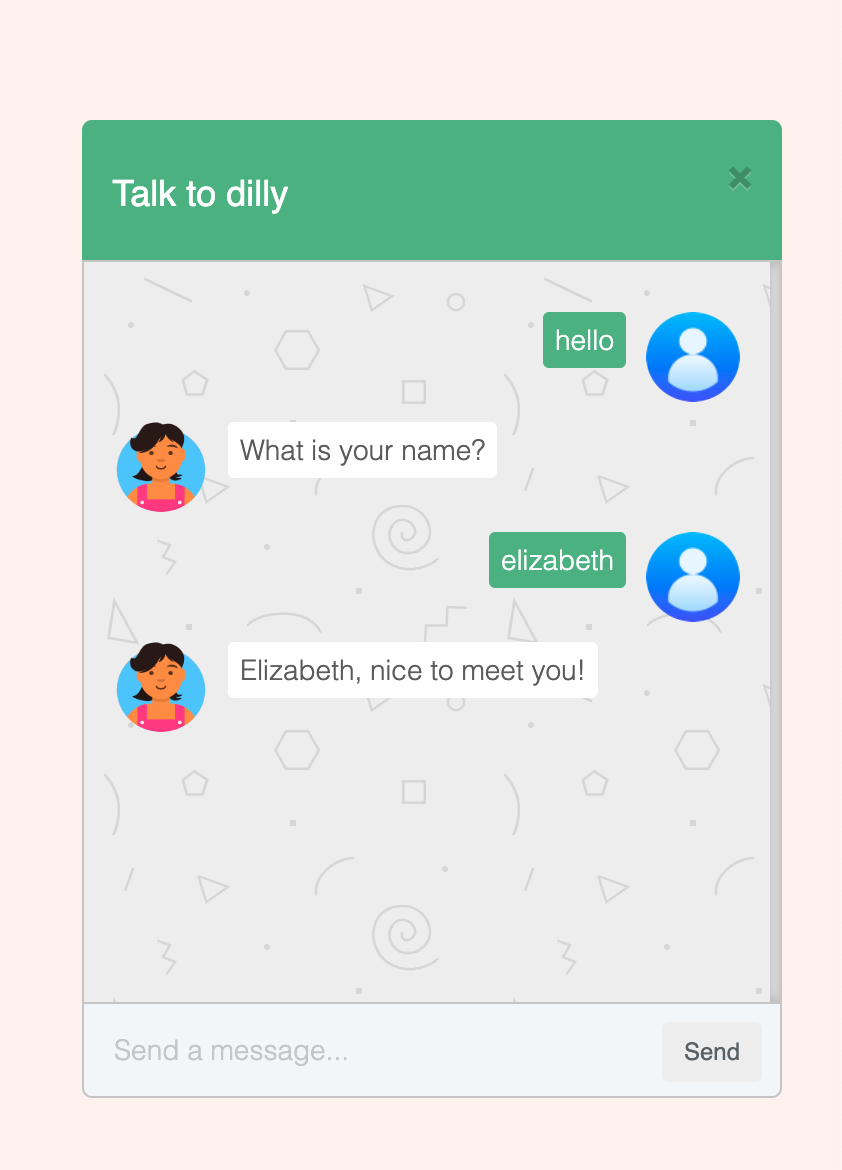
Frontend Popup Widget
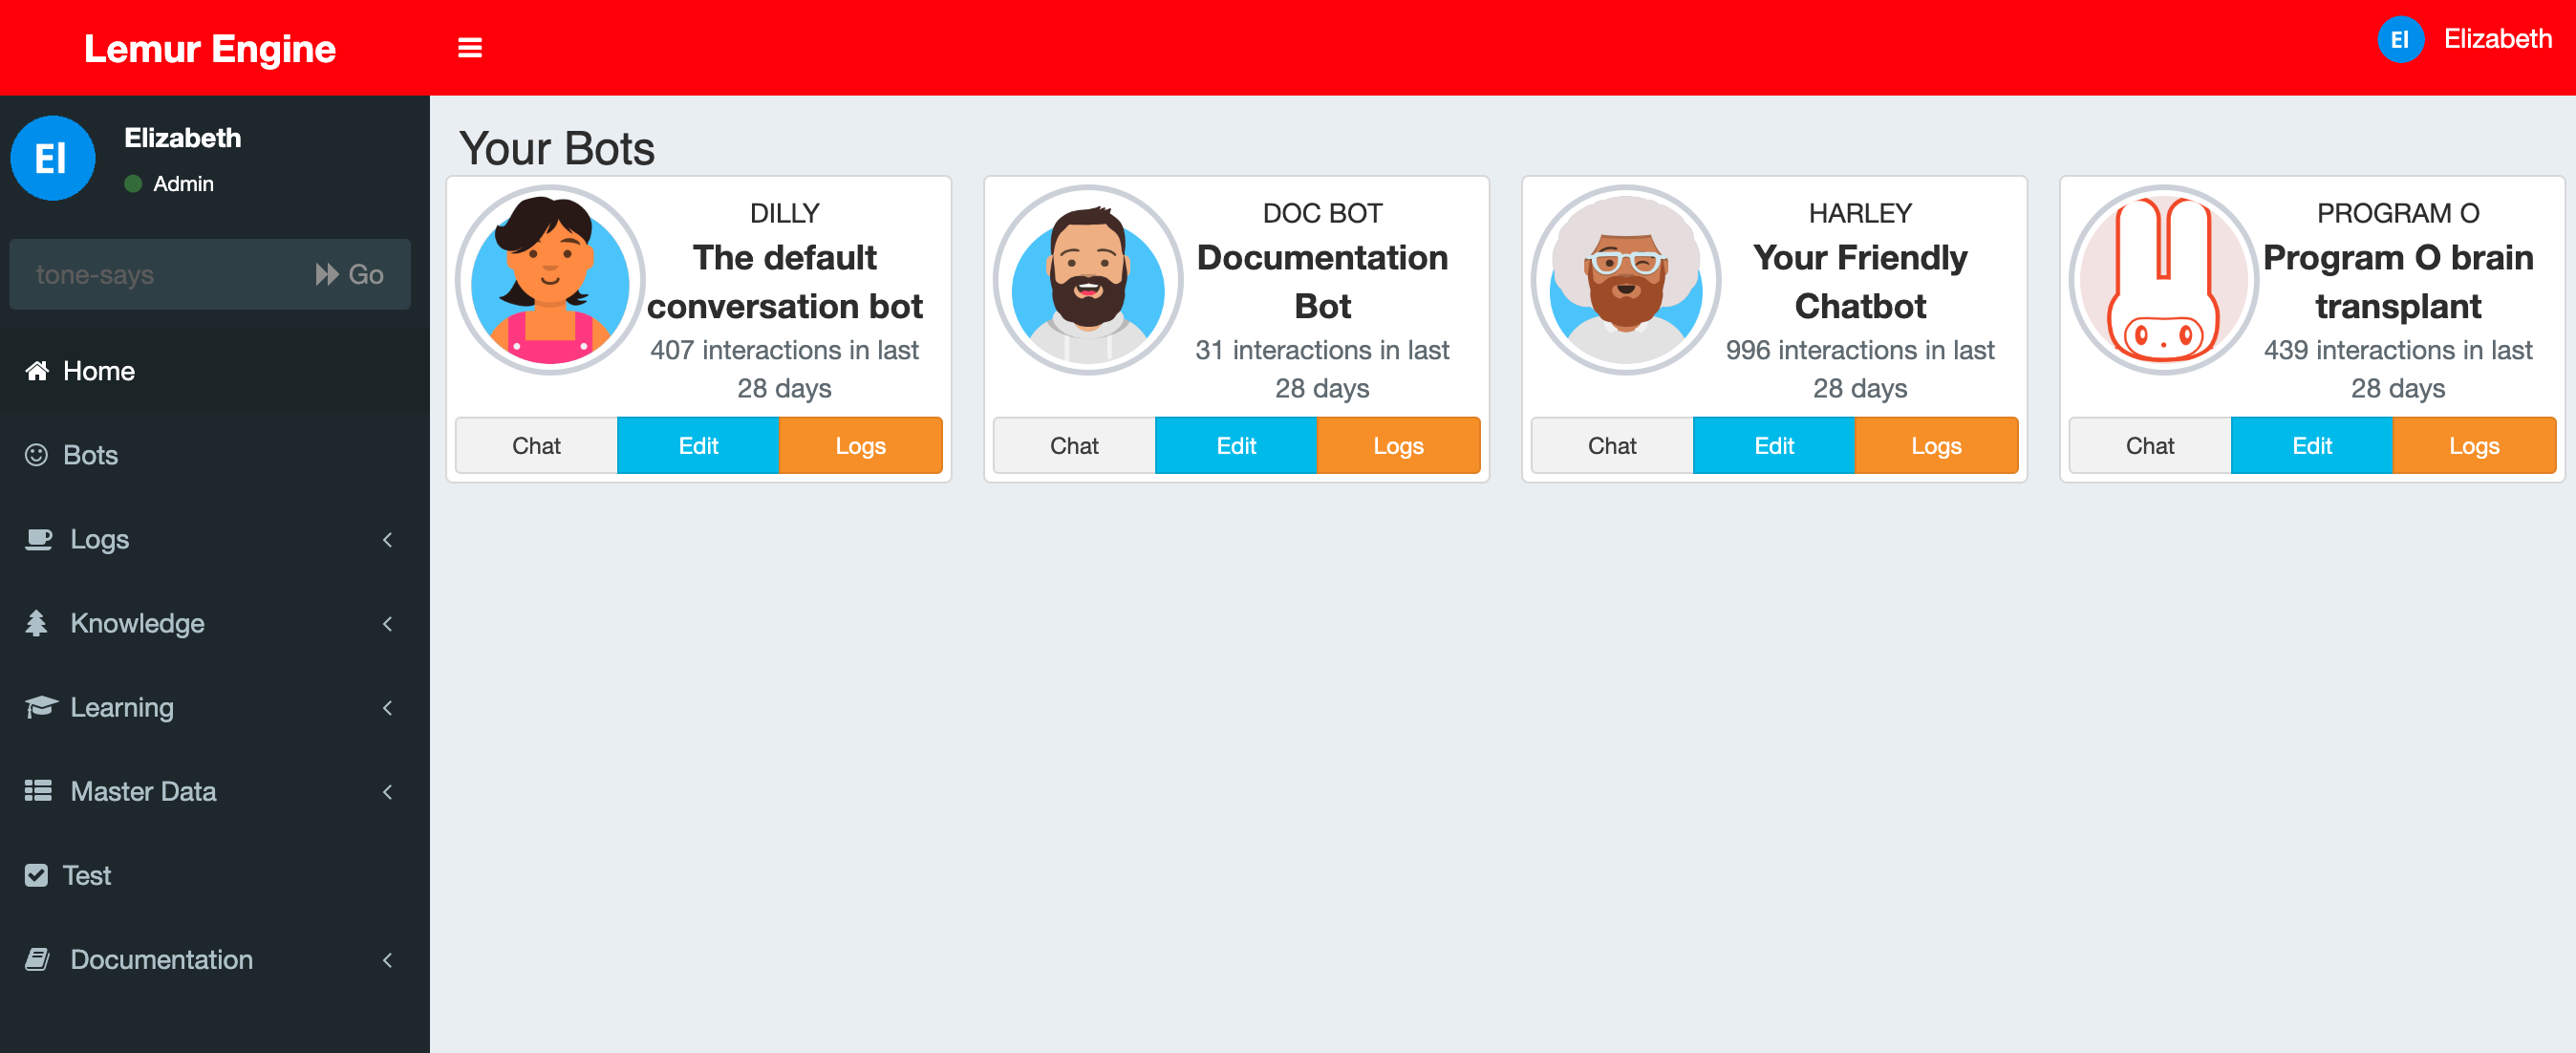
Admin Dashboard
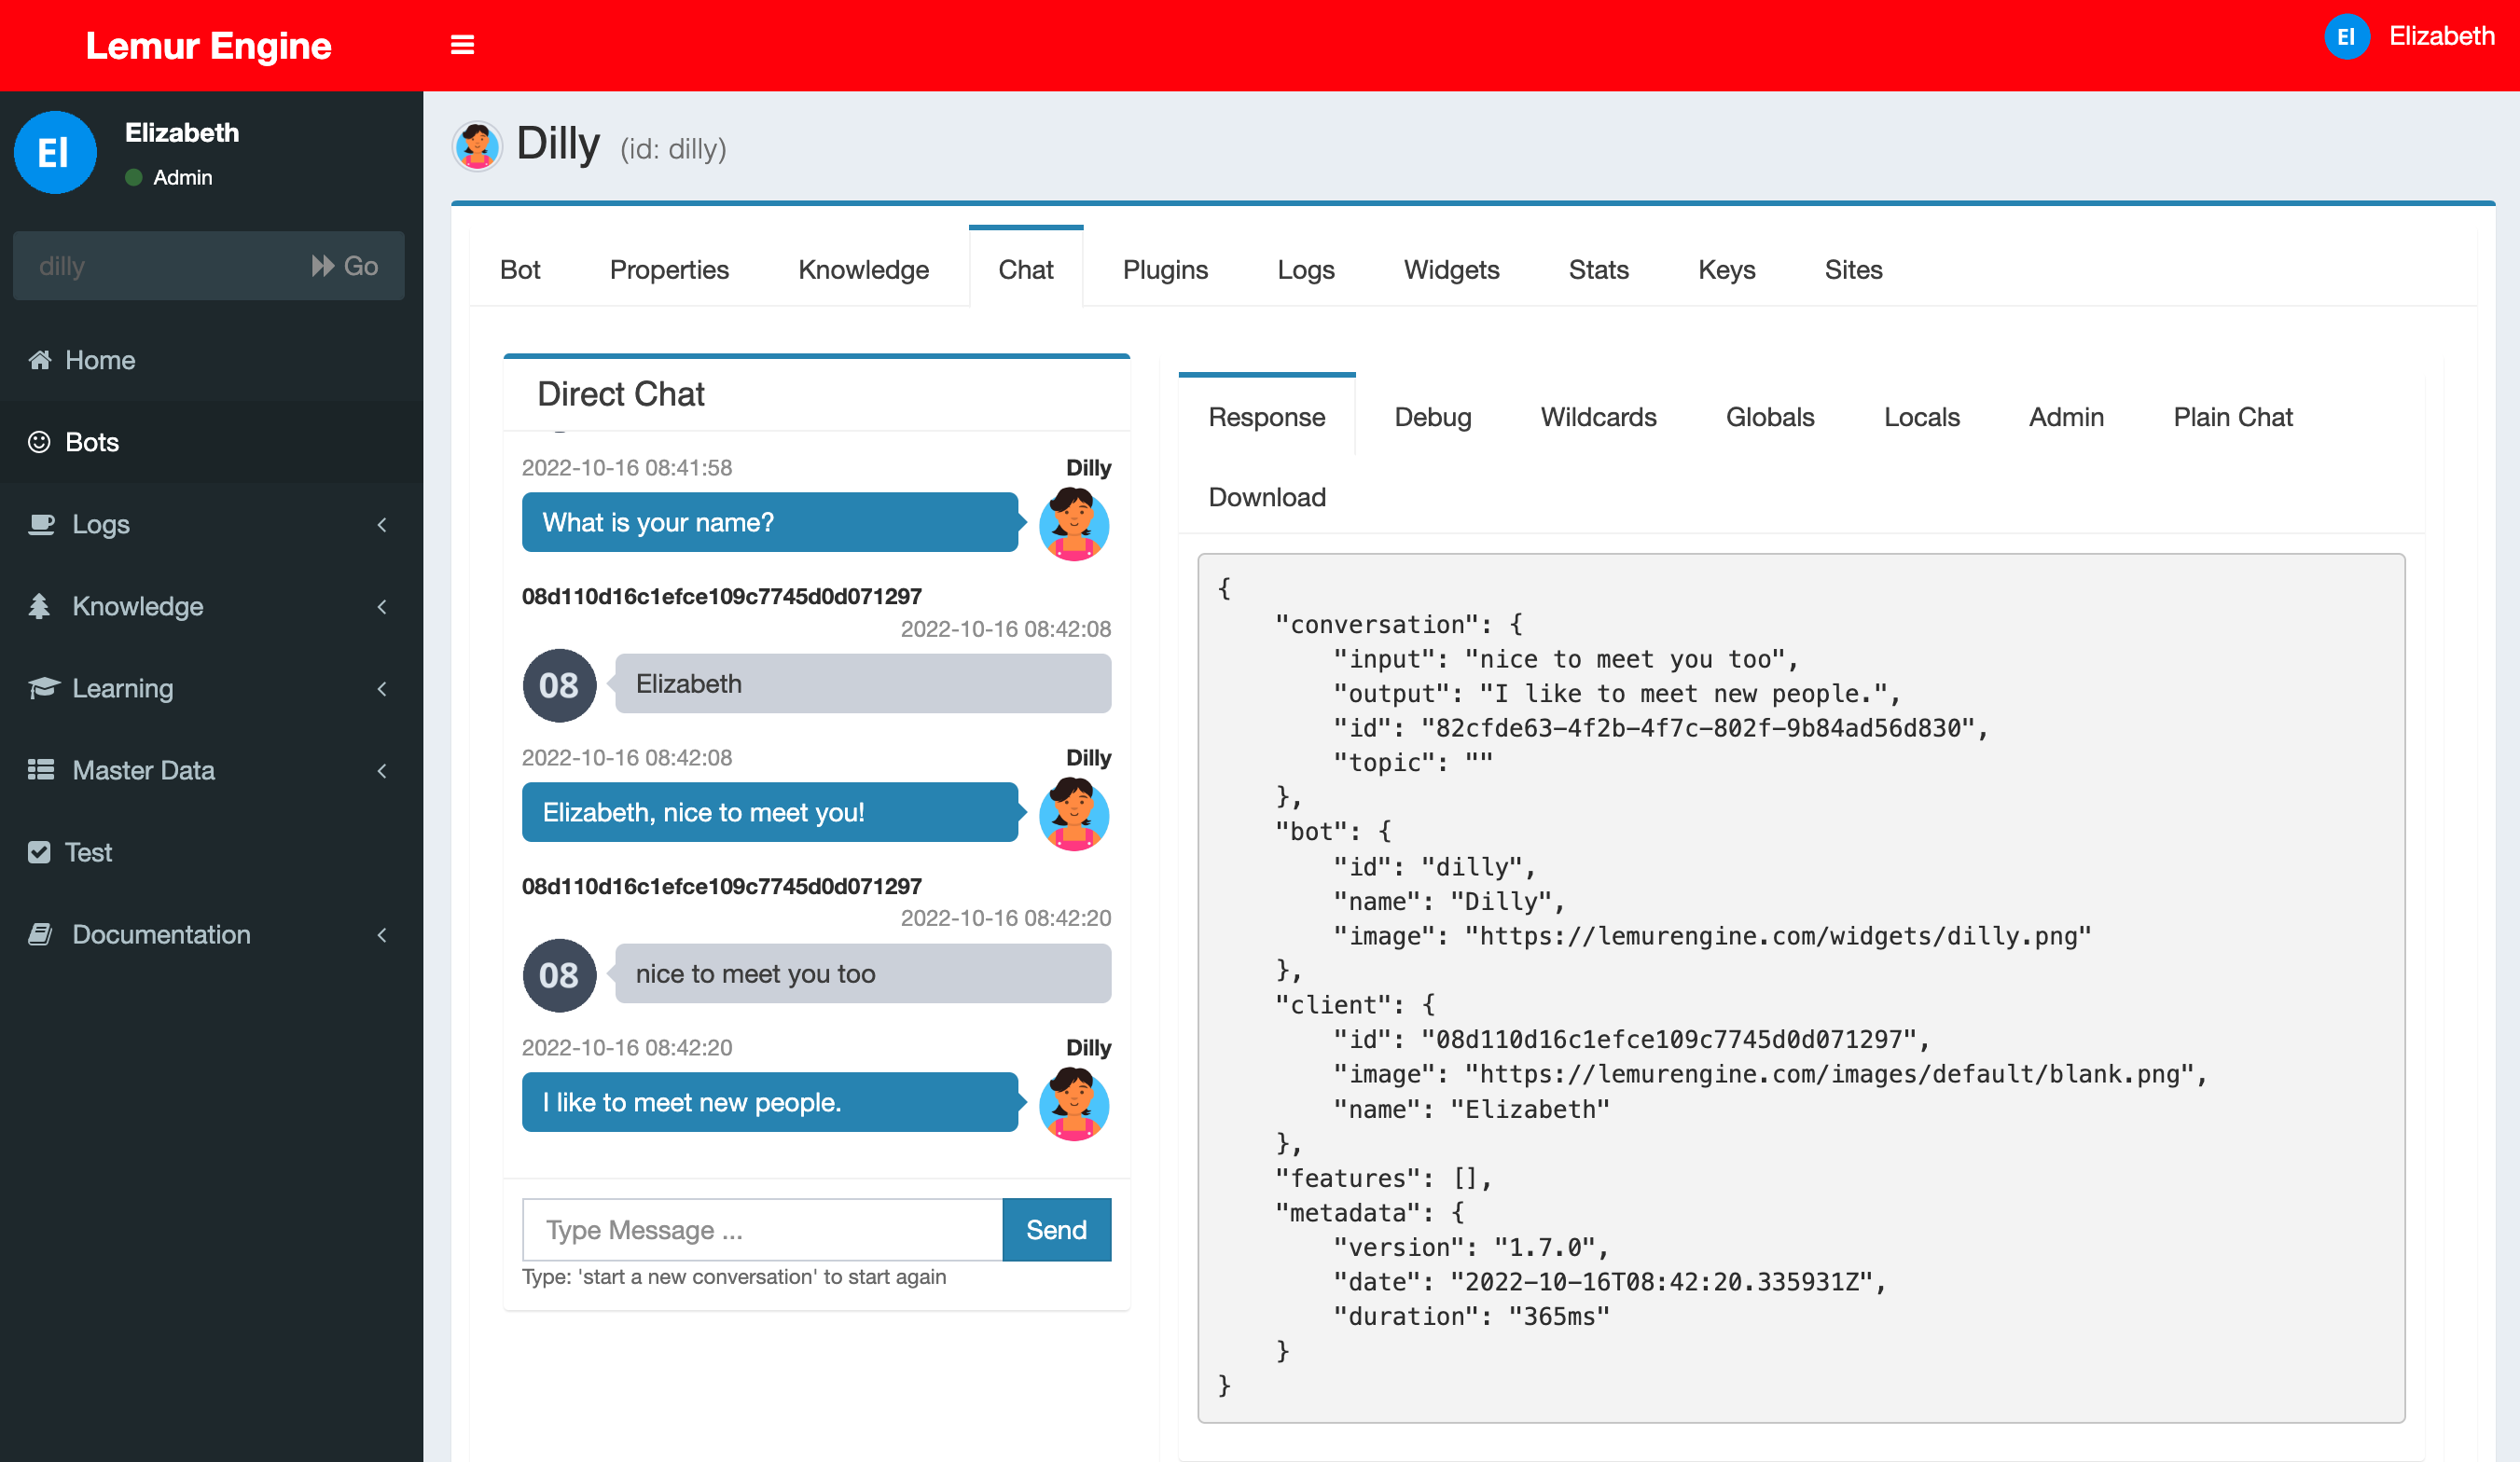
Admin Portal Chat
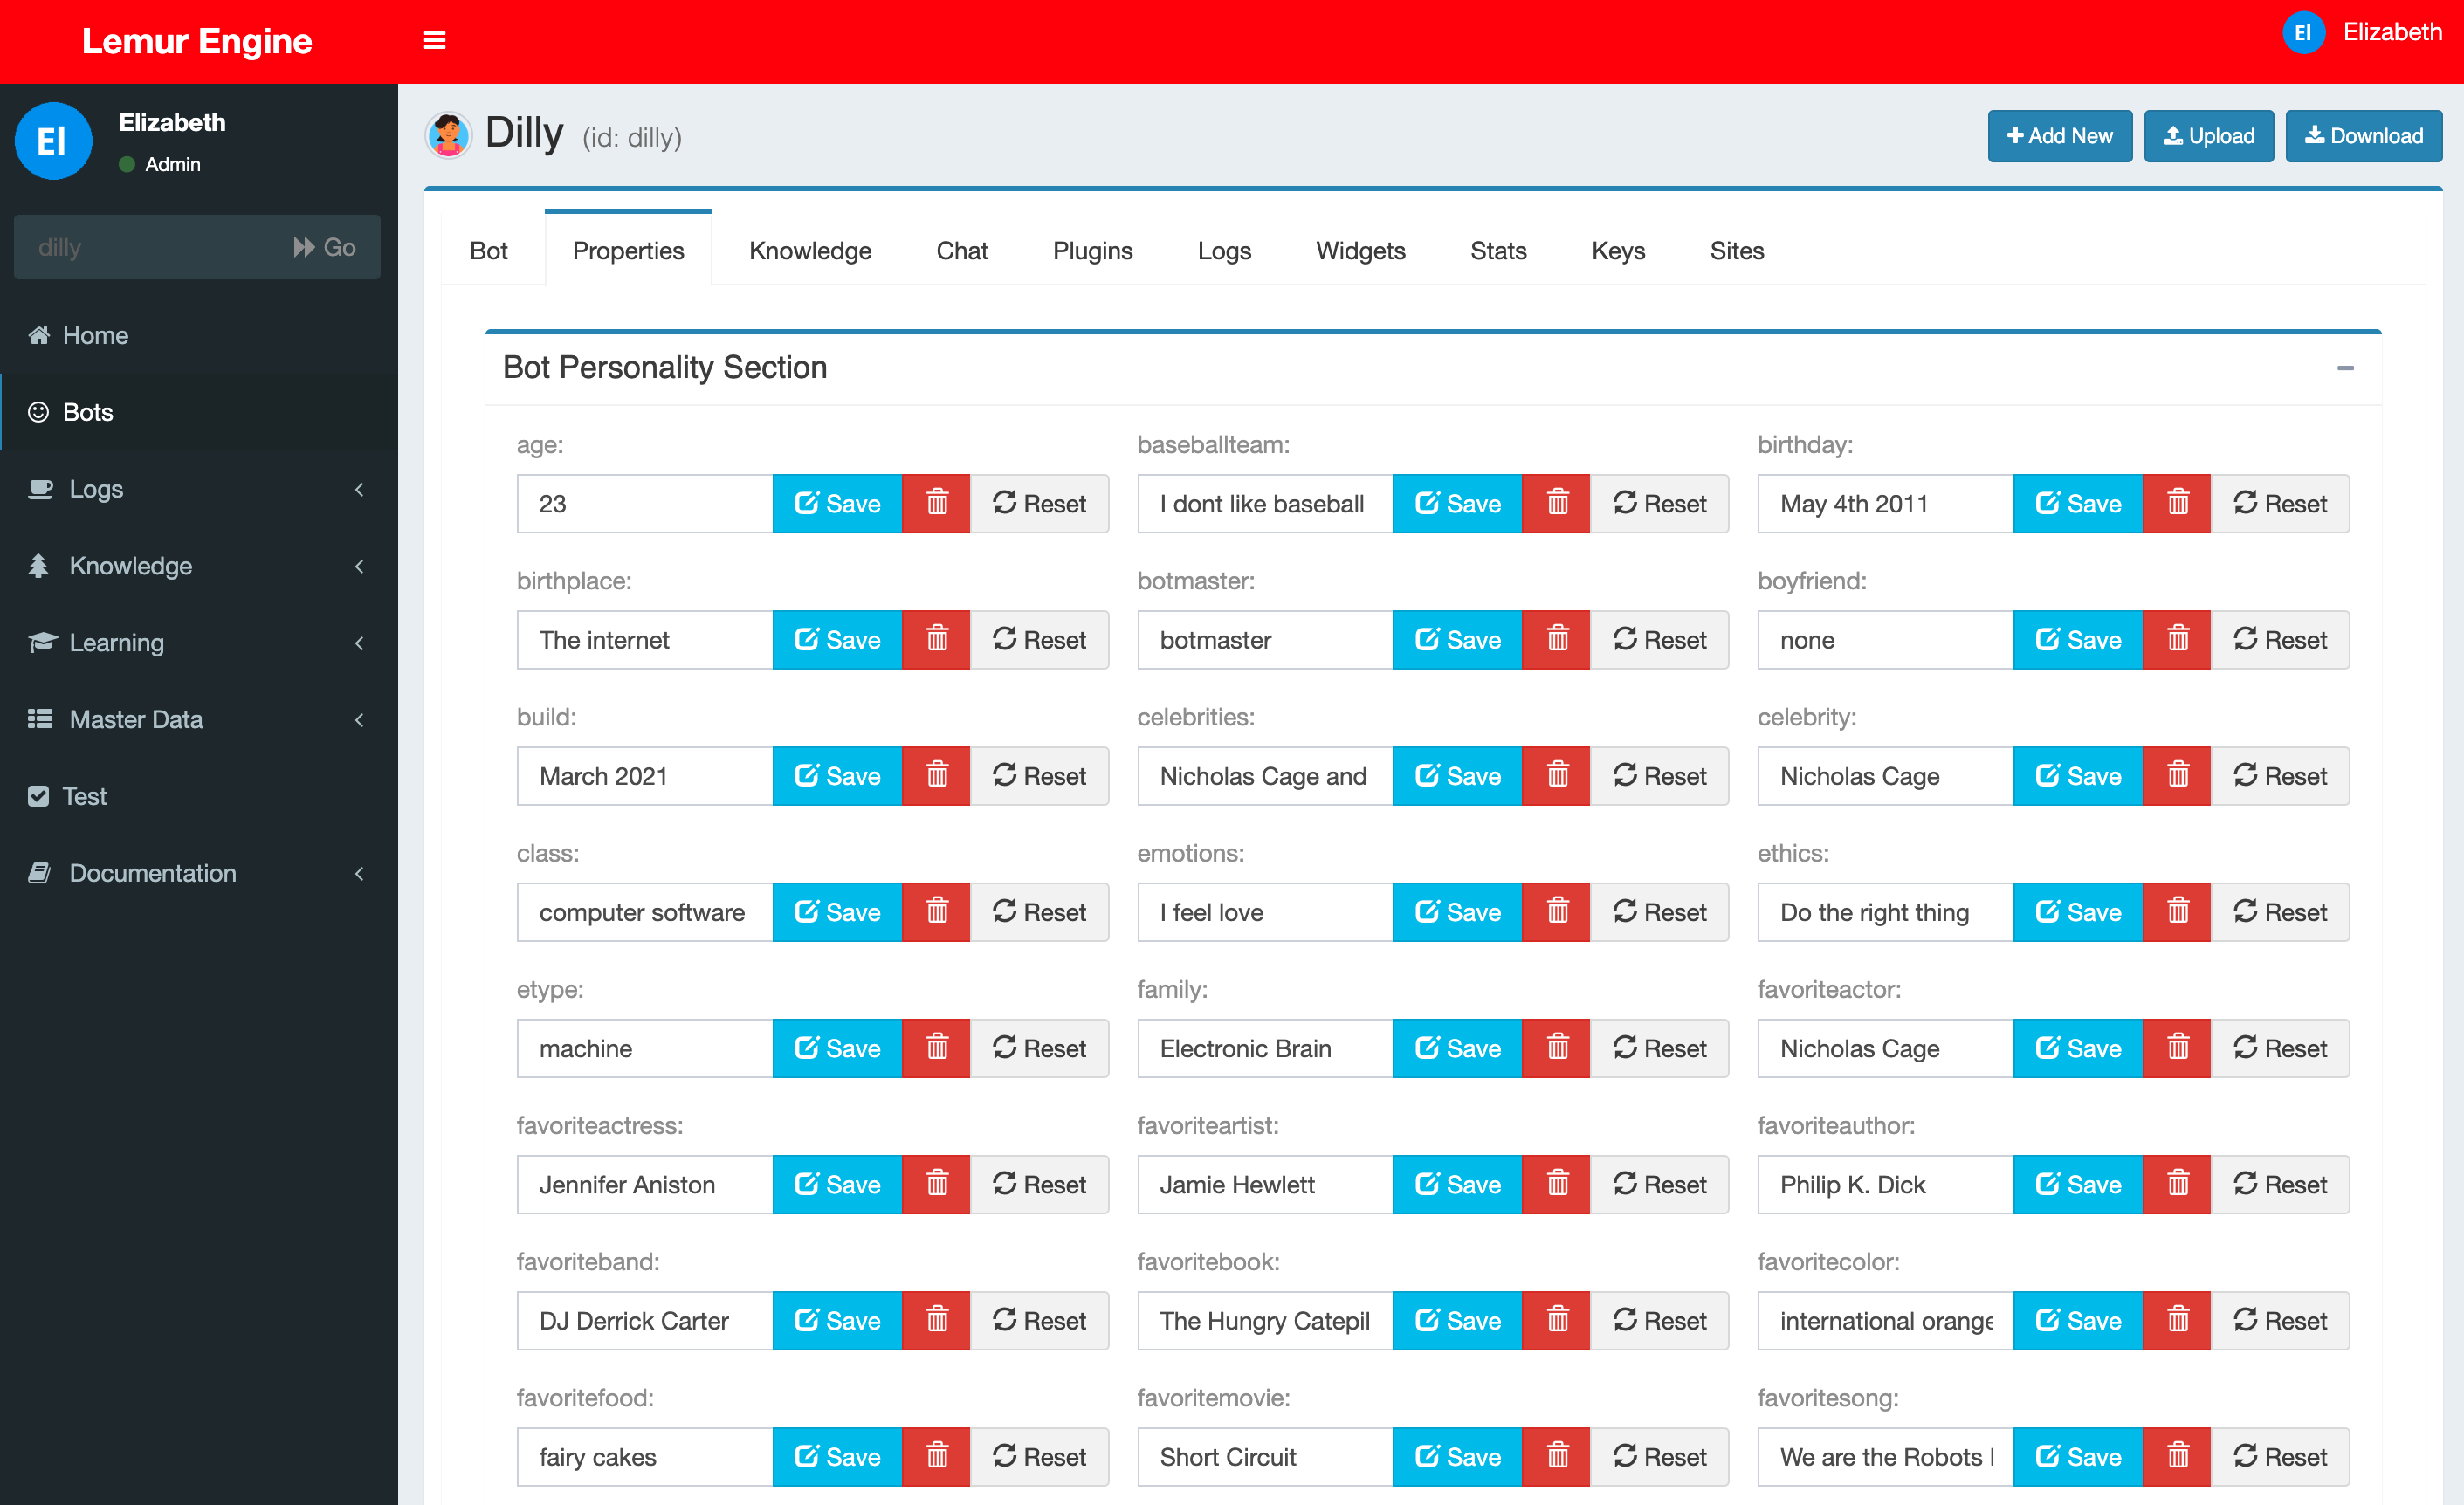
Admin Bot Properties
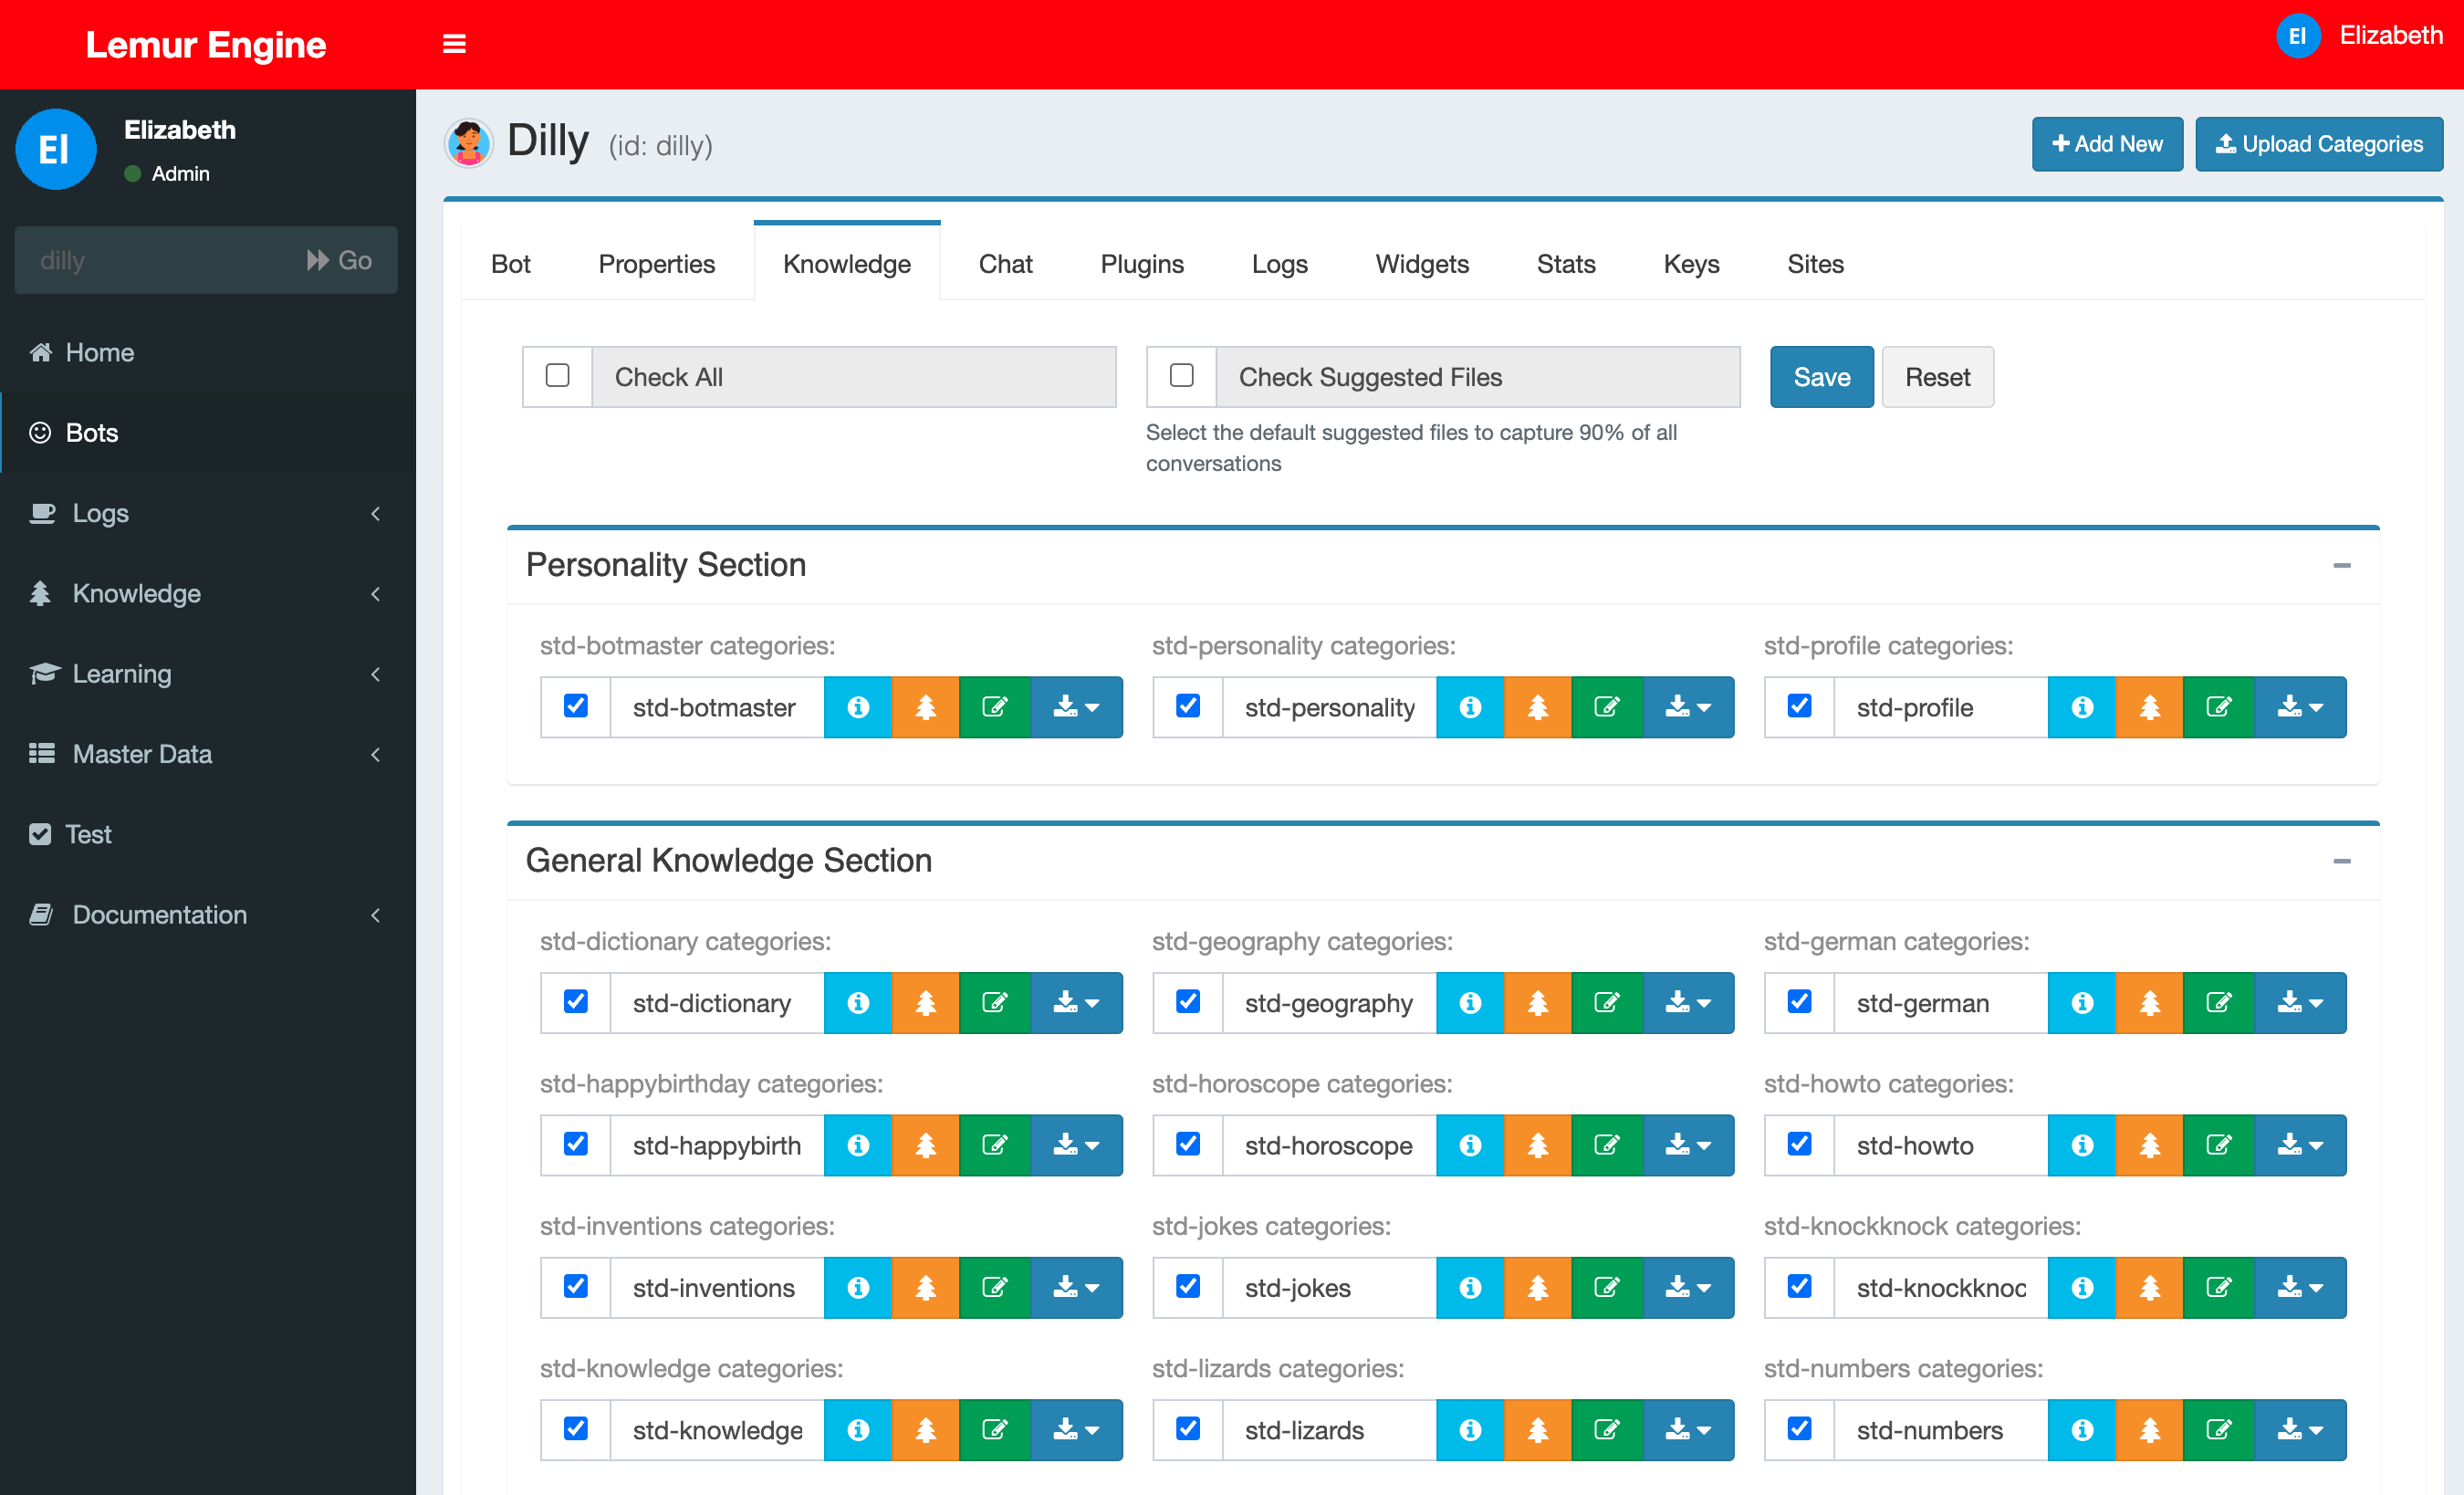
Admin Link Bot Knowledge
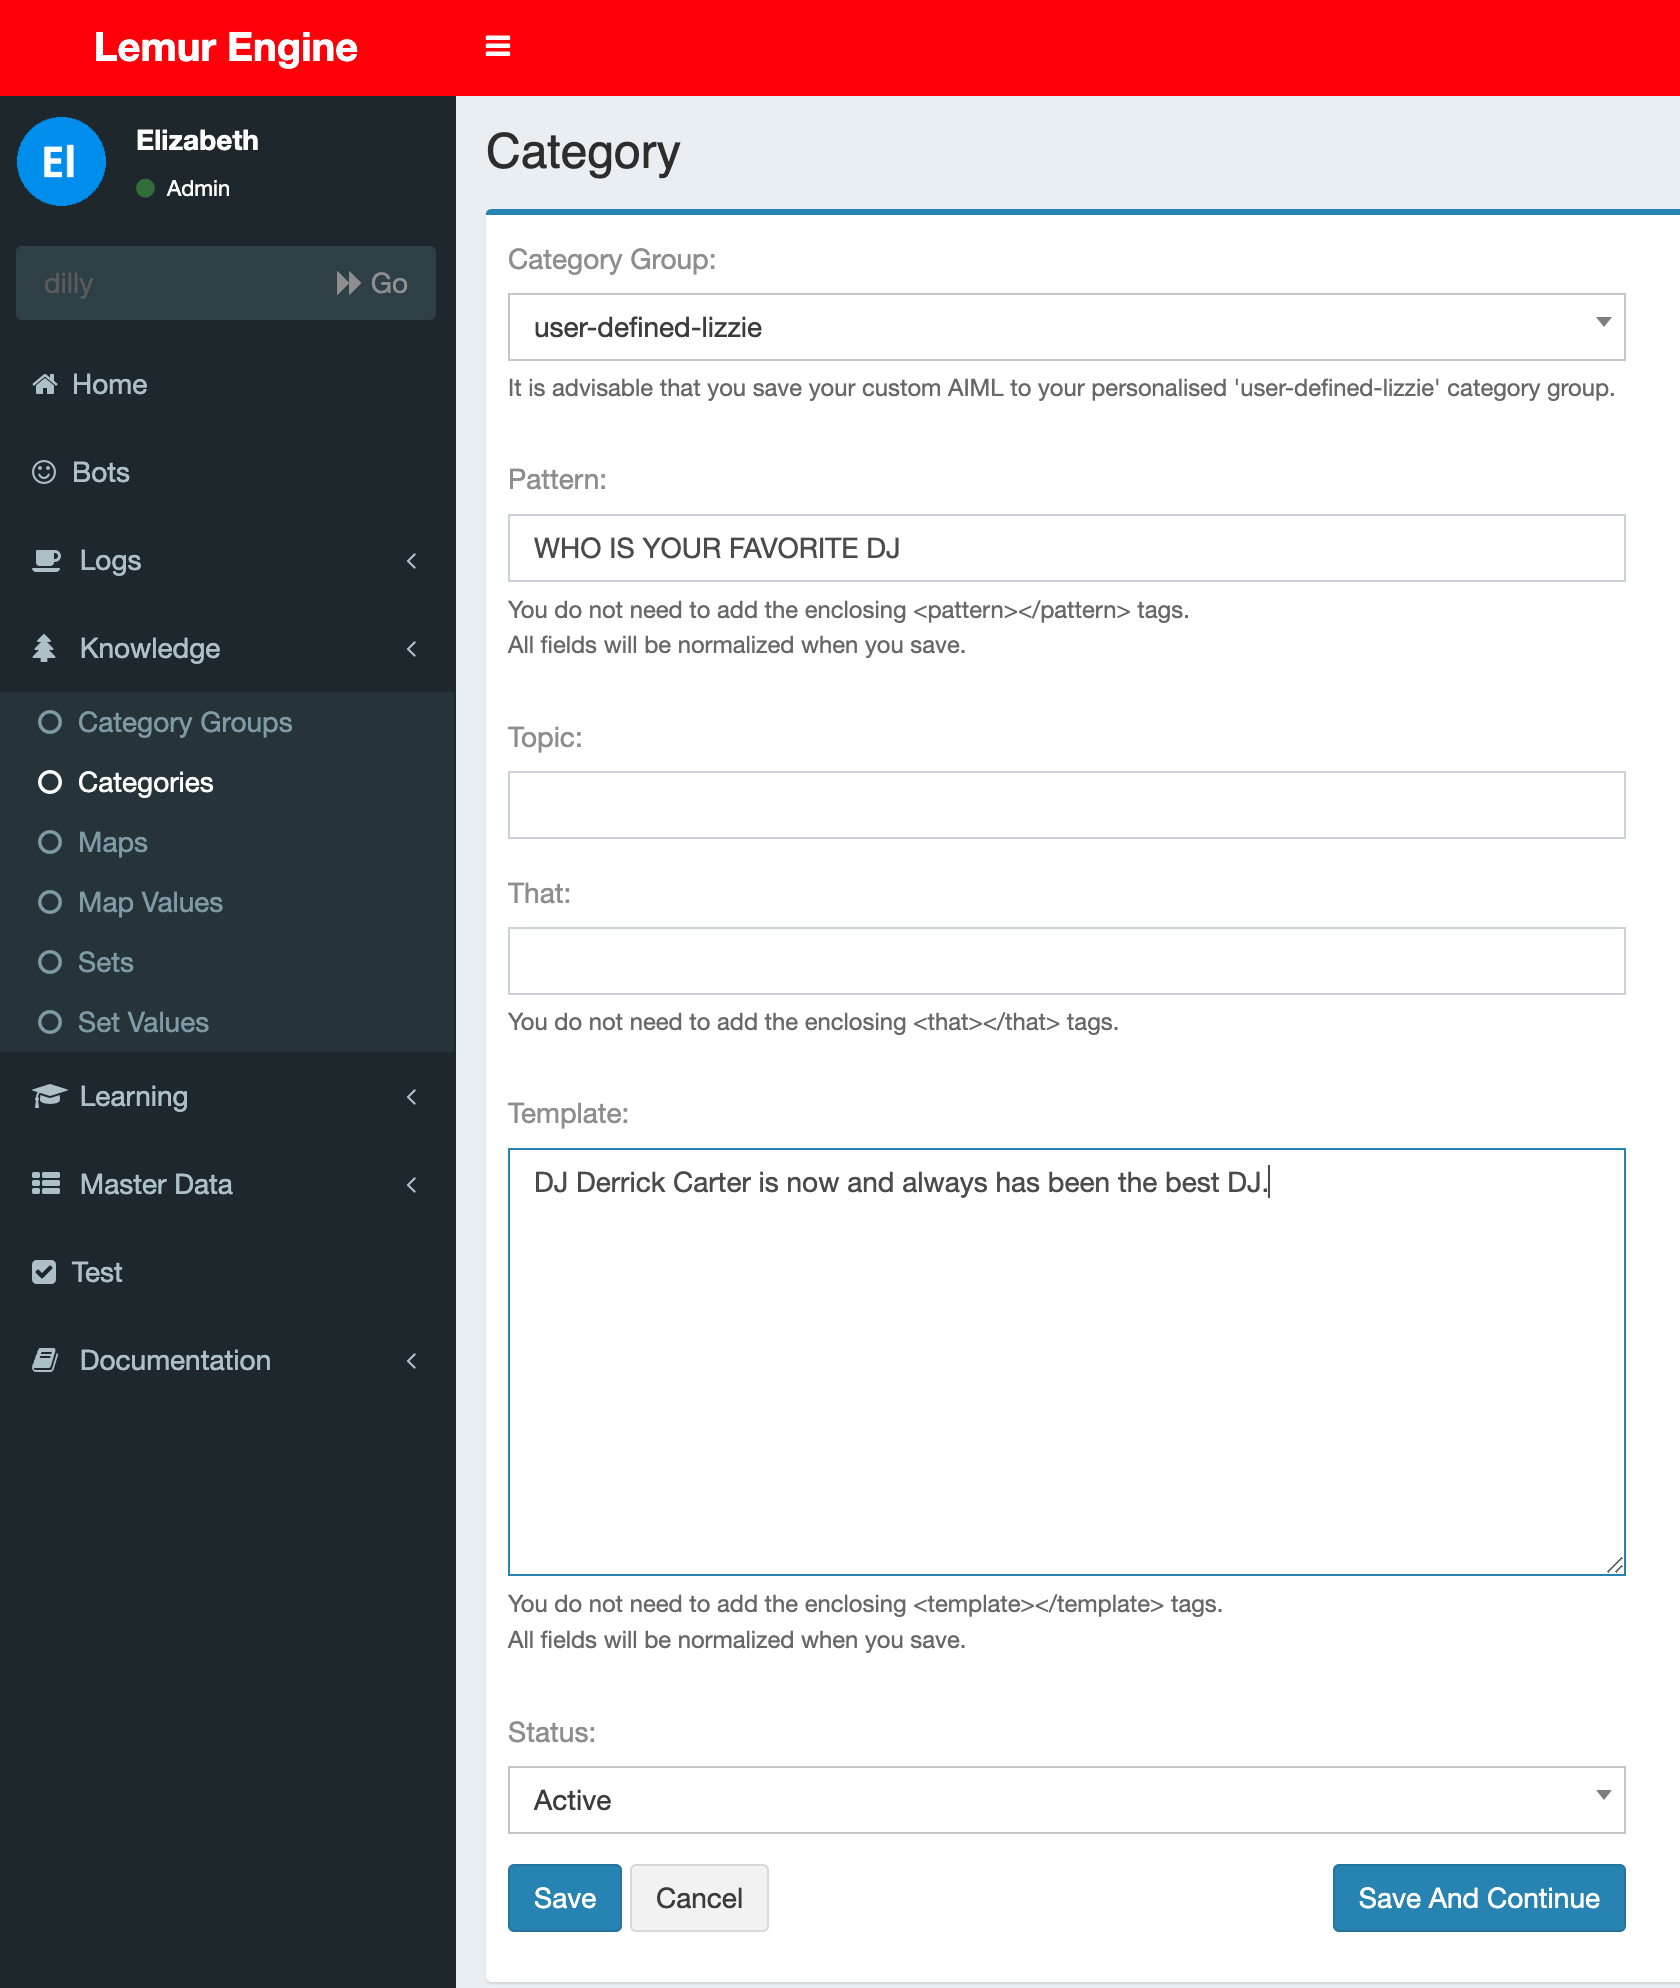
Admin Create Bot Knowledge
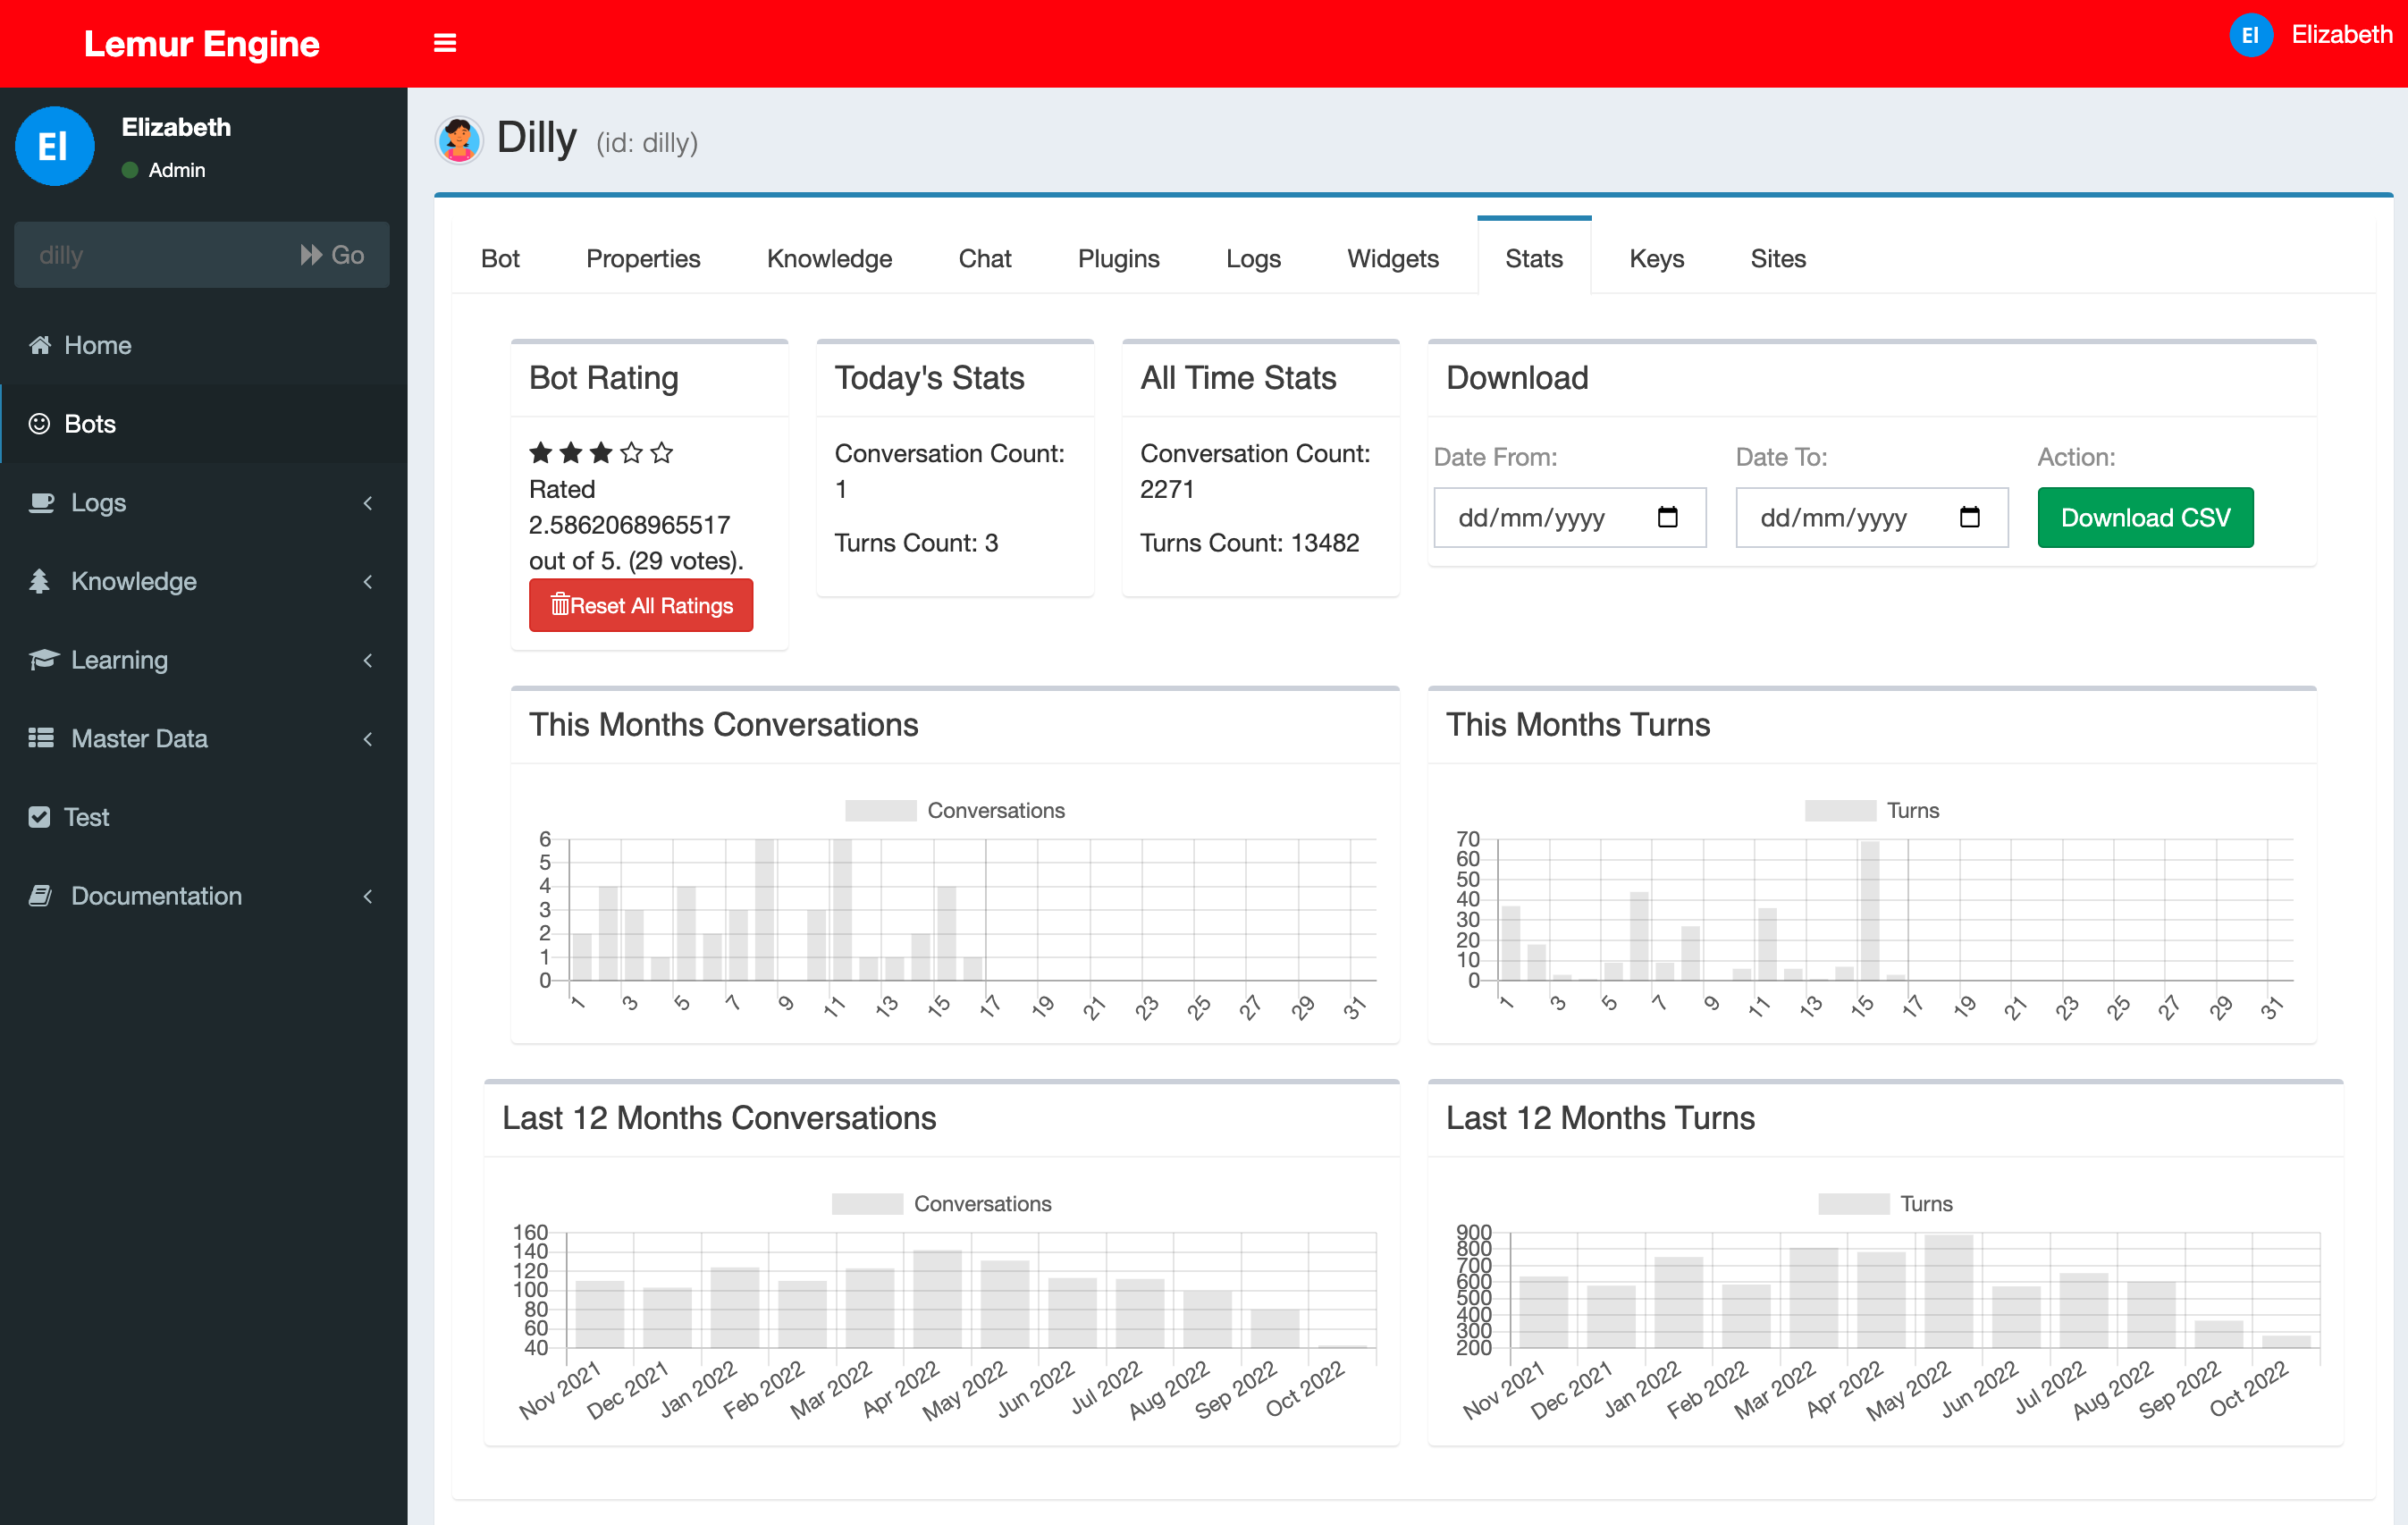
Admin Bot Stats
Versioning
This package is built for Laravel 9.x
Compatible Laravel versions are reflected in the LemurBot versions.
LemurBot 9.x versions are compatible with Laravel 9.x versions
Prerequisites
This has been developed for PHP8.0
TL/DR Fresh Installation Steps
If you do not want to read what the commands actually do and you just want run them then here they are. Only use these command on a FRESH installation of laravel.
php artisan vendor:publish --tag=lemurbot-template --force
php artisan vendor:publish --tag=lemurbot-auth --force
php artisan vendor:publish --tag=lemurbot-assets
php artisan vendor:publish --tag=lemurbot-widgets
php artisan vendor:publish --tag=lemurbot-config
php artisan vendor:publish --tag=datatables
php artisan vendor:publish --tag=datatables-buttons
php artisan vendor:publish --tag=datatables-html
php artisan vendor:publish --tag=datatables-fractal
php artisan vendor:publish --tag=lemurbot-examples
php artisan vendor:publish --tag=lemurbot-migrations
php artisan migrate
php artisan storage:link
php artisan lemur:install-all --admin=admin@lemurengine.local --bot=mybot --data=max
Full Fresh Installation Steps
LemurEngine LemurBots is written for the Laravel framework.
The first step is to install and setup your version of Laravel.
For more information on how to install Laravel check out: https://laravel.com/docs/9.x/installation
Use the --with-all-dependencies flag to update any conflicting packages the first time its run
Install with Lemur Engine with composer
composer require lemurengine/lemurbot dev-develop --with-all-dependencies
Publish Template (recommended)
This will create the default layout for the portal.
If you are installing the Lemur Engine into a fresh application then run this command.
If you already have a layout then you might want to skip this step
As it will overwrite your existing layouts/app.blade.php, auth templates and homepage\
php artisan vendor:publish --tag=lemurbot-template --force
Publish Auth Templates/Controllers (recommended)
This will create the customized authentication layout for the portal.
If you are installing the Lemur Engine into a fresh application then run this command.
If you already have created your authentication layouts/controllers then you might want to skip this step
As it will overwrite your existing resources/views/auth and app/Http/Controllers/Auth
php artisan vendor:publish --tag=lemurbot-auth --force
Publish Public Assets (required)
This will copy the required asset files to your public folder
This is required to make forms and validation features to work correctly
php artisan vendor:publish --tag=lemurbot-assets
Publish Public Widgets (required)
This will copy the widgets to the public widgets' folder \
php artisan vendor:publish --tag=lemurbot-widgets
Publish Config (required)
This will copy the lemur bot config files to config/lemurbot
- config/lemurbot/lemur.php
- config/lemurbot/properties.php
php artisan vendor:publish --tag=lemurbot-config
Publish Datatables Config And Assets (required)
This application uses the Yajra datatables plugin.
https://yajrabox.com/docs/laravel-datatables
If you need to publish the config fun the following command
php artisan vendor:publish --tag=datatables
php artisan vendor:publish --tag=datatables-buttons
php artisan vendor:publish --tag=datatables-html
php artisan vendor:publish --tag=datatables-fractal
Publish Example Tags and Plugins (optional)
This will copy the example HelloWorldTag and EchoTag to the App\LemurTag folder
And will copy the example MaintainMode and ShoutBack to the App\LemurPlugin folder \
php artisan vendor:publish --tag=lemurbot-examples
Publish Database Migrations (optional)
This will copy the lemur engine migration files to database/migration/lemurbot
You don't really need to do this.
But you can if you want to.
php artisan vendor:publish --tag=lemurbot-migrations
Run the database migrations (required)
The following command will create or update your existing database table schema.
php artisan migrate
Symlink public folders (required)
The following command will create or update your existing database table schema.
php artisan storage:link
Run the command to install a user, a bot and the AIML data
If you are migrating or already have this data you probably will not need to run this (see section at top of page about migrating)
php artisan lemur:install-all --admin=[admin_email] --bot=[bot_name] --data=[none|min|max]
example:
php artisan lemur:install-all --admin=admin@lemurengine.local --bot=mybot --data=max
-admin_email is the email address you will log in with.
Your password will be 'password' which you should change immediately.
-bot_name is the name of the bot you will create
-data choose either none|min|all. This will instruct the installer to install either
- none - no data
- min - 4 datasets (testing, hello, the critical and rating)
- max - all available datasets
You do not have to install a user or bot, you can do these things at a later date, but we recommend you do this now.
If your user already exists it will be given bot admin privileges and will be linked to your bot.
Start the Application
You can start the application now and log in using the username you entered above and the password 'password'.
Don't forget to change your password.
php artisan serve
Use
Talk to your bot here: http://127.0.0.1:8000
Log in to admin your bot here: http://127.0.0.1:8000/login
Migrating From theramenrobotdiscocode/lemur-engine
The original version of this library was released as an entire application which included a checked in version of Laravel 7.
It is easy to migrate your original version of theramenrobotdiscocode/lemur-engine to this version.
There are NO database schema changes just some minor data changes and file location changes.
We suggest you install new fresh copy of Laravel 9 and configure it to connect to your existing database.
You will need to still follow the fresh installation instructions below.
And anyway "Additional Upgrade Steps" as well.
Additional Upgrade Step: Custom Tag
Only do this is you are migrating from the old project
Move any custom tags which you have created to a folder called in the main app folder called LemurTag
like so.
app/
├── LemurTag/
│ ├── YourTag.php
│ ├── HelloWorldTag.php
└── Models/
You will need to change the namespace of your custom tags to namespace App\LemurTag;
Please look at the HelloWorldTag for an example
Additional Upgrade Step: Run the command to update a few filenames in the migrations folder
Only do this is you are migrating from the old project
There are 4 filenames in the migration table which need reverting to their original Laravel Migration filenames
Run this command to update the 4 filenames in the migrations table before you move onto the next step
php artisan lemur:upgrade 9.0.0
Additional Upgrade Step: Run the command to update the user to an admin user
Only do this is you are migrating from the old project
If you have existing data and want to give a user bot_admin privileges you can run this command.
php artisan lemur:install-admin --admin=[admin_email]
More information
Check out the docs for more information about how to use the portal and talk to the bot.