findologic / plugin-shopware-6
Findologic plugin for Shopware 6
Installs: 220
Dependents: 0
Suggesters: 0
Security: 0
Stars: 6
Watchers: 4
Forks: 3
Open Issues: 0
Type:shopware-platform-plugin
pkg:composer/findologic/plugin-shopware-6
Requires
- php: >=8.2
- composer/semver: ^3.3
- findologic/findologic-api: ^2.0
- findologic/libflexport: ^3.1
- findologic/shopware6-common: ^3.0.0
- vin-sw/shopware-sdk: ^2.0
Requires (Dev)
- bramus/monolog-colored-line-formatter: ^3.0
- monolog/monolog: ^3.3.1
- squizlabs/php_codesniffer: ^3.5
- dev-develop
- 6.0.4
- 6.0.3
- 6.0.2
- 6.0.1
- 6.0.0
- v5.x-dev
- 5.1.4
- 5.1.3
- 5.1.2
- 5.1.1
- 5.1.0
- 5.0.2
- 5.0.1
- 5.0.0
- 4.0.5
- 4.0.4
- 4.0.3
- 4.0.2
- 4.0.1
- 4.0.0
- 4.0.0-RC4
- 4.0.0-RC3
- 3.1.3
- 3.1.2
- 3.1.1
- 3.1.0
- 3.0.0
- 2.8.2
- 2.8.1
- 2.8.0
- 2.7.1
- 2.7.0
- 2.6.1
- 2.6.0
- 2.5.0
- 2.4.1
- 2.4.0
- 2.3.0
- 2.2.1
- 2.2.0
- 2.2.0-RC1
- v2.1.2
- v2.1.1
- v2.1.0
- v2.0.2
- v2.0.1
- v2.0.0
- v2.0.0-rc.2
- v2.0.0-rc.1
- v1.5.3
- v1.5.2
- v1.5.1
- v1.5.0
- v1.4.0
- v1.3.2
- v1.3.1
- v1.3.0
- v1.3.0-rc.1
- v1.2.0
- v1.1.0
- v1.0.1
- v1.0.0
- dev-SW-810_v5
- dev-SW-803_export_issue_with_new_price_customfield_type
- dev-SW-Test_v6
- dev-SW-test_v5
- dev-SW-801_export_variants_with_different_attribute_values_v4
- dev-SW-810_language_id_on_different_sales_channels
- dev-SW-801_export_variants_with_different_attribute_values_main
- dev-SW-807_fix_collision_for_guzzle_http_client
- dev-SW-803_export_issue_with_new_price_customfield_type_v1
- dev-SW-778_allow_the_pipe_character_in_property_values_name
- dev-simplify_build_files
- dev-SW-778_allow_filter_values_with_pipe_character
- dev-SW-734_the_category_filter_must_work_on_navigate_pages
- dev-SW-665
- dev-SW-779_remove_utf8_control_characters_from_product_description
- dev-SW-508_It_must_be_possible_to_set_configurations_for_all_sales_channels
- dev-main
This package is auto-updated.
Last update: 2026-02-12 10:15:36 UTC
README
Official Findologic plugin for Shopware 6.
Installation
Production
Please see our Shopware 6 documentation.
Development
-
Install the shopware-cli
-
Set up the test shop
- https://sw-cli.fos.gg/commands/project/
shopware-cli project create [folder] [version]
-
Install dependencies for tests
composer require --dev symfony/test-pack
-
Configure test database within the .env.test file (Create file if not present)
- If you want to use a docker database, run
docker-compose up -d
- If you want to use a docker database, run
-
Navigate to the plugins folder
cd custom/plugins -
Clone this repository
git clone git@github.com:findologic/plugin-shopware-6.git
-
Install dependencies
cd plugin-shopware-6 && composer install
-
Navigate back to the shop root
cd ../../.. -
Refresh plugin list
bin/console plugin:refresh --env="test" -
Install and activate the plugin
bin/console plugin:install FinSearch --activate --clearCache --env="test"
Run linting
CLI linting
The Makefile includes commands for all relevant tasks:
make storefront-lintmake administration-lintmake storefront-fixmake administration-fix
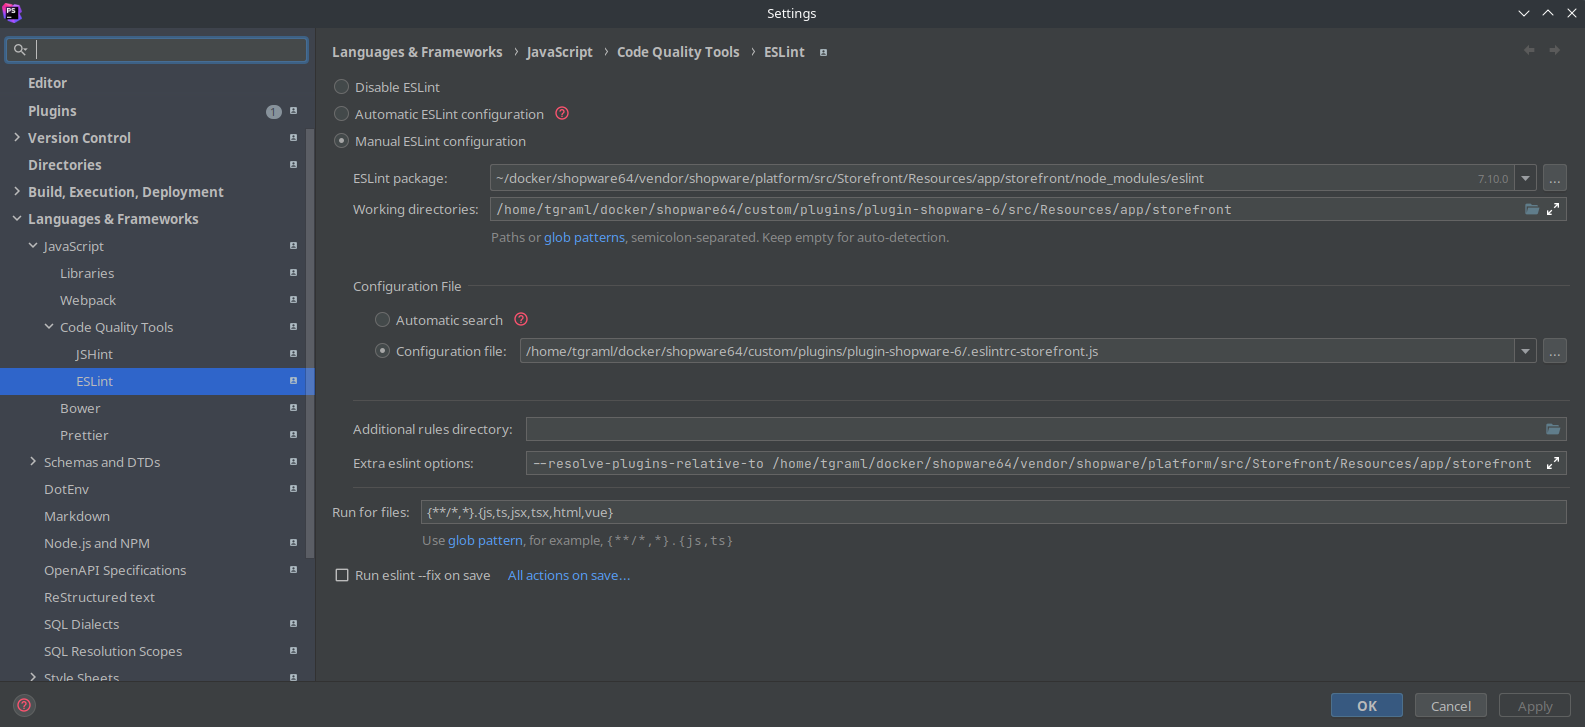
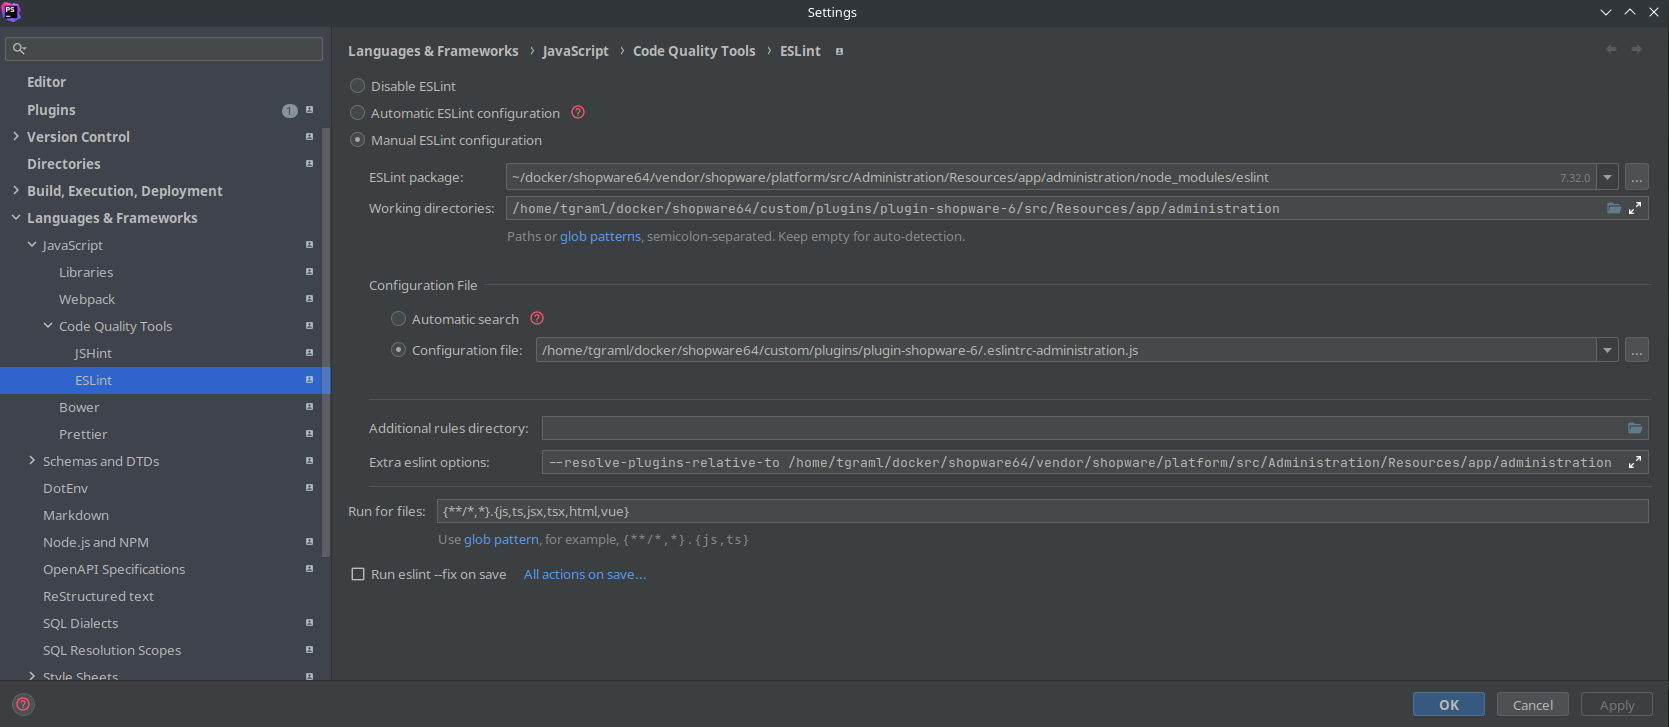
PHPStorm linting
There are different configurations for administration and storefront. Depending on the current project, use the corresponding configuration.
Storefront
Administration
Run PHPUnit tests
Prerequisites
- MySQL >= 8.0
- PHP >= 8.1
Setup
- Create a database user
appwith the passwordapp, which should have permissions to create, update and delete all databases. - In the development templates root, initialize the test setup (run locally, outside the app container)
./psh.phar init
- Navigate to the plugin and run tests
cd custom/plugins/plugin-shopware-6 && composer test
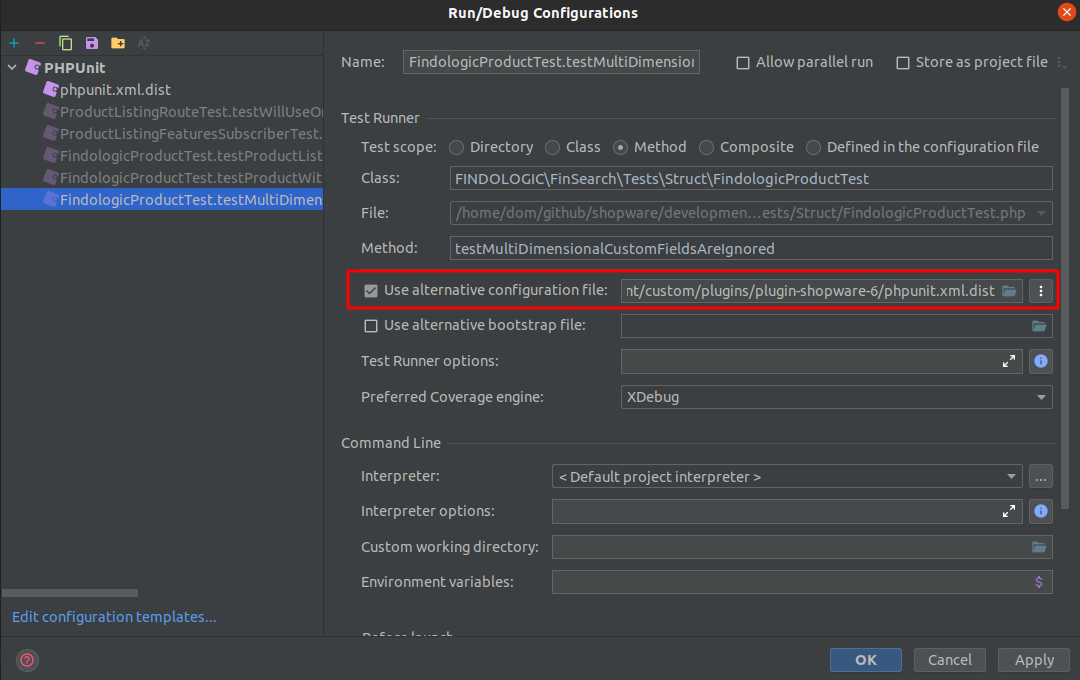
Tests can also be run separately within the IDE. Simply ensure to set phpunit.xml.dist as configuration file.
Run Storefront Jest tests
Prerequisites
- npm
- node
- See Shopware 6 environment requirements minimal required versions.
Setup
- Navigate to the storefront folder
cd src/Resources/app/storefront - Install dependencies
npm install
- Run unit-tests using jest
npm run test
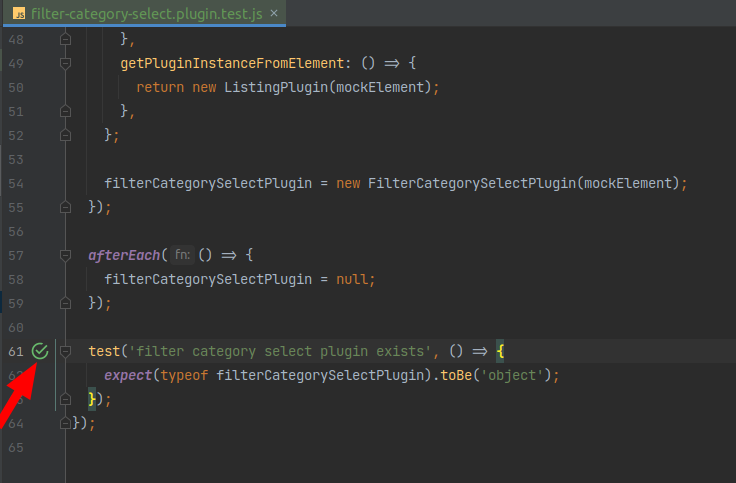
After dependency installation all tests can also be run via the IDE without any additional configuration.
Developing custom JavaScript plugins
- Check out the offical guide on how to extend js storefront plugin.
- Create your plugin files inside
src/Resources/app/storefront/src/js/[your-plugin-name].plugin.js - Register your extended plugin
- For a development build:
./psh.phar storefront:dev - For a production build:
./psh.phar storefront:build
Please note:
- The build commands will create a minified JS file in
src/Resources/app/storefront/dist/storefront/js/[plugin-name].js. - Before committing ensure that all files were built and added to your commit.
- Make sure to also commit the minified JavaScript files.
Libraries
We are using some of our libraries that are especially relevant for this and other plugins. Note that these libraries already come with the plugin itself, so you do not need to install them yourself.
- findologic/libflexport Helps generating the shop's data feed aka. export. We use it to generate an XML based on the product data of the shop.
- findologic/shopware6-common Includes the basic logic for the export.
- findologic/findologic-api Handles requests to FINDOLOGIC. This includes everything from sending query parameters like selected filters, output attributes, to parsing the response with response objects.
Export customization
In some cases you may want to export additional, custom export data. To still provide you plugin updates, we have an extension plugin. It overrides logic of the base plugin to reflect your own logic.
Use the FINDOLOGIC Shopware 6 extension plugin to customize your export. There are already pre-defined examples, that guide you on how you can customize certain entities, like attributes or properties.
Deployment and Release
- Update the changelogs
CHANGELOG_en-GB.mdandCHANGELOG_de-DE.md. - Ensure that all changes, including the changelog changes have been merged into the
developbranch. - Switch to the
developbranch locally and pull the most recent changes.git checkout develop git pull
- Start the release process and follow the instructions.
composer release
- Ensure that the GitHub Actions release is successful.
- Upload it to Google Drive, by downloading the built zip file from the Releases page.
Upload it to the folder
Development/Plugins/Shopware/Shopware 6 DI & API Pluginand move the old version toalte Versionen. - Notify everyone in the
#releasesSlack channel.


