stackkit / laravel-google-cloud-scheduler
Fund package maintenance!
marickvantuil
Installs: 241 928
Dependents: 0
Suggesters: 0
Security: 0
Stars: 33
Watchers: 1
Forks: 5
Open Issues: 0
pkg:composer/stackkit/laravel-google-cloud-scheduler
Requires
- ext-json: *
- google/auth: ^v1.29.1
- google/cloud-scheduler: ^2.0
- laravel/framework: ^11.0|^12.0
- phpseclib/phpseclib: ^3.0
- symfony/cache: ^7.2
Requires (Dev)
- laravel/pint: ^1.14
- nunomaduro/collision: ^8.0
- orchestra/testbench: ^9.0|^10.0
This package is auto-updated.
Last update: 2026-01-09 12:24:40 UTC
README
Companion packages: Cloud Tasks, Cloud Logging
Introduction
This package allows you to use Google Cloud Scheduler to schedule Laravel commands.
How it works
Cloud Scheduler will make HTTP calls to your application. This package adds an endpoint to your application that accepts these HTTP calls with their payload (an Artisan command) and execute them.
There are two ways to schedule commands using this package:
1. Schedule the `schedule:run` command
This is the easiest way to use this package. You can schedule the schedule:run command to run every minute.
2. Schedule commands separately
If your application does not have commands that should run every minute, you may choose to schedule them individually.
If the command uses withoutOverlapping, before, after, onSuccess, thenPing, etc, this package will respect those settings, as long as the command is also scheduled in the console kernel.
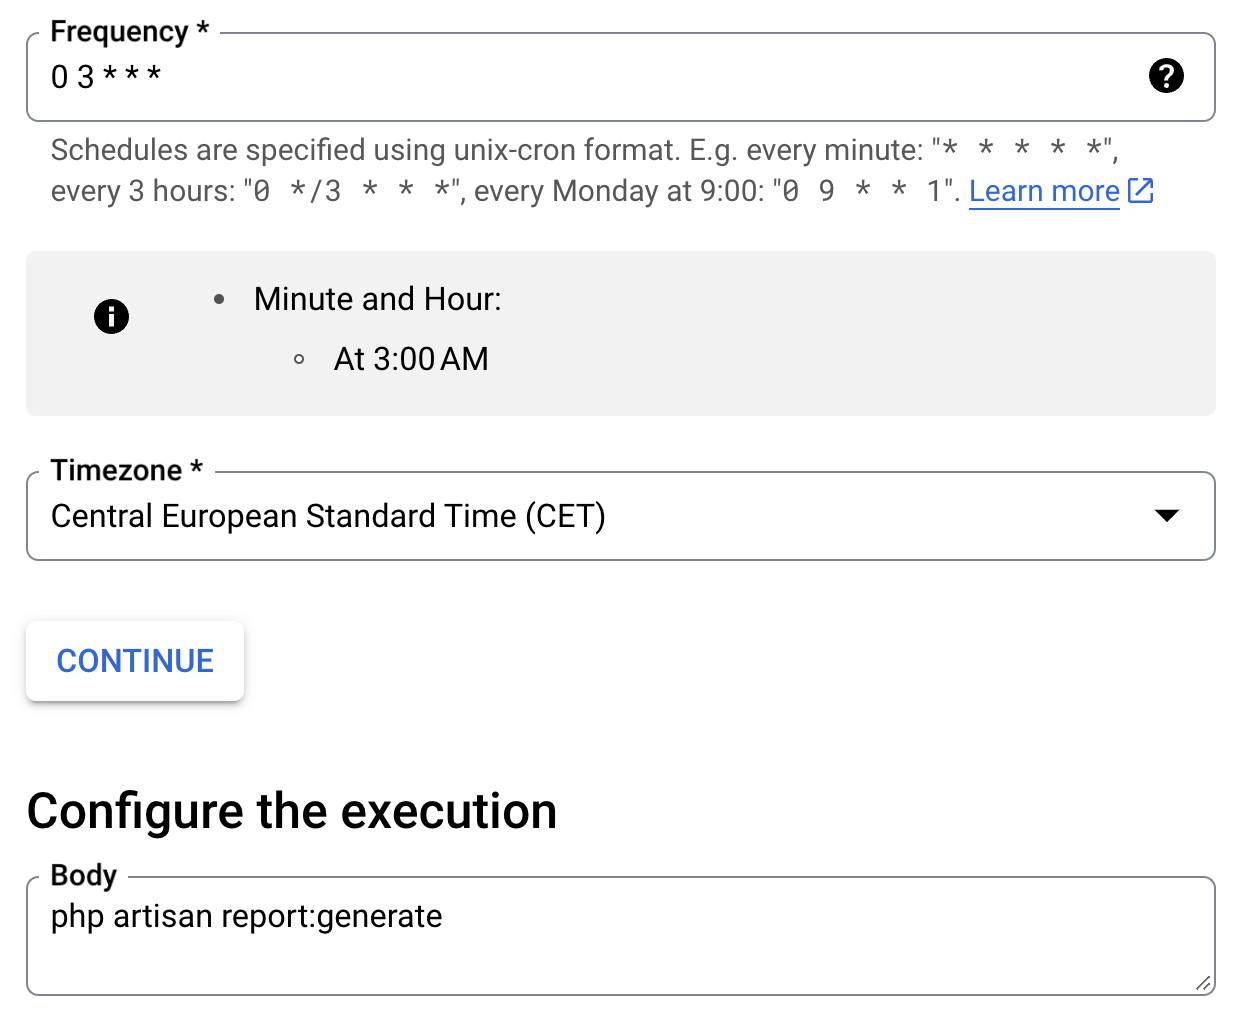
For example, let's say we have to generate a report every day at 3:00 AM. We can schedule the reports:generate command to run at 3:00 AM using Cloud Scheduler. After the report is generated, OhDear should be pinged.
Firstly, schedule the command in Cloud Tasks:

Then, schedule the command in the console kernel:
public function schedule(Schedule $schedule)
{
    $schedule->command('report:generate')
        ->thenPing('https://ohdear.app/ping');
}
The package will pick up on the scheduled settings and ping OhDear after the command has run.
Requirements
This package requires Laravel 11 or 12.
Installation
1 - Require the package using Composer
composer require stackkit/laravel-google-cloud-scheduler
2 - Define environment variables
CLOUD_SCHEDULER_APP_URL - This should be the URL defined in the URL field of your Cloud Scheduler job.
CLOUD_SCHEDULER_SERVICE_ACCOUNT - The e-mail address of the service account invocating the task.
Optionally, you may publish the configuration file:
php artisan vendor:publish --tag=cloud-scheduler-config
3 - Ensure PHP executable is in open_basedir. This is required for the package to run Artisan commands.
How to find the executable:
php artisan tinker --execute="(new Symfony\\Component\\Process\\PhpExecutableFinder())->find()"
4 - Optional, but highly recommended: server configuration
Since Artisan commands are now invoked via an HTTP request, you might encounter issues with timeouts. Here's how to adjust them:
server {
    # other server configuration ...

    location /cloud-scheduler-job {
        proxy_connect_timeout 600s;
        proxy_read_timeout 600s;
        fastcgi_read_timeout 600s;
    }

    # other locations and server configuration ...
}
5 - Optional, but highly recommended: set application RUNNING_IN_CONSOLE
Some Laravel service providers only register their commands if the application is being accessed through the command line (Artisan). Because we are calling Laravel scheduler from a HTTP call, that means some commands may never register, such as the Laravel Scout command:
/**
 * Bootstrap any application services.
 *
 * @return void
 */
public function boot()
{
    if ($this->app->runningInConsole()) {
        $this->commands([
            FlushCommand::class,
            ImportCommand::class,
            IndexCommand::class,
            DeleteIndexCommand::class,
        ]);

        $this->publishes([
            __DIR__.'/../config/scout.php' => $this->app['path.config'].DIRECTORY_SEPARATOR.'scout.php',
        ]);
    }
}
To circumvent this, please add the following to bootstrap/app.php
<?php

use Illuminate\Foundation\Application;
use Illuminate\Foundation\Configuration\Exceptions;
use Illuminate\Foundation\Configuration\Middleware;

+ if (($_SERVER['REQUEST_URI'] ?? '') === '/cloud-scheduler-job') {
+     $_ENV['APP_RUNNING_IN_CONSOLE'] = true;
+ }

return Application::configure(basePath: dirname(__DIR__))
    ->withRouting(
        web: __DIR__.'/../routes/web.php',
        commands: __DIR__.'/../routes/console.php',
        health: '/up',
    )
    ->withMiddleware(function (Middleware $middleware) {
        //
    })
    ->withExceptions(function (Exceptions $exceptions) {
        //
    })->create();
6 - Optional: whitelist route for maintenance mode
If you want to allow jobs to keep running if the application is down (php artisan down), update the following:
return Application::configure(basePath: dirname(__DIR__))
    ->withRouting(
        web: __DIR__ . '/../routes/web.php',
        commands: __DIR__ . '/../routes/console.php',
        health: '/up',
    )
    ->withMiddleware(function (Middleware $middleware) {
        $middleware->preventRequestsDuringMaintenance(
            except: [
                '/cloud-scheduler-job',
            ],
        );
    })
    ->withExceptions(function (Exceptions $exceptions) {
        //
    })->create();
Cloud Scheduler Example
Here is an example job that will run php artisan schedule:run every minute.
These are the most important settings:
- Target must be
HTTP - URL and AUD (audience) must be
https://yourdomainname.com/cloud-scheduler-job - Auth header must be OIDC token!
Security
The job handler requires each request to have an OpenID token. Cloud Scheduler will generate an OpenID token and send it along with the job payload to the handler.
This package verifies that the token is digitally signed by Google and that it's meant for your application. Only Google Scheduler will be able to call your handler.
More information about OpenID Connect:
https://developers.google.com/identity/protocols/oauth2/openid-connect


