sholihin / chattersishop
A simple forum package for your laravel app
Maintainers
Requires
- luketowers/purifier: ~3.0
Requires (Dev)
- illuminate/cache: ~5.1.20|5.2.*|5.3.*
- illuminate/console: ~5.1.20|5.2.*|5.3.*
- mockery/mockery: ^0.9.5
- phpunit/phpunit: ~5.7.14
This package is auto-updated.
Last update: 2026-06-29 01:42:55 UTC
README
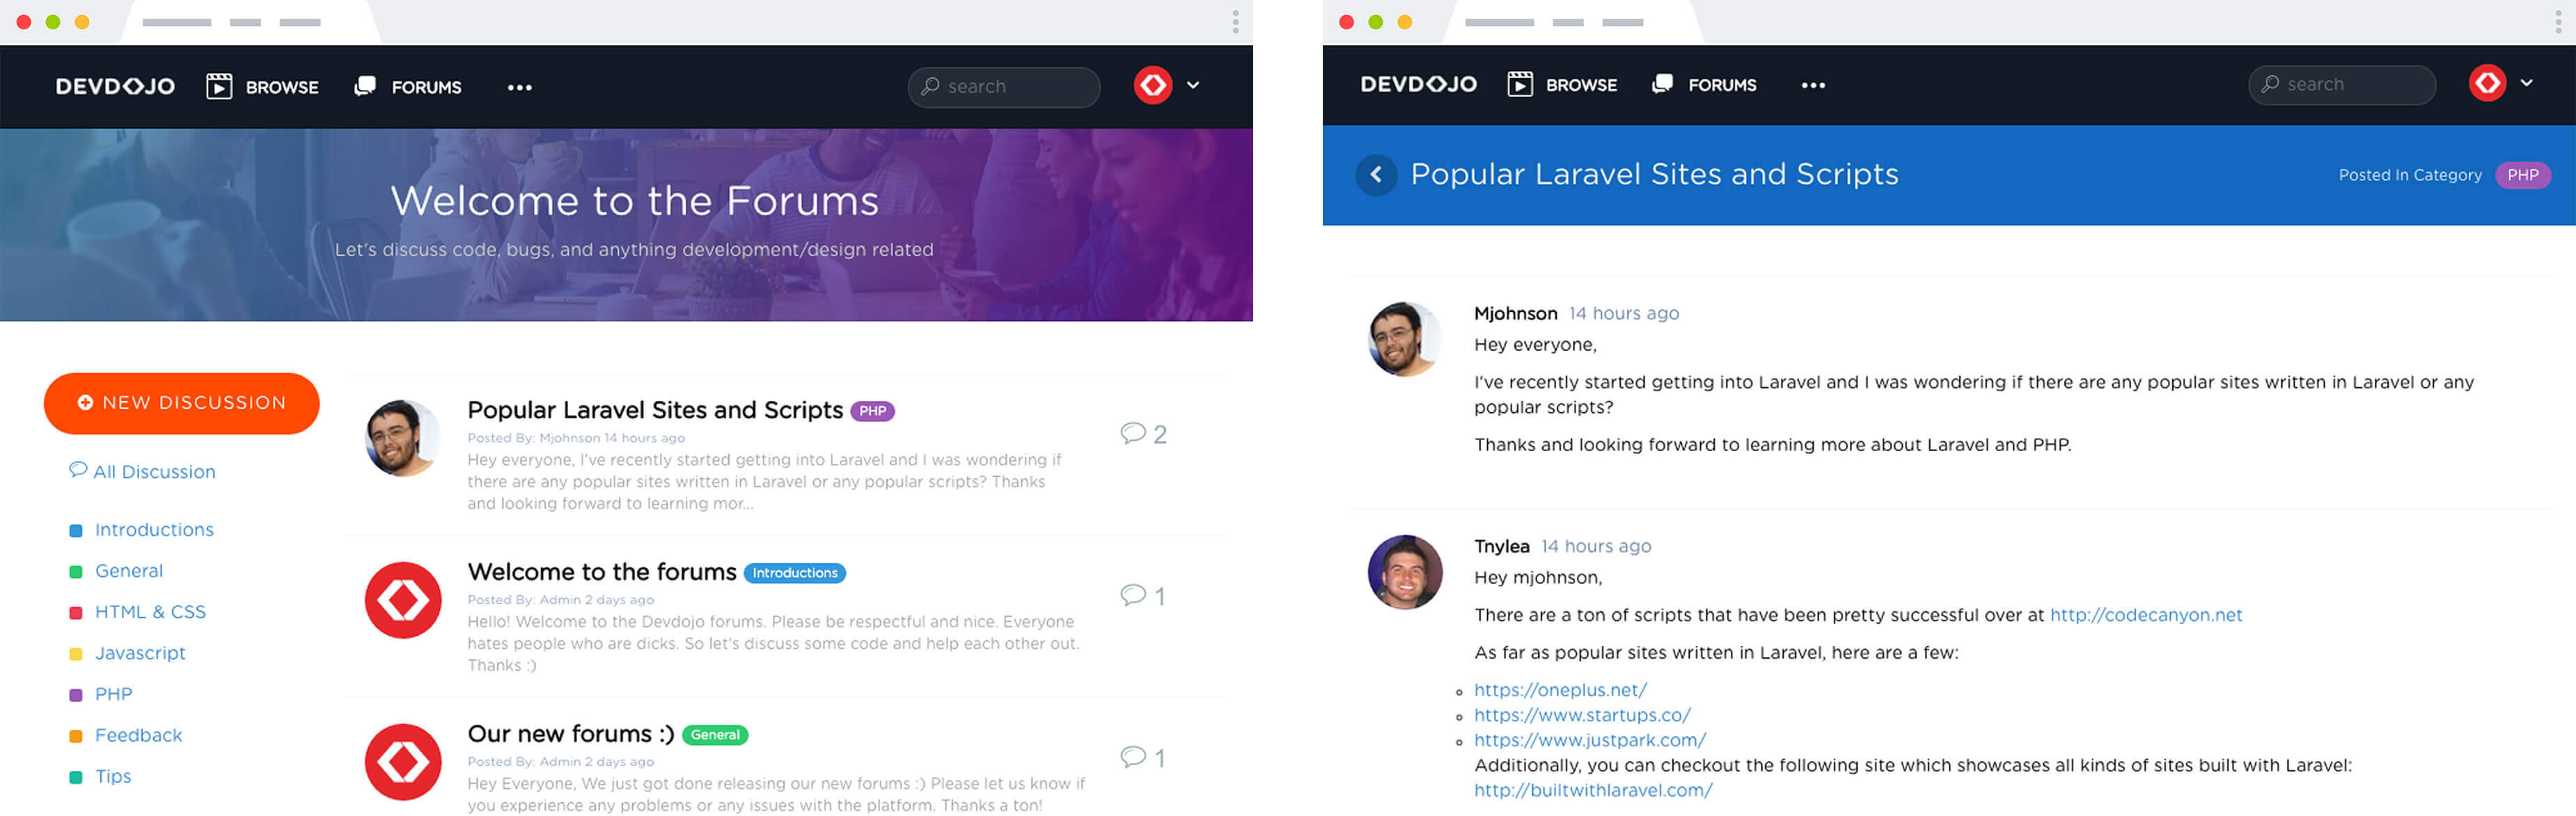
![]()
Laravel Forum Package - Chatter
Installation
Quick Note: If this is a new project, make sure to install the default user authentication provided with Laravel. php artisan make:auth
-
Include the package in your project
composer require "sholihin/chattersishop" -
Add the service provider to your
config/app.phpproviders array:If you're installing on Laravel 5.5+ skip this step
Sholihin\Chattersishop\ChatterServiceProvider::class, -
Publish the Vendor Assets files by running:
php artisan vendor:publish --provider="Sholihin\Chattersishop\ChatterServiceProvider" -
Now that we have published a few new files to our application we need to reload them with the following command:
composer dump-autoload -
Run Your migrations:
php artisan migrate --path=database/migrations/chatter/Quick tip: Make sure that you've created a database and added your database credentials in your
.envfile. -
Lastly, run the seed files to seed your database with a little data:
php artisan db:seed --class=ChatterTableSeeder -
Inside of your master.blade.php file include a header and footer yield. Inside the head of your master or app.blade.php add the following:
@yield('css')Then, right above the
</body>tag of your master file add the following:@yield('js')
Now, visit your site.com/forums and you should see your new forum in front of you!
Upgrading
Then you'll run:
composer update
Next, you may want to re-publish the chatter assets, chatter config, and the chatter migrations by running the following:
php artisan vendor:publish --tag=chatter_assets --force
php artisan vendor:publish --tag=chatter_config --force
php artisan vendor:publish --tag=chatter_migrations --force
Next to make sure you have the latest database schema run:
php artisan migrate --path=database/migrations/chatter/
And you'll be up-to-date with the latest version :)
Markdown editor
If you are going to make use of the markdown editor instead of tinymce you will need to change that in your config/chatter.php:
'editor' => 'simplemde',
In order to properly display the posts you will need to include the graham-campbell/markdown library for Laravel:
composer require graham-campbell/markdown
Trumbowyg editor
If you are going to use Trumbowyg as your editor of choice you will need to change that in your config/chatter.php:
'editor' => 'trumbowyg',
Trumbowyg requires jQuery >= 1.8 to be included.
VIDEOS
Introduction and Installation of Chatter
Configuration
When you published the vendor assets you added a new file inside of your config folder which is called config/chatter.php. This file contains a bunch of configuration you can use to configure your forums
Customization
CUSTOM CSS
If you want to add additional style changes you can simply add another stylesheet at the end of your @yield('css') statement in the head of your master file. In order to only load this file when a user is accessing your forums you can include your stylesheet in the following if statement:
@if(Request::is( Config::get('chatter.routes.home') ) || Request::is( Config::get('chatter.routes.home') . '/*' ))
    <!-- LINK TO YOUR CUSTOM STYLESHEET -->
    <link rel="stylesheet" href="/assets/css/forums.css" />
@endif
SEO FRIENDLY PAGE TITLES
Since the forum uses your master layout file, you will need to include the necessary code in order to display an SEO friendly title for your page. The following code will need to be added to the <head> of your master file:
@if( Request::is( Config::get('chatter.routes.home')) )
    <title>Title for your forum homepage -  Website Name</title>
@elseif( Request::is( Config::get('chatter.routes.home') . '/' . Config::get('chatter.routes.category') . '/*' ) && isset( $discussion ) )
    <title>{{ $discussion->category->name }} - Website Name</title>
@elseif( Request::is( Config::get('chatter.routes.home') . '/*' ) && isset($discussion->title))
    <title>{{ $discussion->title }} - Website Name</title>
@endif
OVERRIDING VIEWS
In order to override Chatter's built in views, simply create a chatter folder in your vendor views folder, i.e. ROOT/resources/views/vendor/chatter. Then simply drop in the Chatter view files you would like to override.
Custom Function Hooks for the forum
Sometimes you may want to add some additional functionality when a user creates a new discussion or adds a new response. Well, there are a few built in functions that you can create in your script to access this functionality:
Before User Adds New Discussion Create a new global function in your script called:
function chatter_before_new_discussion($request, $validator){}
Note: that the $request object is passed with the user input for each webhook. You can use it if you would like :) If not, no worries just add your custom functionality.
After User Adds New Discussion Create a new global function in your script called:
function chatter_after_new_discussion($request){}
Before User Adds New Response Create a new global function in your script called:
function chatter_before_new_response($request, $validator){}
After User Adds New Response Create a new global function in your script called:
function chatter_after_new_response($request){}
Laravel Events for the forum
This package provides a number of events allowing you to respond to user actions as they happen:
| Event | Available properties | Description |
|---|---|---|
ChatterBeforeNewDiscussion |
Illuminate\Http\Request ($request), Illuminate\Validation\Validator ($validator) |
This event is fired before a discussion is validated and created |
ChatterAfterNewDiscussion |
Illuminate\Http\Request ($request), Models::discussion() ($discussion), Models::post() ($post) |
This event is fired after a discussion has been validated and created |
ChatterBeforeNewResponse |
Illuminate\Http\Request ($request), Illuminate\Validation\Validator ($validator) |
This event is fired before a response is validated and created |
ChatterAfterNewResponse |
Illuminate\Http\Request ($request), Models::post() ($post) |
This event is fired after a response is validated and created |
Listening for Events
To register your listeners for these events, follow the Laravel documentation for registering events and listeners.
For example, to register a listener for the "before new discussion" event, add the following to your EventServiceProvider:
protected $listen = [
    'Sholihin\Chattersishop\Events\ChatterBeforeNewDiscussion' => [
        'App\Listeners\HandleNewDiscussion',
    ],
];
where App\Listeners\HandleNewDiscussion is a class in your application which handles the event when it's fired.
You can access the object that triggered the event in your listener with
    public function handle(ChatterAfterNewDiscussion $event)
    {
        // $event->discussion
        // $event->post
    }
and
    public function handle(ChatterAfterNewResponse $event)
    {
        // $event->post
    }
Screenshots