hi-folks / ibis-next
Creating EPUB and PDF ebook from Markdown
Maintainers
Package info
pkg:composer/hi-folks/ibis-next
Requires
- php: ^8.2
- ext-ctype: *
- ext-dom: *
- ext-filter: *
- ext-gd: *
- ext-json: *
- ext-mbstring: *
- ext-openssl: *
- ext-zlib: *
- hi-folks/phpepub: ^1.0.0
- illuminate/filesystem: ^10.0|^11.0
- illuminate/support: ^10.0|^11.0
- mpdf/mpdf: ^8.0
- spatie/commonmark-highlighter: ^3.0
- symfony/console: ^6.0|^7.0
- symfony/yaml: ^6.0|^7.0
Requires (Dev)
- laravel/pint: ^1.2
- pestphp/pest: ^3.0
- phpstan/phpstan: ^1.10
- rector/rector: ^1
- symfony/var-dumper: ^6.0|^7.0
This package is auto-updated.
Last update: 2026-07-13 03:02:44 UTC
README

Create eBooks with Markdown
Ibis Next is an open-source tool developed for ebook creators who want to focus on content creation. Ibis Next supports writing in Markdown and can generate ebooks in PDF, EPUB, or HTML format. The tool aims to simplify the ebook creation process, allowing writers to concentrate on their content while providing functionality for converting it into polished ebooks efficiently.
What is Ibis Next?
Ibis Next is a PHP-based tool that simplifies the entire eBook creation process. Leveraging the power of Markdown, it empowers users to focus on content creation while automating the complexities of generating professional-quality eBooks. Whether you're a seasoned author, a technical writer, or someone venturing into the world of eBook creation for the first time, Ibis Next is here to make the process seamless and efficient.
Key features
- Markdown: Write your content using Markdown's simplicity and versatility.
- Automatic Generation: Effortlessly create PDF, EPUB, or HTML files with a single command using the
ibis-next pdfcommand oribis-next epuboribis-next html. - Aesthetic Appeal: create your eBooks with a custom cover photo, a clickable auto-generated table of contents, and code syntax highlighting.
- Theme Options: Choose between two visually appealing themes, Light and Dark (theme support is available for PDFs).
Why Choose Ibis Next?
Ibis Next is a powerful tool for effortlessly creating digital books (e-books) in EPUB, PDF, and HTML formats. With Ibis Next, writers can concentrate on crafting content without worrying about formatting. The content is authored in Markdown format, allowing for simplicity and flexibility.
Ibis Next seamlessly handles the conversion process, ensuring a hassle-free transition from Markdown to the correct EPUB, PDF, and HTML formats. Embracing markdown streamlines the writing process and enhances collaboration and ease of editing, making it an ideal choice for authors seeking efficiency and focusing on content creation.
Get ready to revolutionize your eBook creation process with Ibis Next!
Mohamed Said created the Ibis project. The sources of the Ibis project are https://github.com/themsaid/ibis. Thank you to Mohamed for creating this tool.
We forked the repository to speed up the process of supporting PHP 8.2, PHP 8.3, PHP 8.4, Laravel 11, Symfony 7, Commonmark 2, and other dependencies upgrades. With Ibis Next, we also added the support for generating the EPUB format and HTML format. So, with Ibis Next, you can create Markdown files and export them into PDF, EPUB, and HTML for better compatibility with your devices and software.
Books created with Ibis Next 📚
The following books have been created using Ibis Next. This list highlights the versatility and potential of Ibis Next in crafting professional and beautiful books for various purposes.
Featured Books
📚 PHP 8 in a Nutshell
- Author(s): Amit D. Merchant
- Description: "PHP 8 in a nutshell" is a book that neatly puts together all the new and important features of PHP 8 clearly and to the point without all the fluff. The book covers all of PHP 8's developer-facing features in a concise format that covers the important nitty-gritty and what you would want in a real-world scenario. The book also covers the newest minor releases, PHP 8.1, 8.2, 8.3, and 8.4, and the features and enhancements that come with them.
- Formats available: PDF and EPUB
- Link: View Book
📚 The Web Dev's Guide to Freelancing
- Author(s): Ash Allen
- Description: Learn proven strategies, tips, and tricks you can use to launch your freelance web development career and build a successful business from scratch.
- Formats available: PDF and EPUB
- Link: View Book
📚 Best Practices for Laravel Enterprise Applications
- Author(s): Wendell Adriel
- Description: Discover essential best practices for developing scalable and robust Laravel enterprise applications.
- Formats available: PDF and EPUB
- Link: View Book
Installation
Before you begin, ensure that you have PHP 8.2 or above installed on your system, and ensure the gd extension is enabled in your php.ini file.
Installing ibis-next locally
To quickly get started with building your eBook locally, follow these steps:
If you want to start quickly to build your eBook, you can:
- Create a new empty directory via the
mkdircommand and navigate into it:
mkdir my-first-ebook
cd my-first-ebook
- Install Ibis Next using Composer:
composer require hi-folks/ibis-next
-
Once the tool is installed, you'll find the
vendor/directory containing your new tool (vendor/bin/ibis-next). -
When launching Ibis Next locally in a specific directory, use the following command:
./vendor/bin/ibis-next list
Installing ibis-next globally
If you prefer to install the composer package globally, use the global option with the composer require command:
composer global require hi-folks/ibis-next
When Ibis Next is installed globally, you can launch and run it using the ibis-next command:
ibis-next list
Initializing the eBook
To get started, initialize your project directory using the init command. This command automatically creates the necessary configuration file, the assets folder, and the content folder for your Markdown files.
Locally Installed Ibis Next
If you installed Ibis Next locally, launch the init command from your project directory:
./vendor/bin/ibis-next init
Globally Installed Ibis Next
If you installed Ibis Next globally, run the init command inside an empty directory where you want to create your eBook:
ibis-next init
The ibis-next init command will generate the following files and directories:
- The
assetsdirectory, which contains theme files used for building the PDF and EPUB files. Since the process involves an intermediary step that temporarily converts the content to HTML, the theme files are in HTML and CSS to ensure the correct styling for the output files. - The
assets/fontsdirectory, where you can download and use your TrueType Font (TTF) files. - The
assets/cover.jpg, which is a sample book cover image. - The
assets/imagesdirectory, containing sample images used in the sample book. - The
contentdirectory, which includes some sample Markdown files. You can edit these files or create new ones. - The
ibis.phpfile, which contains the Ibis Next configuration.
Configure your eBook by editing the ibis.php configuration file.
Setting a specific directory
If you prefer to initialize a different empty directory (not the current one), use the -d option with the init command. For example:
ibis-next init -d ../some-other-directory
This is especially useful if you want to install Ibis Next once and manage multiple books in separate directories.
Writing Your eBook
The init command will create sample .md files inside the content folder. You can explore those files to see how you can write your book.
This sample content is taken from Ibis Next: create your eBooks with Markdown by Roberto Butti.
Inside the content directory, you can write multiple .md files. Ibis uses the headings to divide the book into parts and chapters:
---
title: My Title
---

# Part 1

`<h1>` tags define the start of a part. A separate PDF page will be generated to print the part title and any content below.

## Chapter 1

`<h2>` tags define the start of a chapter. A chapter starts on a new page always.

### Starting with Ibis

`<h3>` tags define different titles inside a chapter.
Adding Aside
Inspired by the great Astro Starlight tool for creating technical documentation, we support aside block. Taking the definition from Astro Starlight documentation: Asides (also known as “admonitions” or “callouts”) help display secondary information alongside a page’s main content.
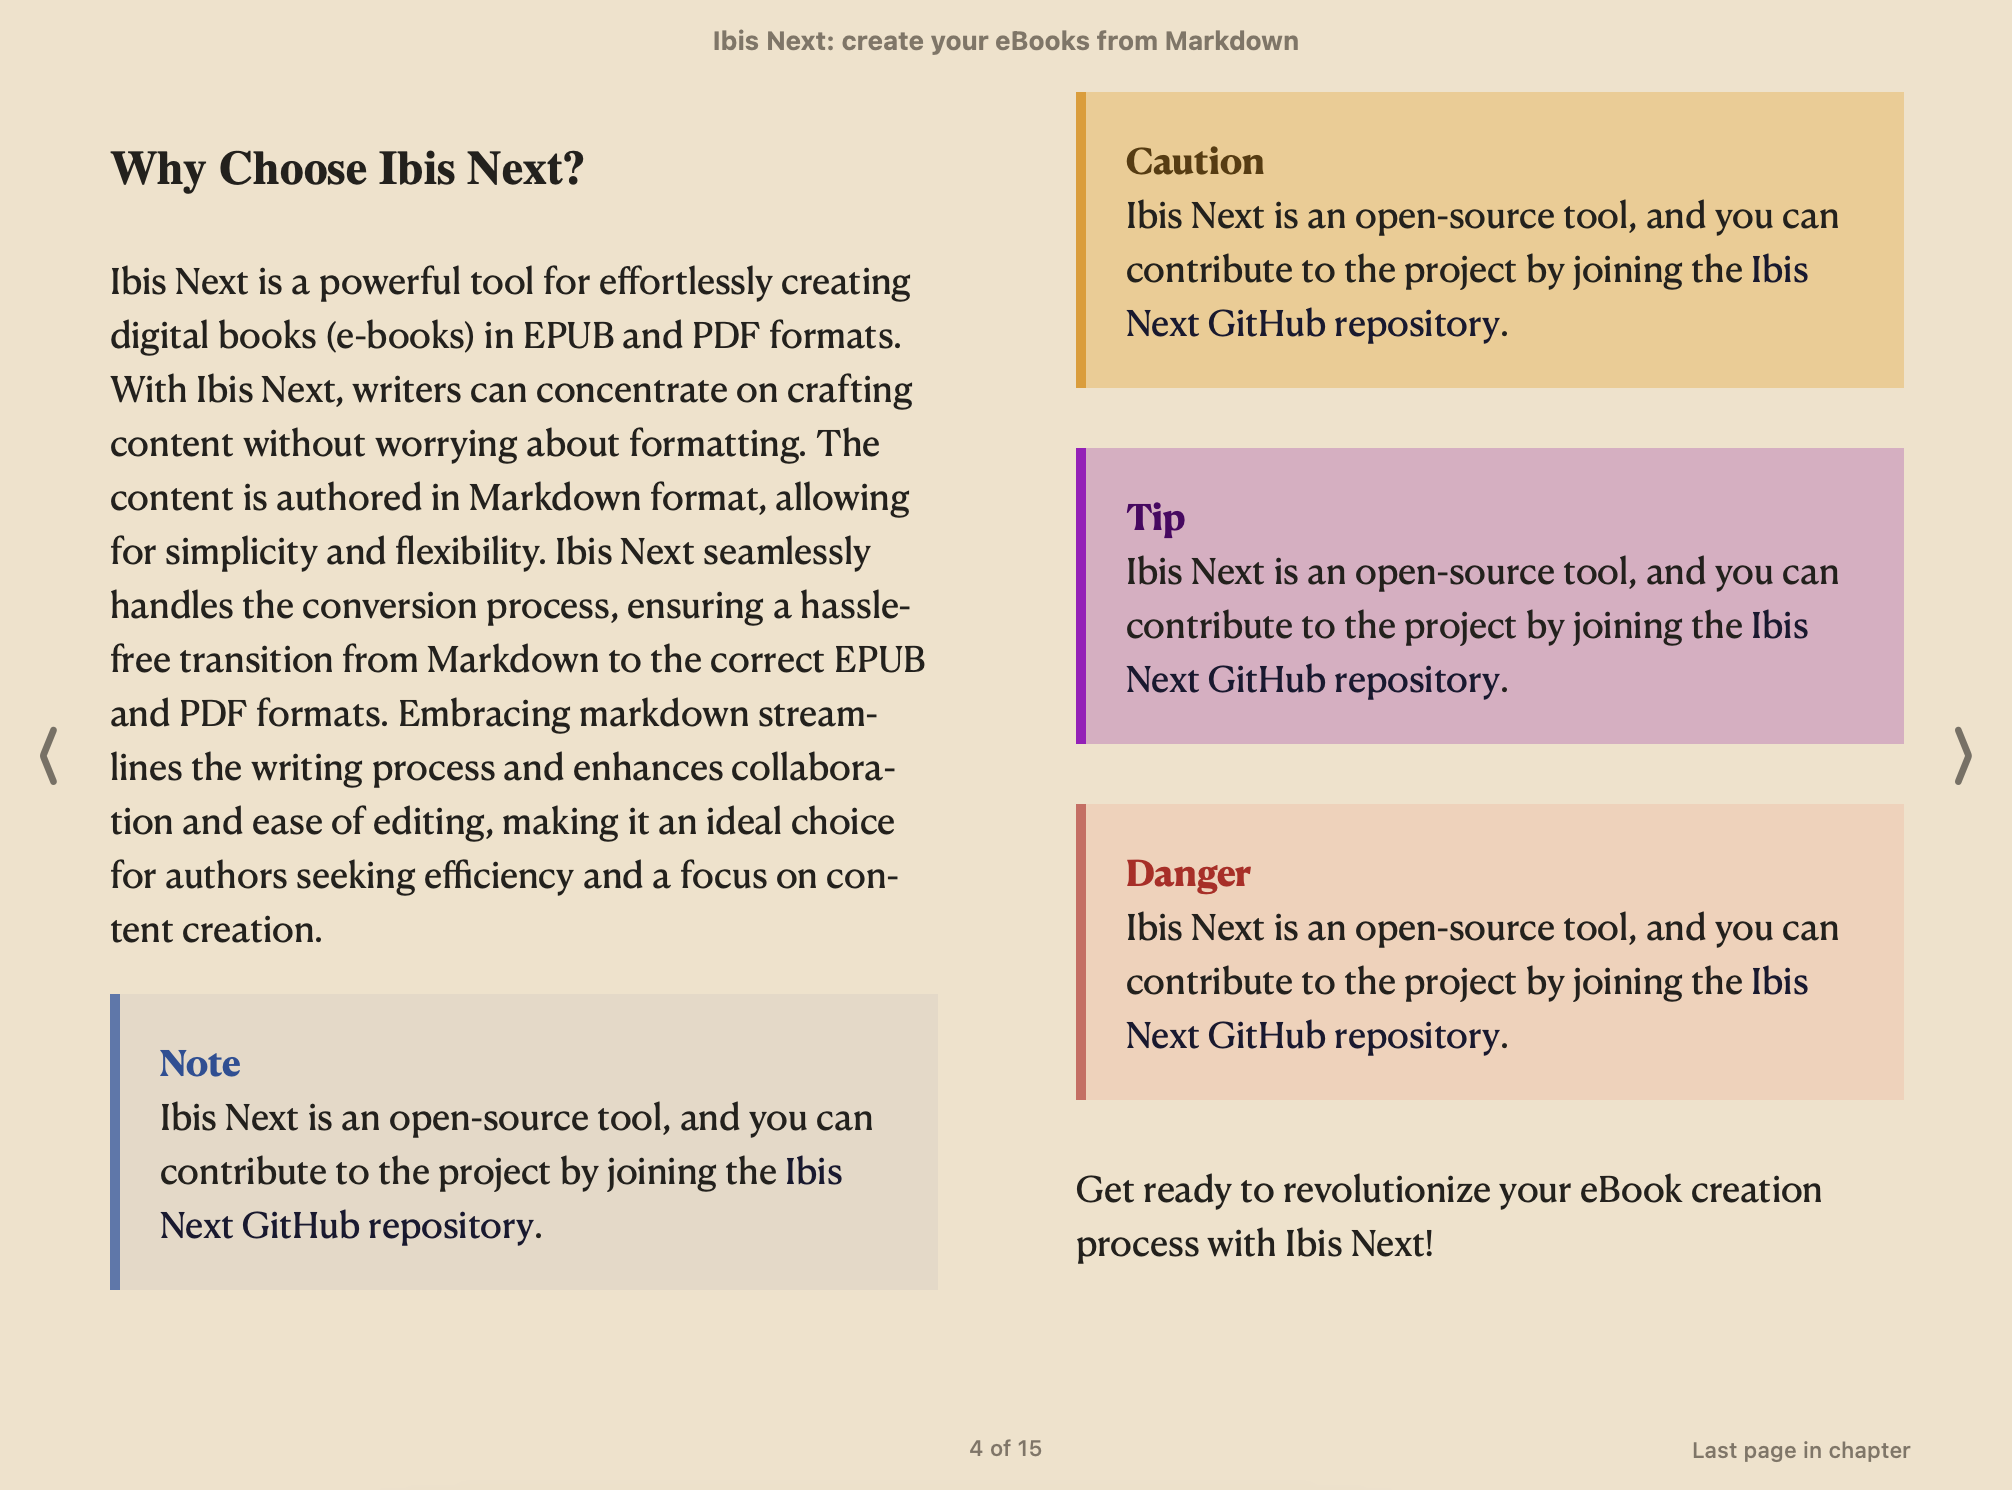
Ibis Next offers a tailored Markdown syntax designed for presenting asides. To demarcate aside blocks, use a set of triple colons ::: to enclose your content, specifying the type as note, tip, caution, or danger.
While you can nest various other Markdown content types within an aside, using asides for brief and succinct portions of the content is recommended.
:::note
**Ibis Next** is an open-source tool, and you can contribute to the project by joining the [Ibis Next GitHub repository](https://github.com/Hi-Folks/ibis-next).
:::

:::warning
**Ibis Next** is an open-source tool, and you can contribute to the project by joining the [Ibis Next GitHub repository](https://github.com/Hi-Folks/ibis-next).
:::

:::tip
**Ibis Next** is an open-source tool, and you can contribute to the project by joining the [Ibis Next GitHub repository](https://github.com/Hi-Folks/ibis-next).
:::

:::danger
**Ibis Next** is an open-source tool, and you can contribute to the project by joining the [Ibis Next GitHub repository](https://github.com/Hi-Folks/ibis-next).
:::
You can also customize the title of the aside block using the square brackets [your title] in this way:
:::tip[My two cents]
I want to give you some advice: use **Ibis Next** to create your e-books.
:::
In the example above, the aside type "tip" was used (:::tip), with a custom title "My two cents" ([My two cents]), and the content of the block can contain text formatted with classic Markdown markers.
Adding different quotes
For historical reasons, Ibis Next also supports another syntax for the quotes. I suggest using the Aside block instead of these (deprecated) quotes.
Three quotes can be added: quote, warning, and notice.
>{quote} This is a quote.

>{warning} This is a warning.

>{notice} This is a notice.
Using images
Images can be added into the markdown in two different way:
- using a remote image:

- using a relative path, in this case the path is realtive to the content directory, where you have your Markdown files (the default is
./content/):

It also works with absolute paths, but I don't recommend using this option as it's strongly tied to your specific machine.
Adding a cover image
To use a cover image, add a cover.jpg in the assets/ directory (or a cover.html file if you'd prefer an HTML-based cover page). If you don't want a cover image, delete these files.
If your cover is in a PNG format, you can store the file in the assets/ directory, and then in the ibis.php file, you can adjust the cover configuration where you can set the cover file name, for example:
    'cover' => [
        'position' => 'position: absolute; left:0; right: 0; top: -.2; bottom: 0;',
        'dimensions' => 'width: 210mm; height: 297mm; margin: 0;',
        'image' => 'cover.png',
    ],
You can use WebP, PNG, or JPG formats for the cover image.
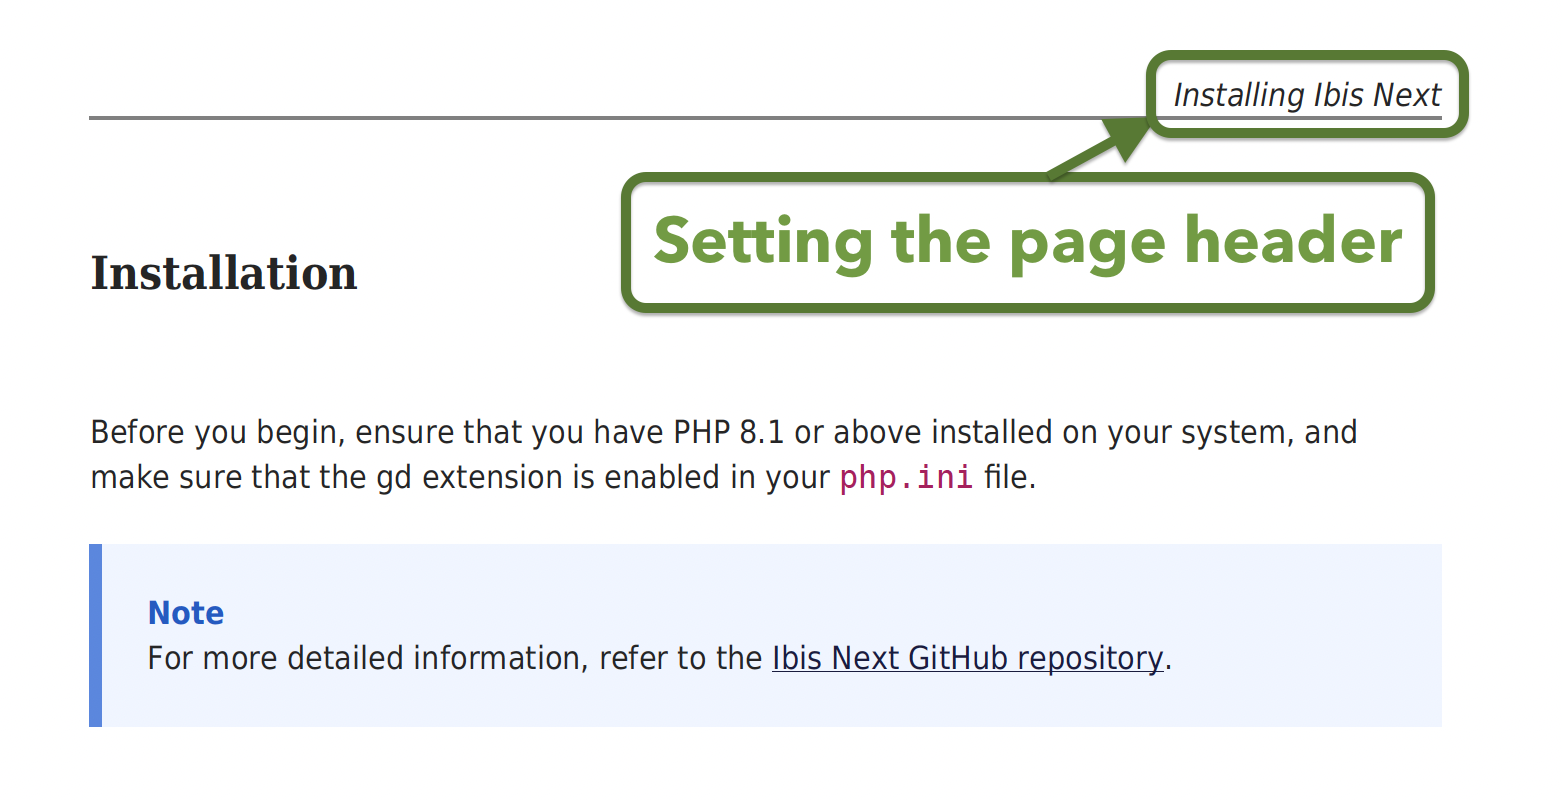
Setting the page headers
In Ibis Next, you can set a customized header for your pages. To do this, navigate to the ibis.php configuration file and locate the header parameter.
Within the ibis.php file, you can specify your desired header like this:
     /**
      * CSS inline style for the page header.
      * If you want to skip header, comment the line
      */
     'header' => 'font-style: italic; text-align: right; border-bottom: solid    1px #808080;',
This allows you to personalize the header content according to your preferences. Feel free to modify the value within the single quotes to suit your specific requirements. The value of the header parameter is the CSS inline style you want to apply to your page header.
You can eliminate the header parameter if you don't need or don't want the page header in your eBook.
If you want to customize the text of the page header for each section, in the markdown file, you can add in the frontmatter section the title parameter:
---
title: My Title
---

## My Section Title
This is an example.
Using Frontmatter
In Markdown, frontmatter refers to a block of metadata at the very beginning of a file, typically enclosed within triple dashes (---). It provides structured information about the document that tools or frameworks can use to customize how the content is processed or displayed.
For example, in Ibis Next, the title specified in the frontmatter has two primary uses:
- Rendering Page Headers:
If page headers are enabled in your Ibis Next configuration, the
titlefrom the frontmatter will be displayed as part of the page's header. This helps readers quickly understand the context or content of the page they are viewing. - Generating the EPUB Index:
When you export your content to an EPUB file, the
titlefrom the frontmatter is also used to create the index entries. This ensures that each section or page is properly labeled in the EPUB's table of contents, making it easier for readers to navigate the book.
Example
Here’s a sample frontmatter in a Markdown file:
---
title: "Introduction to Markdown"
---

# Introduction to Markdown

Markdown is a lightweight markup language...
In this example, the title will be used for the page headers (if enabled) and the EPUB index.
Using frontmatter effectively ensures that your documents are well-structured and displayed consistently across different output formats.
Using Fonts
Edit your /ibis.php configuration files to define the font files to be loaded from the /assets/fonts directory. Afterward, you may use the defined fonts in your themes (/assets/theme-light.html & /assets/theme-dark.html).
Setting the Attributes
Considering that the process of converting Markdown to PDF involves generating HTML, you can apply CSS styles to set specific class styles. To add a CSS class (or any attribute) to an element in Markdown, you can use attribute syntax.
For example, to add a CSS class to an image, consider that the conversion from Markdown results in an HTML p element containing an img element.
You can define a CSS style like this:
.image-container {
    text-align: center; /* Center the content inside the paragraph */
    padding: 20px; /* Optional: Add padding around the paragraph */
    background-color: #f5f5f5; /* Optional: Set a background color */
    border-radius: 10px; /* Optional: Add rounded corners */
}

.image-container img {
    max-width: 80vw; /* Set the image to 80% of the viewport width */
    height: auto; /* Maintain the aspect ratio */
    display: inline-block; /* Ensure the image behaves like an inline-block element */
}
Then, when you need to embed an image in Markdown using the image-container CSS class, you can use the following syntax:
{#id-cover-001 .image-container}

Generating eBook
Generating PDF eBook
To generate a PDF eBook using Ibis Next, run the following command:
ibis-next pdf
Ibis Next parses files alphabetically by default and stores the PDF file in the export directory.
If you prefer using the dark theme for the PDF, use the following command:
ibis-next pdf dark
Using content from a different directory
If your Markdown files (content) are stored in a directory other than the default ./content/, specify the content directory using the --content option:
ibis-next pdf --content=./your-content-directory
or, using the shorter form with the -c option:
ibis-next pdf -c ./your-content-directory
Generating EPUB eBook
To automatically generate an EPUB file from your Markdown content, use the epub command:
ibis-next epub
Ibis Next will parse files alphabetically and store the EPUB file in the export directory. You can easily upload or transfer the EPUB file to your mobile, tablet, or Kindle devices.
By default, the assets/style.css file is used to generate the EPUB file.
Using a different assets/config directory for generating an eBook
If you manage multiple books, you can specify the working directory, the location of your assets folder, and the ibis.php configuration file. Define the path of the working directory using the -d option:
ibis-next epub -c ../your-dir-with-markdown-files -d ../myibisbook
You can combine the usage of the -c option for defining the content directory and the -d option for defining the working directory.
You can organize your Markdown files in your content directory in subfolders.
Generating HTML eBook
To automatically generate an HTML file from your Markdown content, use the html command:
ibis-next html
Ibis Next will parse files alphabetically and store the HTML file in the export directory. You can easily read the HTML file with any Browsers.
By default, the assets/theme-html.html file is used to generate the HTML file.
Markdown Files List Configuration
The md_file_list configuration (in the ibis.php configuration file) allows you to specify which Markdown files should be included when generating PDF, EPUB, or HTML outputs. By default, if md_file_list is not set, all Markdown files in the content directory will be used.
Usage
If you want to limit the files to a specific subset, you can define the md_file_list array with the filenames (including extensions) as follows:
'md_file_list' => [
    'routing.md',
    'artisan.md',
    'console-tests.md',
],
In this example, only routing.md, artisan.md, and console-tests.md from the content directory will be processed for PDF, EPUB, or HTML generation.
Notes
- Default Behavior: If
md_file_listis not specified, all Markdown files in the content directory will be included. - File Paths: Ensure that the filenames listed in
md_file_listinclude the correct extensions and are located within the content directory.
This configuration provides flexibility in selecting specific files for your output needs, enabling you to tailor the content as required.
For example, you can use md_file_list if you need to build a sample of your book.
Generating A Sample
For generating a sample, I suggest to evaluate using the md_file_list configuration.
For historical reasons also the sample command is available but it works only for PDF files.
ibis-next sample

ibis-next sample dark
This command will use the generated files from the ibis-next build command to generate samples from your PDF eBook. You can configure which pages to include in the sample by updating the /ibis.php file.
Feedback
If you are using or if you are evaluating using Ibis Next for creating your next eBook, let me know. I can support you by demoing the tool, helping with the configuration or evaluating feature requests.
Config migration
The config:migrate command helps you upgrade old array-based configuration files (Ibis Next v2) to the new Config class (v3) format introduced in Ibis Next v3.
This is particularly useful when migrating existing projects to Ibis Next v3, ensuring your configuration structure is fully compatible with the latest system.
Description
Migrates legacy array-based configs to the new Config class format.
Usage
./ibis-next config:migrate [options]
Options
| Option | Description | Default |
|---|---|---|
-d, --book-dir[=BOOK-DIR] |
The base path where the config file is located. | "" (current directory) |
Example
# Migrate config files in the current directory
./ibis-next config:migrate

# Migrate config files in a specific book directory
./ibis-next config:migrate --book-dir=/path/to/book
What It Does
- Detects old array-style configuration structures.
- Converts them into the new configuration schema (v3).
- Saves the updated configuration in the same location.
- Ensures backward compatibility with existing Ibis Next tools.
Notes
- Always back up your existing configuration files before running the migration.
- After migration, review the generated config to verify that all settings were properly converted.
Development
If you want to contribute to developing this open-source project, you can read the CONTRIBUTING file.
Credits
- Mohamed Said the author of the original Ibis project
- Roberto Butti the author of the updates and the fork for Ibis Next project
- All Contributors
License
The MIT License (MIT). Please see License File for more information.