codezero / laravel-stagefront
Quickly add some password protection to a staging site.
Fund package maintenance!
Ko Fi
paypal.me/ivanvermeyen
Installs: 75 044
Dependents: 0
Suggesters: 0
Security: 0
Stars: 20
Watchers: 3
Forks: 5
Open Issues: 5
pkg:composer/codezero/laravel-stagefront
Requires
- php: ^7.1|^8.0
- codezero/dotenv-updater: ^1.1|^2.0
- illuminate/support: ^5.7|^6.0|^7.0|^8.0|^9.0|^10.0|^11.0
Requires (Dev)
- orchestra/testbench: ^3.7|^4.0|^5.0|^6.0|^7.0|^8.0|^9.0
- phpunit/phpunit: ^7.0|^8.0|^9.0|^10.0
README
Quickly add password protection to a staging site.
Shielding a staging or demo website from the public usually involves setting op authentication separate from the actual project. This isn't always easy or is cumbersome at the least.
It doesn't have to be!
By installing StageFront with composer, adding the middleware and setting 3 variables in your .env file you are ready to go. As you will discover below, you also have a bunch more options available.
✅ Requirements
- PHP ^7.1 | ^8.0
- Laravel >= 5.7
📦 Installation
☑️ Require the package via Composer:
composer require codezero/laravel-stagefront
Laravel will automatically register the ServiceProvider and routes.
When StageFront is disabled, its routes will not be registered.
☑️ Install Middleware
To activate the middleware, add it to the web middleware group in app/Http/Kernel.php, right after the StartSession middleware:
protected $middlewareGroups = [
    'web' => [
        \Illuminate\Session\Middleware\StartSession::class, // <= after this
        \CodeZero\StageFront\Middleware\RedirectIfStageFrontIsEnabled::class,
        //...
    ],
];
In Laravel 6+ you need to add the middleware to the $middlewarePriority array in app/Http/Kernel.php, right after the StartSession middleware.
protected $middlewarePriority = [
    \Illuminate\Session\Middleware\StartSession::class, // <= after this
    \CodeZero\StageFront\Middleware\RedirectIfStageFrontIsEnabled::class,
    //...
];
Now you just need to set some .env variables and you are up and running!
⌨️ Quick Setup
Set some options in your .env file or publish the configuration file.
See an example .env file.
Enable StageFront and choose a login and password:
| Option | Type | Default |
|---|---|---|
STAGEFRONT_ENABLED |
bool |
false |
STAGEFRONT_LOGIN |
string |
stagefront |
STAGEFRONT_PASSWORD |
string |
stagefront |
STAGEFRONT_ENCRYPTED |
bool |
false |
By default StageFront is disabled and uses a plain text password when it's enabled. If you set STAGEFRONT_ENCRYPTED to true the password should be a hashed value. You can generate this using Laravel's \Hash::make('your password') function.
Artisan Commands for Quick Setup
You can also update the credentials in the .env file with our artisan command:
php artisan stagefront:credentials <username> <password> --encrypt
If you don't enter a username or password, the command will ask for your input step by step:
php artisan stagefront:credentials
Next, you can enable or disable StageFront:
php artisan stagefront:enable
php artisan stagefront:disable
👥 Database Logins
If you have existing users in the database and want to use those credentials, you can set STAGEFRONT_DATABASE to true.
The above login and password settings will then be ignored.
| Option | Type | Default |
|---|---|---|
STAGEFRONT_DATABASE |
bool |
false |
STAGEFRONT_DATABASE_WHITELIST |
string |
null |
STAGEFRONT_DATABASE_TABLE |
string |
users |
STAGEFRONT_DATABASE_LOGIN_FIELD |
string |
email |
STAGEFRONT_DATABASE_PASSWORD_FIELD |
string |
password |
If you want to grant access to just a few of those users, you can whitelist them by setting STAGEFRONT_DATABASE_WHITELIST to a comma separated string: 'john@doe.io,jane@doe.io'.
In the config file itself you can also use an array of e-mail addresses.
By default the users table is used with the email and password field names. But you can change this if you are using some other table or fields.
🔖 IP Whitelist
You can add a comma separated list of IP's to grant these users easier or exclusive access to your staging site.
For example: '1.2.3.4,1.2.3.4'. In the config file itself you can also use an array of IP's.
| Option | Type | Default |
|---|---|---|
STAGEFRONT_IP_WHITELIST |
string |
null |
STAGEFRONT_IP_WHITELIST_ONLY |
bool |
false |
STAGEFRONT_IP_WHITELIST_REQUIRE_LOGIN |
bool |
false |
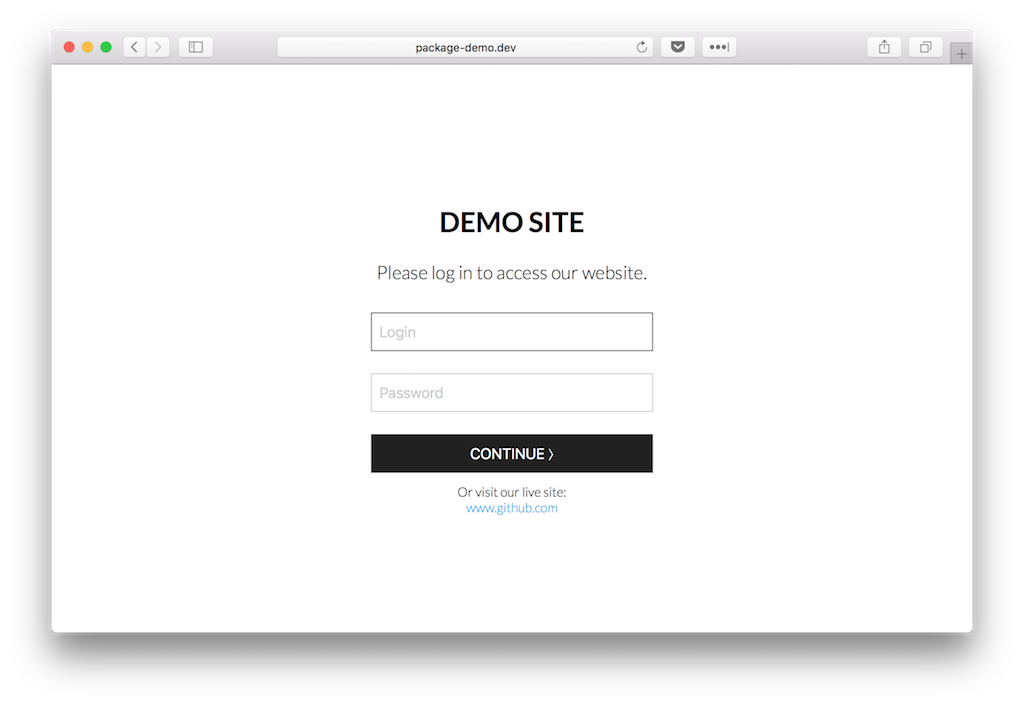
When you add IP's to your whitelist, the default behavior is that these users will have instant access to the site, while someone with another IP will be presented with the normal login form.
To exclusively allow whitelisted IP's to access your site, set STAGEFRONT_IP_WHITELIST_ONLY to true.
Users from other IP's will now get a 403 - Forbidden error.
To crank up security, you may also require whitelisted IP's to go through the login form.
Set STAGEFRONT_IP_WHITELIST_REQUIRE_LOGIN to true to set this up.
⚙️ Other Options
☑️ Change Route URL
By default a GET and POST route will be registered with the /stagefront URL.
You can change the URL by setting this option:
| Option | Type | Default |
|---|---|---|
STAGEFRONT_URL |
string |
stagefront |
It runs under the web middleware since it uses the session to keep you logged in.
You can change the middleware if needed in the configuration file.
☑️ Throttle Login Attempts
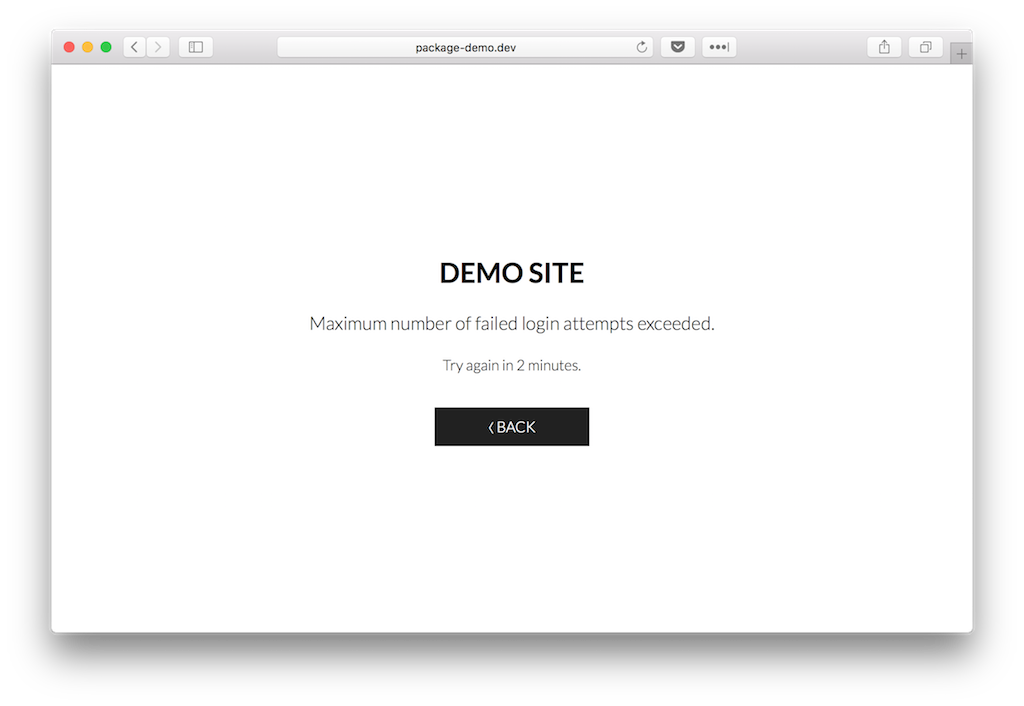
To prevent malicious users from brute forcing passwords, login attempts will be throttled unless you disable it. You can change the number of failed attempts per minute to allow, and the delay (in minutes) that users have to wait after reaching the maximum failed attempts.
| Option | Type | Default |
|---|---|---|
STAGEFRONT_THROTTLE |
bool |
true |
STAGEFRONT_THROTTLE_TRIES |
integer |
3 (per minute) |
STAGEFRONT_THROTTLE_DELAY |
integer |
5 (minutes) |
When you tried to login too many times, Laravel's 429 error page will be shown. You can easily modify this by creating a 429.blade.php view in resources/views/errors. To save you a little time, I have included a localized template you can include in that page:
@include('stagefront::429')
If you want to include a different partial for other throttled pages, you can check the request:
@if (request()->is(config('stagefront.url')))
    @include('stagefront::429')
@else
    @include('your.partial.view')
@endif
Text in this view can be changed via the translation files.
☑️ Ignore URLs
If for any reason you wish to disable StageFront on specific routes, you can add these to the ignore_urls array in the configuration file. You can use wildcards if needed. You can't set this in the .env file.
For example:
'ignore_urls' => [
    // ignores /john, but noting under /john
    '/john',
    // ignores everyting under /jane, but not /jane itself
    '/jane/*',
],
☑️ Ignore Domains
If for any reason you wish to disable StageFront on specific doamins, you can add these to the ignore_udomains array in the configuration file. You can't set this in the .env file.
For example:
'ignore_domains' => [
    'admin.domain.com',
],
☑️ Link Live Site
If you set the URL to your live site, a link will be shown underneath the login form.
| Option | Type | Default |
|---|---|---|
STAGEFRONT_LIVE_SITE |
string |
null |
Make sure you enter the full URL, including https://.
☑️ Change App Name
By default, the app name that is configured in config/app.php is shown as a title on the login and throttle page. You can use a different title by setting this option:
| Option | Type | Default |
|---|---|---|
STAGEFRONT_APP_NAME |
string |
config('app.name') |
📇 Publish Configuration File
You can also publish the configuration file.
php artisan vendor:publish --provider="CodeZero\StageFront\StageFrontServiceProvider" --tag="config"
Each option is documented.
📑 Translations and Views
You can publish the translations to quickly adjust the text on the login screen and the errors.
php artisan vendor:publish --provider="CodeZero\StageFront\StageFrontServiceProvider" --tag="lang"
If you want to customize the login page entirely, you can also publish the view.
php artisan vendor:publish --provider="CodeZero\StageFront\StageFrontServiceProvider" --tag="views"
Extra translations are always welcome. :)
📏 Laravel Debugbar
Laravel Debugbar will be disabled on the StageFront routes automatically if you use it in your project. This will hide any potential sensitive data from the public, if by accident Debugbar is running on your staging site. You can disable this feature by editing the middleware option in the configuration file.
🚧 Testing
composer test
☕️ Credits
🔓 Security
If you discover any security related issues, please e-mail me instead of using the issue tracker.
📑 Changelog
A complete list of all notable changes to this package can be found on the releases page.
📜 License
The MIT License (MIT). Please see License File for more information.


