yidas / deployer-php-cli
Code deployment tool based on RSYNC running by PHP-CLI script
Maintainers
Requires
- php: >=5.4.0
README
CI/CD Deployment tool written in PHP supported for popular frameworks
FEATURES
-
Deploy to multiple servers by projects/groups
-
Yii2, Laravel, Codeigniter3 Frameworks support
-
Pipeline support for Git, Composer, test and customized tasks
-
CI/CD automation solution
Helping developers to deploy codes from local instance to remote instances.
OUTLINE
DEMONSTRATION
Command Line
Deploy local project to remote servers by just executing the deployer in command after installation:
$ deployer
Alternatively, you could call the original bootstrap:
$ ./deployer,$ php ./deployer
The interactive result could like be:
$ deployer

Your available projects in configuration:
  [0] your.project.com
  [1] second.project.com
  [2] other.site.com

  Please select a project [number or project, Ctrl+C to quit]:0

Selected Project: your.project.com
Successful Excuted Task: Git
Successful Excuted Task: Composer
Successful Excuted Task: Composer
Successful Excuted Task: Test UnitTest
Successful Excuted Task: Commands before: Minify assets
Successful Excuted Task: Deploy to 127.0.0.11
Successful Excuted Task: Deploy to 127.0.0.12
Successful Excuted Task: Deploy
Successful Excuted Task: Commands after: Email notification
Or you could run by non-interactive mode with the same purpose:
$ deployer --project="your.project.com"
REQUIREMENTS
This library requires the following:
- PHP(CLI) 5.4.0+
- RSYNC
INSTALLATION
Composer Installation
Using Composer by sudoer or root to install is the easiest way with auto-installer:
composer create-project --prefer-dist yidas/deployer-php-cli
Wget Installation
You could see Release for picking up the package with version, for example:
$ wget https://github.com/yidas/deployer-php-cli/archive/master.tar.gz -O deployer-php-cli.tar.gz
After download, uncompress the package:
$ tar -zxvf deployer-php-cli.tar.gz
In addition, you can rename the unzipped folder by
mkdir deployer-php-cli && tar -zxvf deployer-php-cli.tar.gz --strip-components 1 -C deployer-php-cli
Make Command
To make a command for deployer, if the package folder is deployer-php-cli then create a symbol by following command:
$ sudo chmod +x $(pwd -L)/deployer-php-cli/deployer
$ sudo ln -s $(pwd -L)/deployer-php-cli/deployer /usr/bin/deployer
Startup
After installation, you could start to set up the config.inc.php for deployer, and enjoy to use:
$ deployer
Upgrade
To upgrade, you could re-install the deployer and copy the old config.inc.php to the new one, for example:
$ cp ./deployer-php-cli/config.inc.php ./
$ rm -r deployer-php-cli
$ composer create-project --prefer-dist yidas/deployer-php-cli
$ mv ./config.inc.php ./deployer-php-cli
CONFIGURATION
Project Setting:
You need to set up the projects configuration such as servers, source and destination in config.inc.php file:
<?php

return [
    // This project config processes deployment only for simple usage
    'default' => [
        'servers' => [
            '127.0.0.1',
        ],
        'source' => '/home/user/project',
        'destination' => '/var/www/html/prod/',
    ],
];
You could refer config.inc.php file as an example..
Config Options:
Configuration provides many features' setting, you could customize and pick up the setting you need.
| Key | Type | Description |
|---|---|---|
| servers | array | Distant server host list |
| user | array|string | Local/Remote server user, auto detect current user if empty |
| source | string | Local directory for deploy, use / as end means * |
| destination | string | Remote path for synchronism |
| exclude | array | Excluded files based on sourceFile path |
| verbose | bool | Enable verbose with more infomation or not |
Git
To use Git into deploy task, you need to init or clone Git to the source directory at the first time:
$ git clone git@gitlab.com:username/project-to-deploy.git sourceDir
| Key | Type | Description |
|---|---|---|
| enabled | bool | Enable git or not |
| checkout | bool | Execute git checkout -- . before git pull |
| branch | string | Branch name for git pull, pull default branch if empty |
| submodule | bool | Git submodule enabled |
Composer
To use Composer into deploy task, make sure that there are composer files in the source directory.
| Key | Type | Description |
|---|---|---|
| enabled | bool | Enable Composer or not |
| path | string | Composer executing relative path which supports multiple array paths |
| command | string | Update command likes composer update |
Test
To use Test into deploy task, make sure that there are test configuration in the source directory.
| Key | Type | Description |
|---|---|---|
| enabled | bool | Enable Test or not |
| name | string | The test name for display |
| type | string | Test type, support phpunit. |
| command | string | The test bootstrap command supported relative filepath such as ./vendor/bin/phpunit |
| configuration | string | The test configuration file supported relative filepath such as ./phpunit.xml |
Tests
For multiple test tasks, using array to declare each test options:
return [
    'default' => [
        'tests' => [
            [
                'name' => 'Test Task 1',
                // ...
            ],
            [
                'name' => 'Test Task 2',
                // ...
            ],
        ],
        // ...
Rsync
| Key | Type | Description |
|---|---|---|
| enabled | bool | Enable rsync or not |
| params | string | Addition params of rsync command |
| timeout | int | Timeout seconds of each rsync connections |
| sleepSeconds | int | Seconds waiting of each rsync connections |
| identityFile | string | Identity file path for appling rsync |
Commands
Commands provides you to customize deploy tasks with many trigger hooks.
| Key | Type | Description |
|---|---|---|
| init | array | Addition commands triggered at initialization |
| before | array | Addition commands triggered before deploying |
| after | array | Addition commands triggered after deploying |
Example
- Copy
projectdirectory form/var/www/html/to destination under/var/www/html/test/:
'source' => '/var/www/html/project',
'destination' => '/var/www/html/test/',
- Copy all files (
*) form/var/www/html/project/to destination under/var/www/html/test/:
'source' => '/var/www/html/project/',
'destination' => '/var/www/html/test/',
USAGE
Usage:
  deployer [options] [arguments]
  ./deployer [options] [arguments]

Options:
  -h, --help            Display this help message
      --version         Show the current version of the application
  -p, --project         Project key by configuration for deployment
      --config          Show the seleted project configuration
      --configuration
      --skip-git        Force to skip Git process
      --skip-composer   Force to skip Composer process
      --git-reset       Git reset to given commit with --hard option
  -v, --verbose         Increase the verbosity of messages
Interactive Project Select
$ deployer

Your available projects in configuration:
  [0] default
  [1] your.project.com

  Please select a project [number or project, Ctrl+C to quit]:your.project.com

Selected Project: your.project.com
Successful Excuted Task: Git
Successful Excuted Task: Composer
Successful Excuted Task: Deploy to 127.0.0.11
Successful Excuted Task: Deploy
Non-Interactive Project Select
$ deployer --project="your.project.com"
Skip Flows
You could force to skip flows such as Git and Composer even when you enable then in config.
$ deployer --project="default" --skip-git --skip-composer
Revert & Reset back
You could reset git to specified commit by using --git-reset option when you get trouble after newest release.
$ deployer --project="default" --git-reset="79616d"
This option is same as executing
git reset --hard 79616din source project.
IMPLEMENTATION
Assuming project1 is the developing project which you want to deploy.
Developers must has their own site to develop, for example:
# Dev host
/var/www/html/dev/nick/project1
/var/www/html/dev/eric/project1
In general, you would has stage project1 which the files are same as production:
# Dev/Stage host
/var/www/html/project1
The purpose is that production files need to be synchronous from stage:
# Production host
/var/www/html/project1
This tool regard stage project as source, which means production refers to destination, so the config file could like:
return [
    'project1' => [
        ...
        'source' => '/var/www/html/project1',
        'destination' => '/var/www/html/',
        ...
After running this tool to deploy project1, the stage project's files would execute processes likes git pull then synchronise to production.
Permissions Handling
1. Local and Remote Users
You could create a user on local for runing Deployer with umask 002. It will run process by the local user you set even you run Deployer by root:
return [
    'project1' => [
         'user' => [
            'local' => 'deployer',
            'remote' => 'deployer',
        ],
        ...
2. Application File Permissions
Deployer uses rsync to deploy local source project to remote without --no-perms, which means that the source files' permission would keep on remote, but the files' owner would re-generate by remote user including root with --no-owner --no-group.
On the remote user, you could set the user's default groud ID to www-data in /etc/passwd, which the local user generates 664/775 mod files to deploy for remote www-data access.
For local user,
umask 002could be set in~/.bashrcor global. Note that the permission need to apply for source files such as init from Git clone.
CI/CD
Webhook
Deployer provides webhook feature for triggering project deployment by any webhook service such as Gitlab.
To use webhook, you need add webhook setting into the projects you needed in config.inc.php:
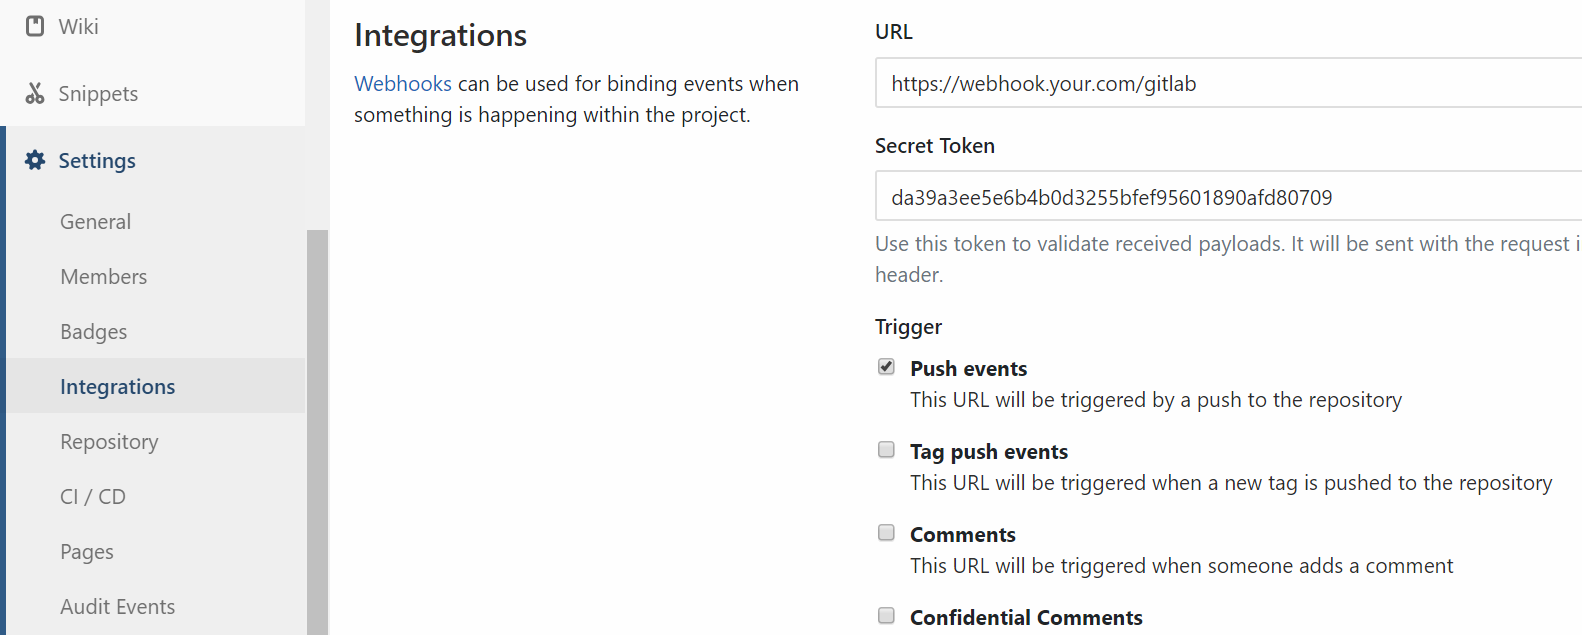
return [
    'project' => [
        // ...
        'webhook' => [
            'enabled' => true,
            'provider' => 'gitlab',
            'project' => 'yidas/deployer-php-cli',
            'token' => 'da39a3ee5e6b4b0d3255bfef95601890afd80709',
            'branch' => 'release',
            'log' => '/tmp/deployer-webhook-project.log'
        ],
    ],
];
| Key | Type | Description |
|---|---|---|
| enabled | bool | Enable Webhook or not |
| provider | string | Webhook provider such as gitlab |
| project | string | Provider's project name likes username/project |
| token | string | Webhook secret token |
| branch | string | Listening branch for push event |
| log | bool|string | Enabled log and specify the log file |
PHP Web Setting
Deployer need a user to excute deployment, and the user is usually not the PHP web user.
For PHP-FPM, you could add a new PHP pool socket with the current user setting for the webhook site, for example /etc/php/fpm/pool.d/deployer.conf:
[deployer]

user = deployer
group = www-data

listen = /run/php/php7.0-fpm_deployer.sock
Then give the new socket to the webhook server setting, for Nginx eaxmple /etc/nginx/site-enabled/webhook:
server_name webhook.your.com;
root /srv/deployer/deployer-php-cli/webhook;

location ~ \.php$ {
    include snippets/fastcgi-php.conf;
    fastcgi_param SCRIPT_FILENAME $request_filename;
    fastcgi_pass unix:/run/php/php7.0-fpm_deployer.sock;
}
After a successful webhook, Deployer would prepare to process while responding the status and the result url for checking the deployment result.
Note: The
PATHenvironment variable between Shell and PHP should be set to the same to prevent any unexpected problems.
Gitlab
- Prividor key:
gitlab
According to above Nginx website setting, the webhook URL could be https://webhook.your.com/gitlab. After setting config.inc.php and setting up scecret token, you could give a push event to go!
Note: Default setting is listen
releasebranch's push event to trigger.
To browse the web page for result log report, enter the same webhook URL with log and token parameters to access.
For example: https://webhook.your.com/gitlab?log={project-name}&token={project-token}
ADDITIONS
Rsync without Password:
You can put your local user's SSH public key to destination server user for authorization.
.ssh/id_rsa.pub >> .ssh/authorized_keys
Save Binary Encode File:
While excuting script, if you get the error like Exception: Zend Extension ./deployer does not exist, you may save the script file with binary encode, which could done by using vim:
:set ff=unix
Yii2 Deployment
For yii2-app-advanced, you need to enable Composer and set yii2 init command in config.inc.php:
'composer' => [
    'enabled' => true,
],
'commands' => [
    'before' => [
        'yii2 init prod' => './init --env=Production --overwrite=All',
    ],
],
Minify/Uglify by Gulp
1. Install NPM, for Debian/Ubuntu:
apt-get install npm
2. Install Gulp by NPM
npm install -g gulp
3. Create Gulp Project
cd /srv/tools/minify-project
npm init
npm install gulp --save-dev
touch gulpfile.js
4. Set Gulp with packages
Package: gulp-uglify
$ npm install gulp-uglify --save-dev
$ npm install pump --save-dev
gulpfile.js:
var gulp = require('gulp');
var uglify = require('gulp-uglify');
var pump = require('pump');
var assetPath = '/srv/your.project.com/assets/js';

gulp.task('compress', function (callback) {
  pump([
        gulp.src(assetPath+'/**/*.js'),
        uglify(),
        gulp.dest(assetPath)
    ],
    callback
  );
});
5. Set Gulp Process into Deployer
'source' => '/srv/project',
'commands' => [
    'before' => [
        'Minify inner JS' => [
            'command' => 'cd /srv/tools/minify-project; gulp compress',
        ],
    ],
],