tentwentyfour / blockdiag-mediawiki-extension
Blockdiag wrapper for Mediawiki
Installs: 37
Dependents: 0
Suggesters: 0
Security: 0
Stars: 0
Watchers: 8
Forks: 2
Open Issues: 1
Type:mediawiki-extension
pkg:composer/tentwentyfour/blockdiag-mediawiki-extension
Requires
- php: >=5.4
- composer/installers: ~1.0
Requires (Dev)
- phpspec/phpspec: ~2.0
- squizlabs/php_codesniffer: ~1.5
This package is not auto-updated.
Last update: 2026-02-15 01:13:04 UTC
README
Since version 1.1.0, this extension provides two services:
- a ParserHook to be used when manually specifying blockdiag DSL
- a ResultPrinter for SemanticMediaWiki. (Currently this only supports the
nwdiagformat.)
Requirements
- blockdiag (and/or seqdiag, actdiag, nwdiag)
- mediawiki >= 1.25.0
Installation
- Simply run the following command inside your mediawiki doc-root:
$ composer require tentwentyfour/blockdiag-mediawiki-extension
- Then add this line to the end of your LocalSettings.php :
wfLoadExtension('BlockdiagMediawiki');
- (Optional) If you installed your blockdiag package somewhere else than the default, you may tell the plugin where to find the binaries:
$wgBlockdiagPath = '/usr/bin/'; // default is /usr/local/bin/
Using the ParserHook
<blockdiag>
{
    A -> B -> C
         B -> D -> E
}
</blockdiag>
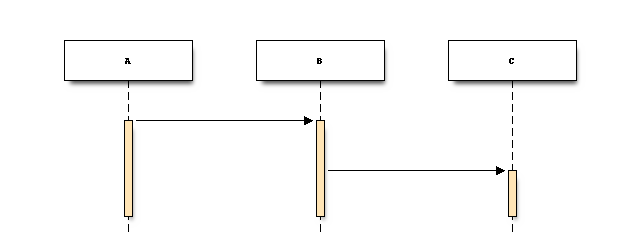
If you want to use other *diag tools, simply specify their name before the leading opening brace: "{", e.g. seqdiag { or nwdiag {.
<blockdiag>
seqdiag {
    A -> B;
         B -> C;
}
</blockdiag>
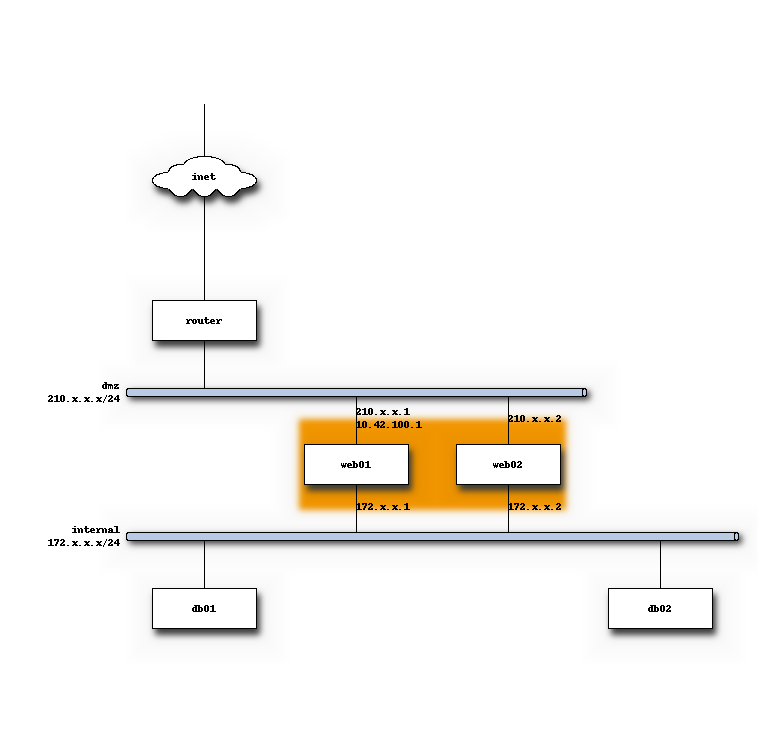
<blockdiag>
nwdiag {
inet [shape = cloud];
inet -- router;
network dmz {
      router;
      address = "210.x.x.x/24"
      group web {
          web01 [address = "210.x.x.1, 10.42.100.1"];
          web02 [address = "210.x.x.2"];
      }
  }
  network internal {
      address = "172.x.x.x/24";

      web01 [address = "172.x.x.1"];
      web02 [address = "172.x.x.2"];
      db01;
      db02;
  }
}
</blockdiag>
Please note that the Blockdiag extension will cache your images so that they don't have to be re-rendered on each page-load. If you need your diagram to be re-rendered, you need to referesh or edit the page or disable caching for the page.
Using the Semantic Result Printer
If you have Semantic Mediawiki installed, you can use this extension as a result printer as well, generating diagrams directly from your semantic queries.
Requirements
Templates
The following templates are given as an example only and present the bare minimum of properties required for the result printer to give you sensible results.
Note that you can adjust the style and properties as you wish, as long as you make sure your {{#ask:}} query returns IP addresses and fully qualified domain names (fqdn) for the selected nodes.
We have omitted forms and property details. Semantic Forms will simplify the creation of your Server and Tunnel entries.
Server Template
<onlyinclude>
{| class="wikitable" style="width: 30em; font-size: 90%; border: 1px solid #aaaaaa; background-color: #f9f9f9; color: black; margin-bottom: 0.5em; margin-left: 1em; padding: 0.2em; float: right; clear: right; text-align:left;"
! style="text-align: left; background-color:#ccccff;" colspan="2" |<big>{{PAGENAME}}</big>
|-
! Fully Qualified Domain Name:
| [[Has fqdn::{{{fqdn|}}}]]
|-
! Tunneled IPs:
| {{{tipv4|}}} {{{tipv6|}}}
|-
! Uses VPN tunnel:
| {{#arraymap:{{{tunnel|}}}|,|x|[[Uses VPN tunnel::x]]}}
|}
<includeonly>
{{#set:
Has tunnel IPv4={{{tipv4|}}}
}}
[[Category:Server]]</includeonly></onlyinclude>
Tunnel Template
<includeonly>{| class="wikitable"
! colspan="2" | {{PAGENAME}}
|-
! Purpose
|  [[Has purpose::{{{purpose|}}}]]
|-
! Subnet
|  [[Has subnet::{{{subnet|}}}]]
|-
! Server
|  [[Has server::{{{server|}}}]]
|-
! Port
|  [[Has VPN port::{{{port|}}}]]
|-
! Hosts connected through this tunnel
| {{#ask:[[Uses VPN tunnel::{{SUBJECTPAGENAME}}]]|format=list|?Has tunnel IPv4=}}
|}
[[Category:Tunnel]]
</includeonly>
Example query
E.g. on a page that is named after one of your OpenVPN configurations, you could use a query like the following one:
{{#ask:
 [[Uses VPN tunnel::{{PAGENAME}}]]
 |format=nwdiag
 |domain=servers.mydomain.tld
 |gateway=gateway.hypervisor
 |sort=Has tunnel IPv4
 |?Has tunnel IPv4=ipv4
 |?Has fqdn=fqdn
}}
The gateway parameter is optional.


