ronasit / laravel-swagger
Provided middleware for generating of swagger-documentation file by run testing of restful API.
Requires
- php: ^8.3
- ext-json: *
- laravel/framework: >=11.34
- phpunit/phpunit: >=11.4
Requires (Dev)
- laravel/pint: ^1.27
- orchestra/testbench: >=9.3
- php-coveralls/php-coveralls: ^2.7
- php-mock/php-mock-phpunit: >=2.10
- ronasit/laravel-helpers: ^3.5
This package is auto-updated.
Last update: 2026-07-10 15:12:01 UTC
README

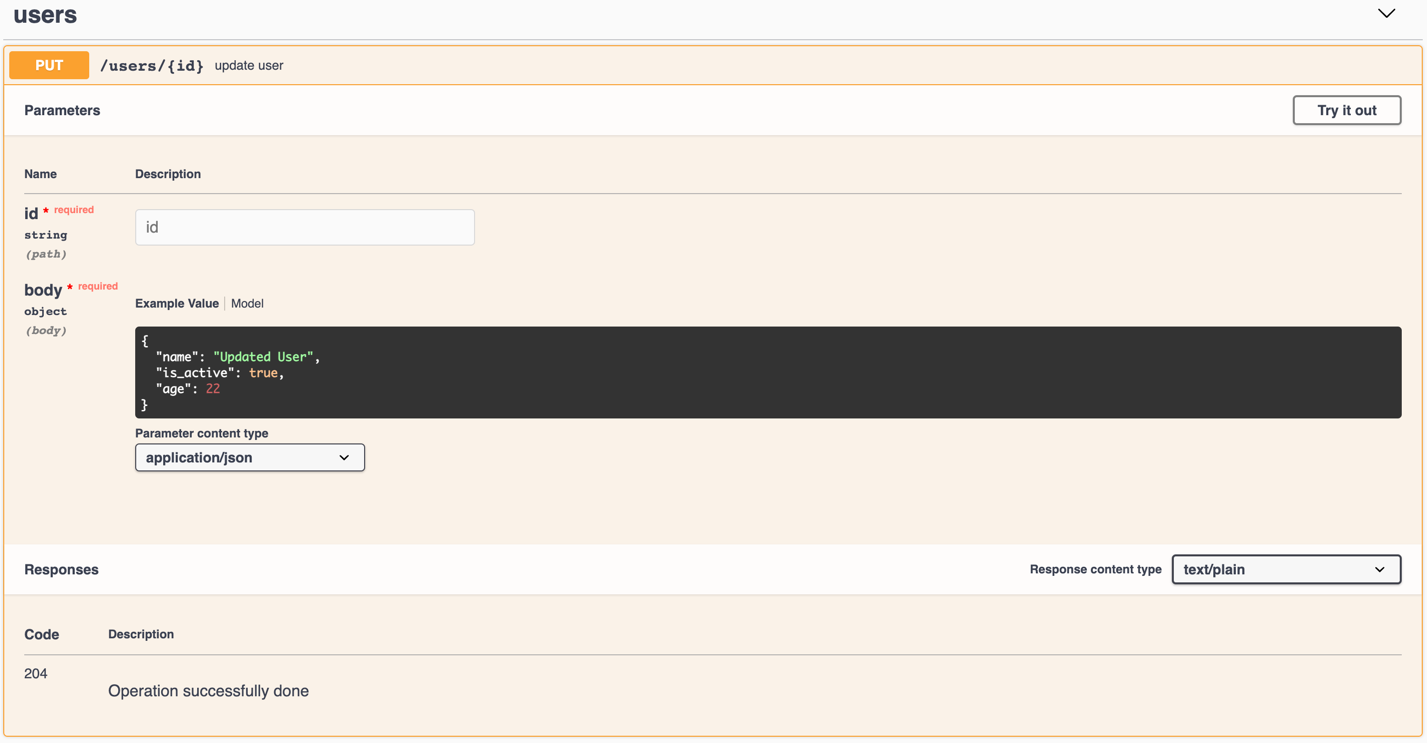
Laravel Swagger plugin
![]()
Comparison to another documentation generators
| LaravelSwagger | Scramble | |
|---|---|---|
| Force developers to write tests | ✅ | ❌ |
| Guarantee that API works | ✅ | ❌ |
| Works with any route types covered by tests | ✅ | ❌ |
| Generate response schema using JSON Resource class | ❌ | ✅ |
| Runtime documentation generation | ❌ | ✅ |
Introduction
This plugin is designed to generate documentation for your REST API during the passing PHPUnit tests.
Installation
- Install the package using the following command:
composer require ronasit/laravel-swagger
Note
For Laravel 5.5 or later the package will be auto-discovered. For older versions add the
AutoDocServiceProviderto the providers array inconfig/app.phpas follow:'providers' => [ ... RonasIT\AutoDoc\AutoDocServiceProvider::class, ],
- Run
php artisan vendor:publish --provider=RonasIT\\AutoDoc\\AutoDocServiceProvider
- Add
\RonasIT\AutoDoc\Http\Middleware\AutoDocMiddleware::classmiddleware to the global HTTP middleware listbootstrap\app.php:
    return Application::configure(basePath: dirname(__DIR__))
        ->withMiddleware(function (Middleware $middleware) {
            $middleware->use([
                ...
                \RonasIT\AutoDoc\Http\Middleware\AutoDocMiddleware::class,
            ]);
        });
-
Add
\RonasIT\AutoDoc\Traits\AutoDocTestCaseTraittrait totests/TestCase.php -
Configure documentation saving using one of the next ways:
- Add
SwaggerExtensionto the<extensions>block of yourphpunit.xml. Please note that this way will be removed after updating PHPUnit up to 10 version (sebastianbergmann/phpunit#4676)
<phpunit>
    <extensions>
        <bootstrap class="RonasIT\AutoDoc\Support\PHPUnit\Extensions\SwaggerExtension"/>
    </extensions>
    <testsuites>
        <testsuite name="Feature">
            <directory suffix="Test.php">./tests/Feature</directory>
        </testsuite>
    </testsuites>
</phpunit>
- Call
php artisan swagger:push-documentationconsole command after thetestsstage in your CI/CD configuration
Usage
Basic usage
-
Create request class:
<?php

namespace App\Http\Requests;

use Illuminate\Foundation\Http\FormRequest;

/**
* @summary Update user
*
* @deprecated
*
* @description
* This request should be used for updating the user data
*
* @_204 Successful
*
* @is_active will indicate whether the user is active or not
*/
class UpdateUserDataRequest extends FormRequest
{
    /**
     * Determine if the user is authorized to make this request.
     *
     * @return bool
     */
    public function authorize()
    {
        return true;
    }

    /**
     * Validation Rules
     *
     * @return array
     */
    public function rules()
    {
        return [
            'name' => 'string',
            'is_active' => 'boolean',
            'age' => 'integer|nullable'
        ];
    }
}
Note
For correct working of plugin you'll have to dispose all the validation rules in the
rules()method of your request class. Also, your request class must be connected to the controller via dependency injection. Plugin will take validation rules from the request class and generate fields description of input parameter. -
Create a controller and a method for your route:
<?php

namespace App\Http\Controllers;

use App\Http\Requests\Users\UpdateUserDataRequest;

class UserController extends Controller
{
    public function update(UpdateUserDataRequest $request, UserService $service, $id)
    {
        // do something here...

        return response('', Response::HTTP_NO_CONTENT);
    }
}
Note
Dependency injection of request class is optional but if it not presents, the "Parameters" block in the API documentation will be empty.
-
Create test for API endpoint:
public function testUpdate()
{
    $response = $this->json('put', '/users/1', [
        'name': 'Updated User',
        'is_active': true,
        'age': 22
    ]);

    $response->assertStatus(Response::HTTP_NO_CONTENT);
}
-
Run tests
-
Go to route defined in the
auto-doc.routeconfig -
Profit!

Annotations
You can use the following annotations in your request classes to customize documentation of your API endpoints:
- @summary - short description of request
- @description - implementation notes
- @_204 - custom description of response code. You can specify any code as you want.
- @some_field - description of the field from the rules method
- @deprecated - mark route as deprecated
Note
If you do not use request class, the summary and description and parameters will be empty.
Configs
auto-doc.route- route for generated documentationauto-doc.basePath- root of your API
Custom driver
You can specify the way to collect and view documentation by creating your own custom driver.
You can find example of drivers here.
Viewing OpenAPI documentation
As of version 2.2, the package includes the ability to switch between OpenAPI documentation
viewers. To access different viewers, modify the documentation_viewer configuration.
This change is reflected immediately, without the need to rebuild the documentation file.
Merging additional documentations
The package supports the integration of the primary documentation with additional valid
OpenAPI files specified in the additional_paths configuration.
Integration with Postman
The package provides a separate endpoint to get the OpenAPI spec documentation in a Postman-specific format. Pass your app's /auto-doc/documentation/postman endpoint into the Postman import.
Migration guides
Contributing
Thank you for considering contributing to Laravel Swagger plugin! The contribution guide can be found in the Contributing guide.
License
Laravel Swagger plugin is open-sourced software licensed under the MIT license.