jmpatricio / easy-google-analytics
Maintainers
Package info
github.com/jmpatricio/easy-google-analytics
Type:package
pkg:composer/jmpatricio/easy-google-analytics
Requires
- php: >=5.4.0
- google/apiclient: 1.1.*
- illuminate/support: 4.2.*
- nesbot/carbon: ~1
This package is auto-updated.
Last update: 2026-06-29 01:08:39 UTC
README
Laravel Package to connect Google Analytics
Changelog
- 1.0.4 | 2015-08-21
- Added new users metric
- Duplicate code removed
- PHP Docs improved
- Code Style fixed
Instalation
-
Run
composer require jmpatricio/easy-google-analytics -
Add
Jmpatricio\EasyGoogleAnalytics\EasyGoogleAnalyticsServiceProviderto your service providers -
Instalation Done.
Configuration
This step is the most important. Let's make it simple:
- Open a terminal and run:
php artisan config:publish "jmpatricio/easy-google-analytics". - Now you have
{$projectRoot}/app/config/packages/jmpatricio/easy-google-analytics/config.phpfile with:
return [
    'client_id'            => 'xxx.apps.googleusercontent.com',
    'service_account_name' => 'xxx@developer.gserviceaccount.com',
    'keyfile'              => storage_path('xxx.p12'),
    'analytics_id'         => 'ga:xxx',
];
-
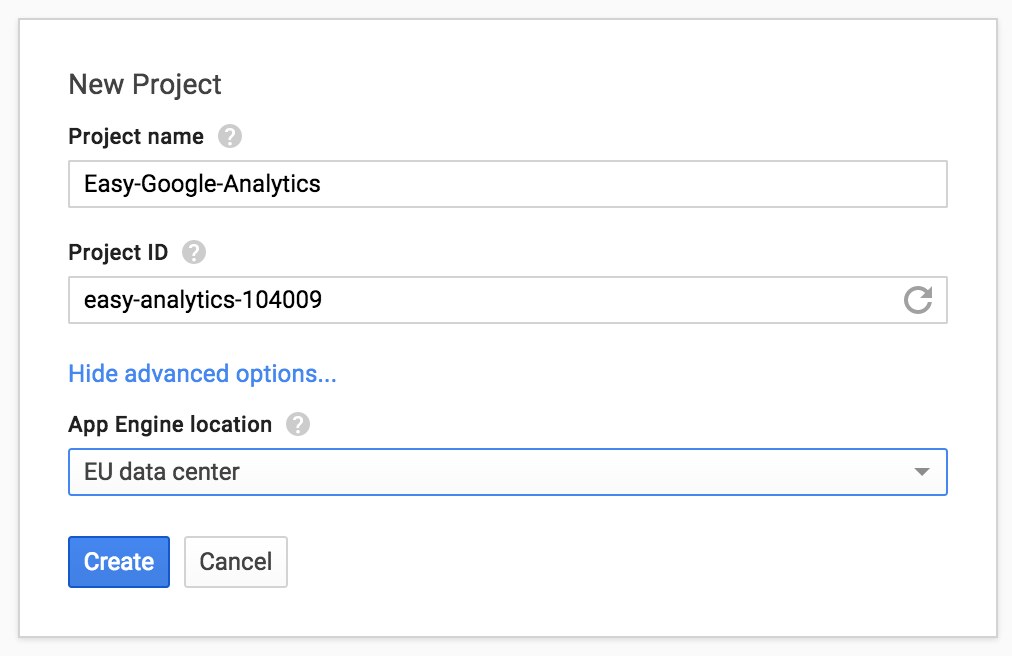
Now you have to go to your googe developer account and configure a new project. (If you already have a project, ignore this step)

-
You need to enable the Analytics API to your project. Inside project, go to APIs & auth and then inside APIs. Enable the analytics
-
Inside the project, on developers console, go to Credentials inside APIs & auth, create a new Service Account
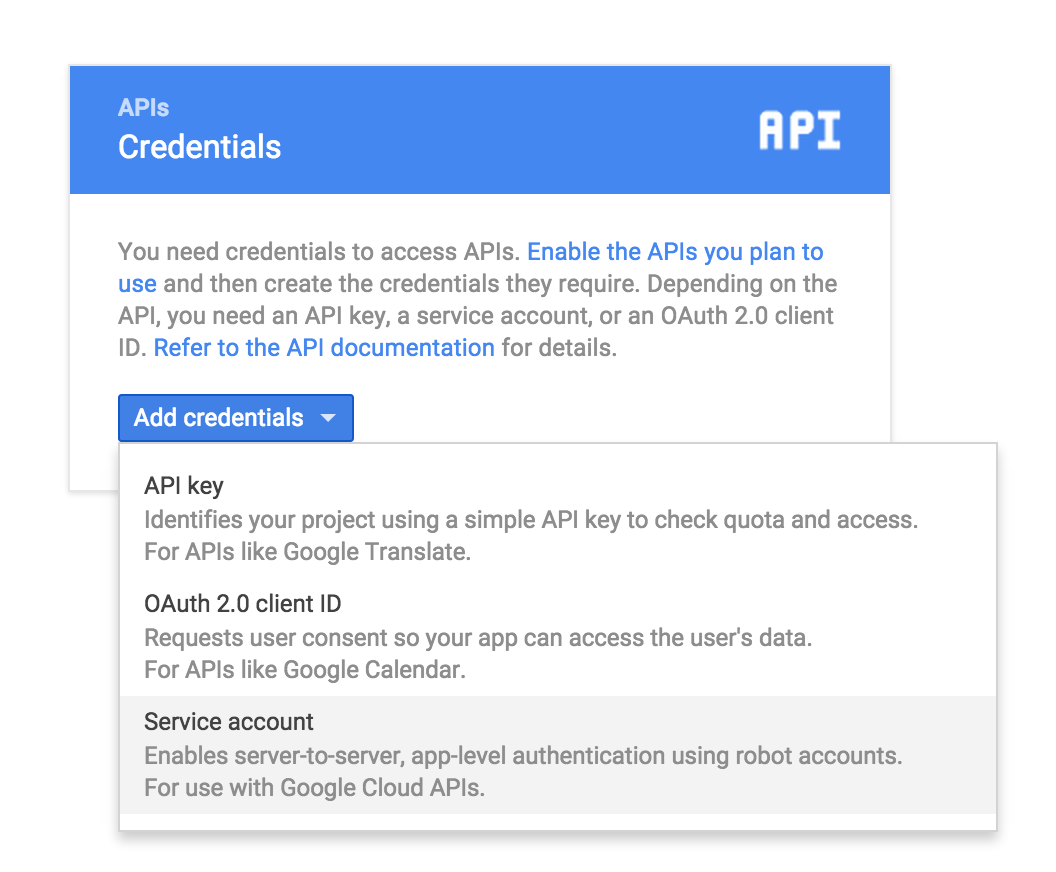
-
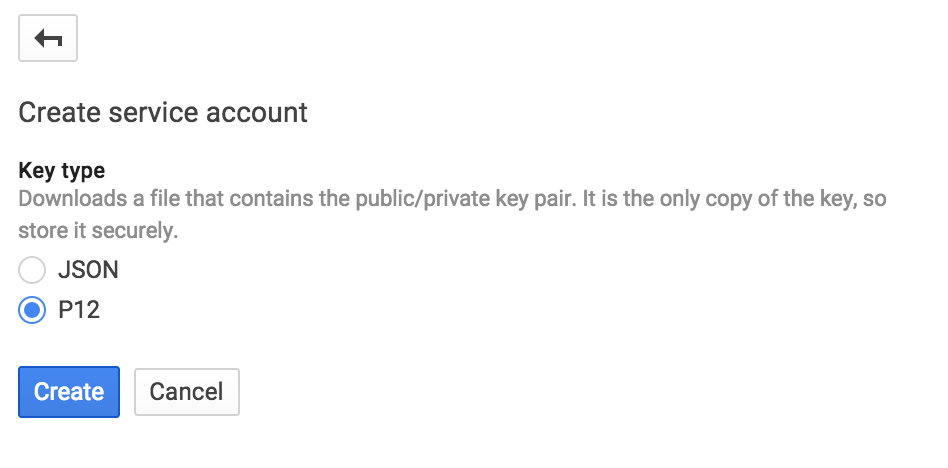
Choose a p12 key

-
Save your p12 key inside
{$projectRoot}/app/storage.


-
Edit the config file and define the keyfile entry:
'keyfile' => storage_path('Easy-Google-Analytics-da31194a03c6.p12'), -
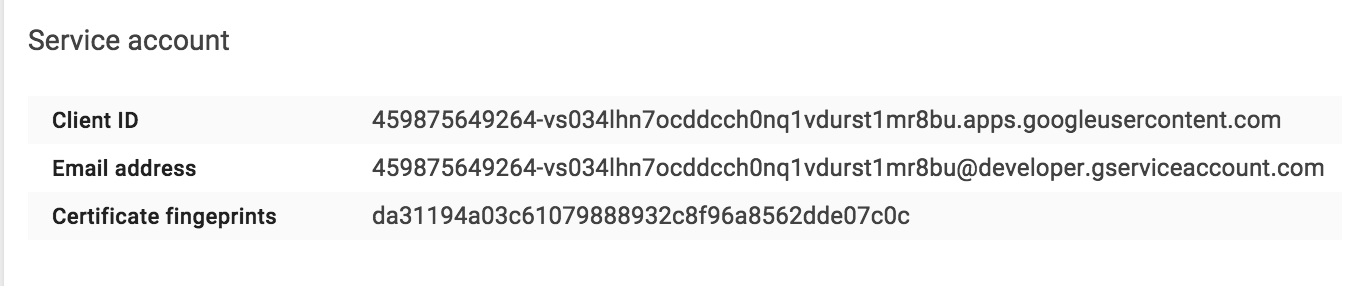
Now you have the information about the credentials
 Click on the email, and the following screen shows up:
-
Add the client id and the email address to the config:
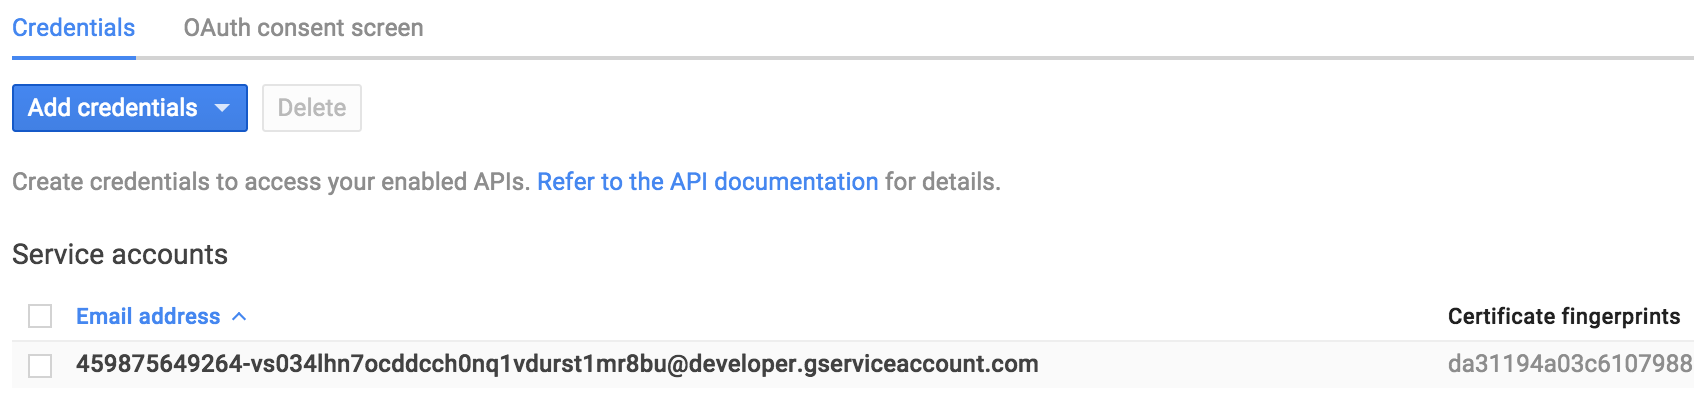

return [
	'client_id'            => '459875649264-vs034lhn7ocddcch0nq1vdurst1mr8bu.apps.googleusercontent.com',
	'service_account_name' => '459875649264-vs034lhn7ocddcch0nq1vdurst1mr8bu@developer.gserviceaccount.com',
	'keyfile'              => storage_path('Easy-Google-Analytics-da31194a03c6.p12'),
	'analytics_id'         => 'ga:xxx',
];
- Now the only thing missing is the analytics id
- Go to your analytics dashboard, and inside the admin area select the view settings:
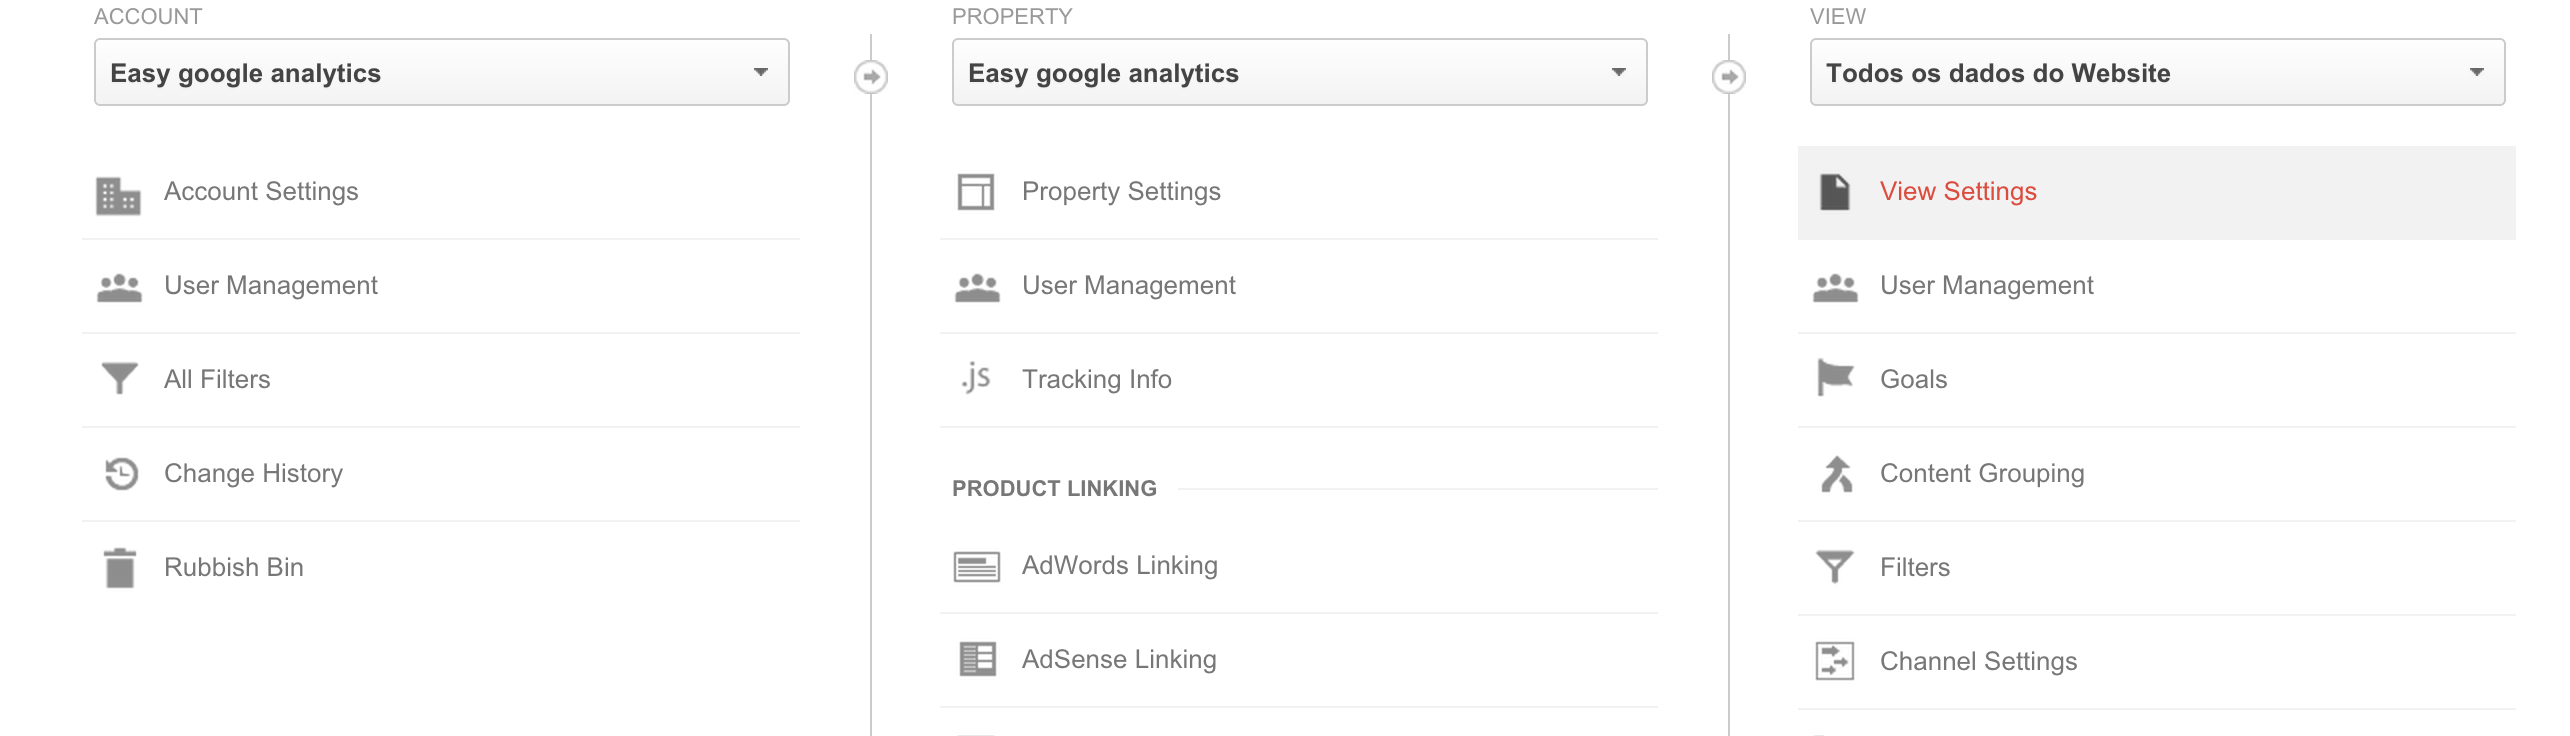
- Copy the view id and add to the config:
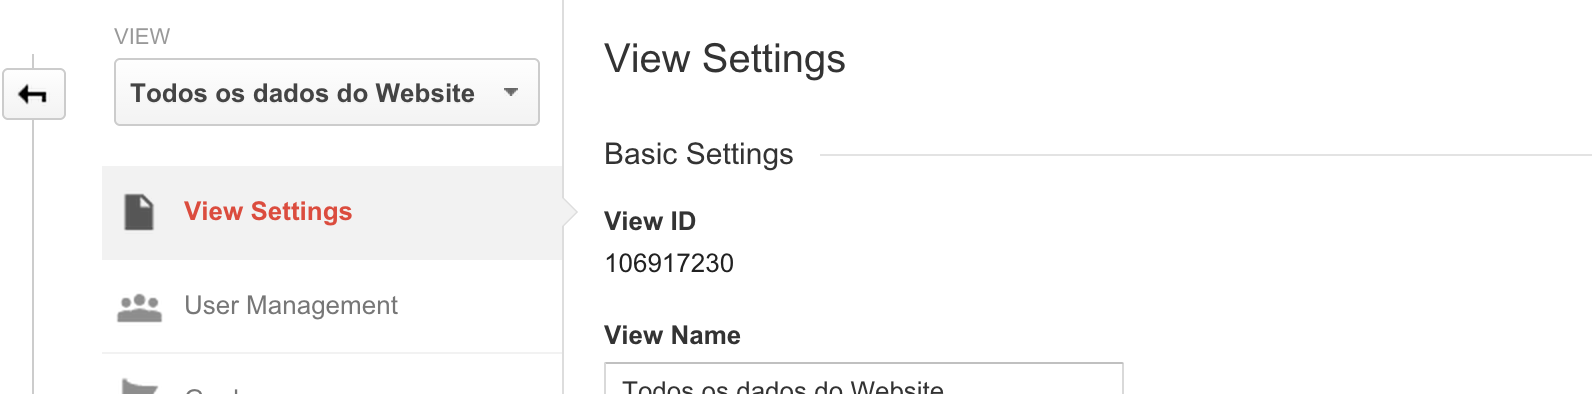


The config will be the following:
return [
    'client_id'            => '459875649264-vs034lhn7ocddcch0nq1vdurst1mr8bu.apps.googleusercontent.com',
    'service_account_name' => '459875649264-vs034lhn7ocddcch0nq1vdurst1mr8bu@developer.gserviceaccount.com',
    'keyfile'              => storage_path('Easy-Google-Analytics-da31194a03c6.p12'),
    'analytics_id'         => 'ga:106917230',
];
-
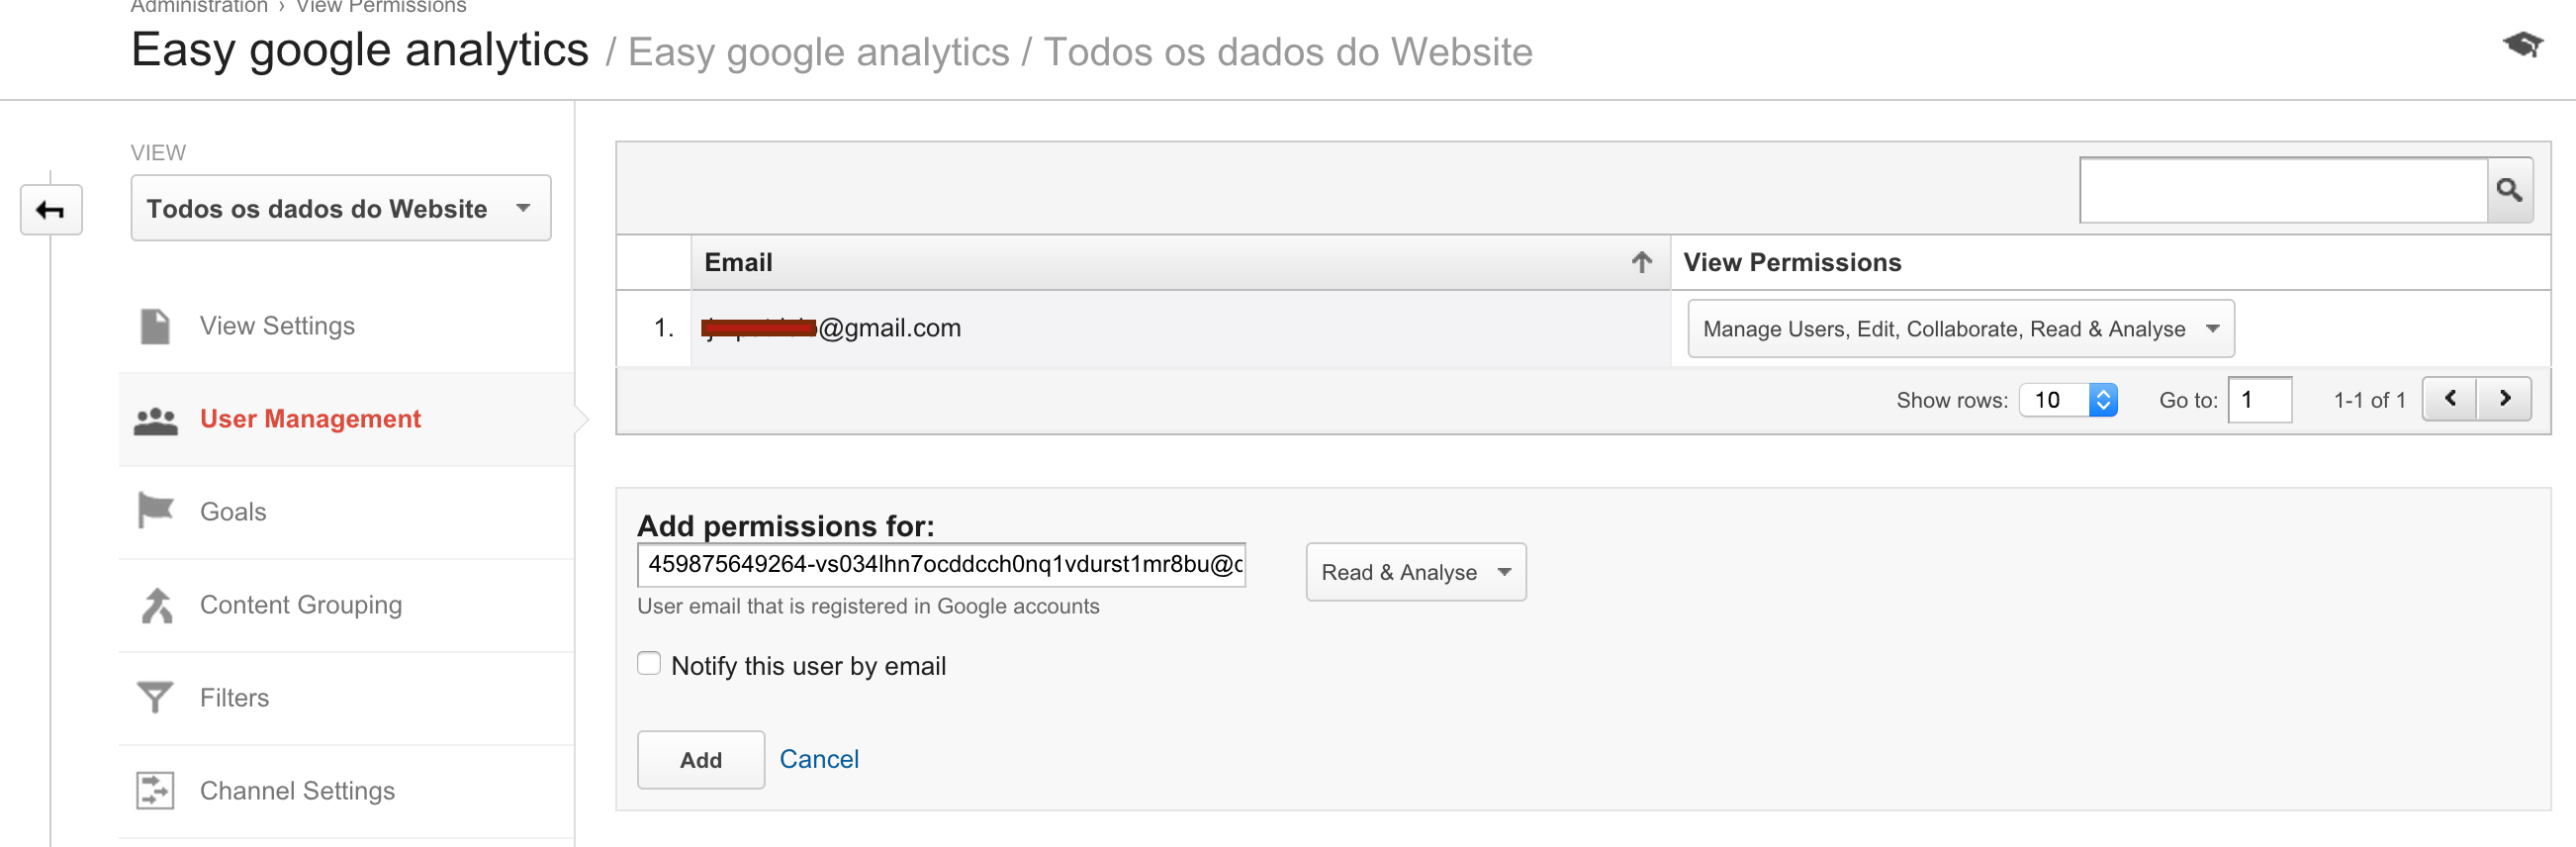
Now we have to add permissions to the service account inside analytics console:
-
Go to the analytics admin console, and add the user with the respective permissions:
-
The configuration is complete!

Basic usage
$connector = new Jmpatricio\EasyGoogleAnalytics\Connector();

// Total visits for today
$totalVisitors = $connector->getTotalVisits();

// Total visits with from-to dates
$totalVisitors = $connector->getTotalVisits(new Carbon\Carbon('2015-08-01'), new Carbon\Carbon('2015-08-05'));

// Active users
$activeUsers = $connector->getActiveUsers();

// Generic API Access

// GA API
$fromDate = new Carbon\Carbon('2015-08-01');
$toDate = new Carbon\Carbon('2015-08-05');
$serviceResponse = $connector->getGA($fromDate,$toDate,'ga:visitors')

// Realtime API
$serviceResponse = $connector->getRT('rt:activeUsers',['dimensions'=>'rt:country']);