abdul / laravel-role-permission
Laravel routes permission configurable from backend
Installs: 14
Dependents: 0
Suggesters: 0
Security: 0
Stars: 0
Watchers: 1
Forks: 0
Open Issues: 0
Type:laravel-package
pkg:composer/abdul/laravel-role-permission
This package is auto-updated.
Last update: 2022-05-20 08:54:22 UTC
README
An easy and flexible Laravel roles and permissions management for admin.
This package basic idea is based on (amiryousefi/laravel-permission) module.
Why we need a Laravel permission package
In many projects, we need to implement a role-based permissions management system for our clients. This will make the development and controlling the access management easy for web projects built on Laravel.
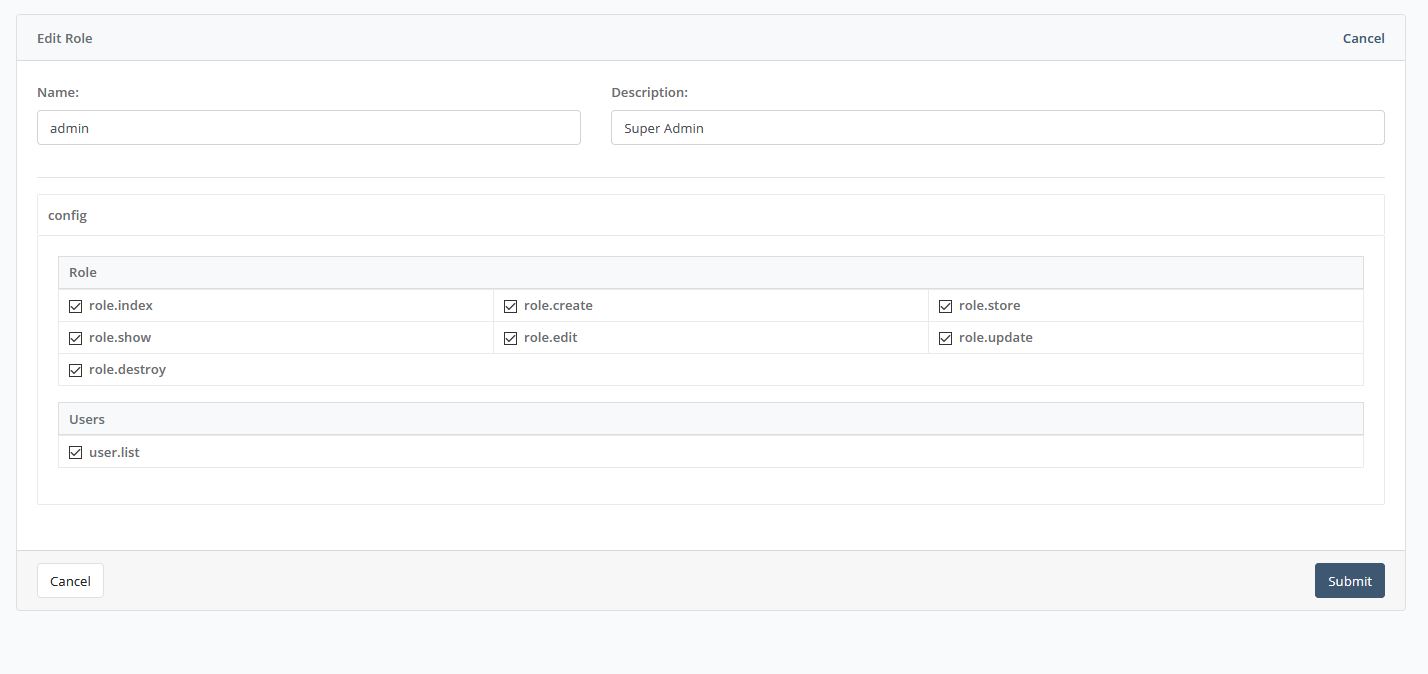
How add permissions via admin panel
After installation if you visit the route
Roles From All routes belongs to auth.role middleware will appear, you can add to role according to your application needs
How to use
The idea is to use this package as easy and as flexible as possible.
This package creates a list of all your routes and assigns these permissions list to user roles.
Although the laravel-role-permission package does most of the work, you could easily extend it and implement your authorization system.
Installation
Start with installing the package through the composer. Run this command in your terminal:
$ composer require abdul/laravel-role-permission
After that, you need to run the migration files:
$ php artisan migrate
How to authorize user
This package adds a role_id to the users table.
Roles are stored in the roles table. You can assign the permission to roles in your administrator panel, assign the role to user and Then, you only need to assign auth.role middleware to your routes.
Assign a route to a role
Besides middleware and other route settings, you can use a role key in your route groups to assign a role to your routes.
You can put your routes for a role in a Route group like this:
Route::group([
    'middleware' => 'auth.role',
    'prefix' => 'config',
    'module' => 'Role',
    'role' => 'admin',
    ...
],function (){
    Route::get('/roles', 'RoleController@index');
});
Of course, you can have as many as route groups like this.
Then you need to run this artisan command to register all permissions:
$ php artisan permissions:generate
This command will register all permissions and assign permissions to the roles.
If you add a fresh option to this command, it will delete all data and generate fresh routes data:
$ php artisan permissions:generate --fresh
Now only users with the proper role can access the route assigned to them.
Don't forget that this package does not handle assigning roles to the users. You need to handle this in your administration panel or anywhere else you handle your users.
How to create roles
The php artisan permissions:generate command will make all roles defined in the routes if they are not exist.
Also, You can create a seeder to fill the roles table. It takes only a name field.
Your RolesSeeser file can look like this.
Role::firstOrCreate(['name' => 'admin']);
Role::firstOrCreate(['name' => 'customer']);
Don't forget to import the Role model in your seeder.
use Abdul\RolePermission\Models\Role;
How to clear permissions
To clear registered permissions you can run this command:
$ php artisan permissions:clear
You can use this command to clear all permissions data for a specific role
$ php artisan permissions:clear --roles role1 role2
To erase only permissions list, run permissions:clear command with this option:
$ php artisan permissions:clear --tables permissions
To clear all roles:
$ php artisan permissions:clear --tables roles
To clear only permissions role relation:
$ php artisan permissions:clear --tables permission_role
This command erases all permissions assigned to roles, so you can regenerate permissions
Also, you can use these options in combination:
$ php artisan permissions:clear --roles admin --tables permission_role

