wexo / module-webshipper
Webshipper Magento2 Module
Installs: 16 246
Dependents: 0
Suggesters: 0
Security: 0
Stars: 1
Watchers: 6
Forks: 5
Open Issues: 5
Type:magento2-module
pkg:composer/wexo/module-webshipper
Requires
Requires (Dev)
- wexo/custom-magento-2-coding-standard: *
README
Setup
For the Webshipper setup to work we need to connect Webshipper to Magento and visa versa.
This will be done by Creating an Order Channel in Webshipper and connecting it to Magento via a System Integration which supplies Webshipper with an API_TOKEN which can be used by Webshipper to communicate with your Magento platform.
Likewise in order to allow for your Magento platform to communicate with Webshipper we need to take the Configuration Token generated by the Order Channel and supply it in Magento.
Create Order Channel
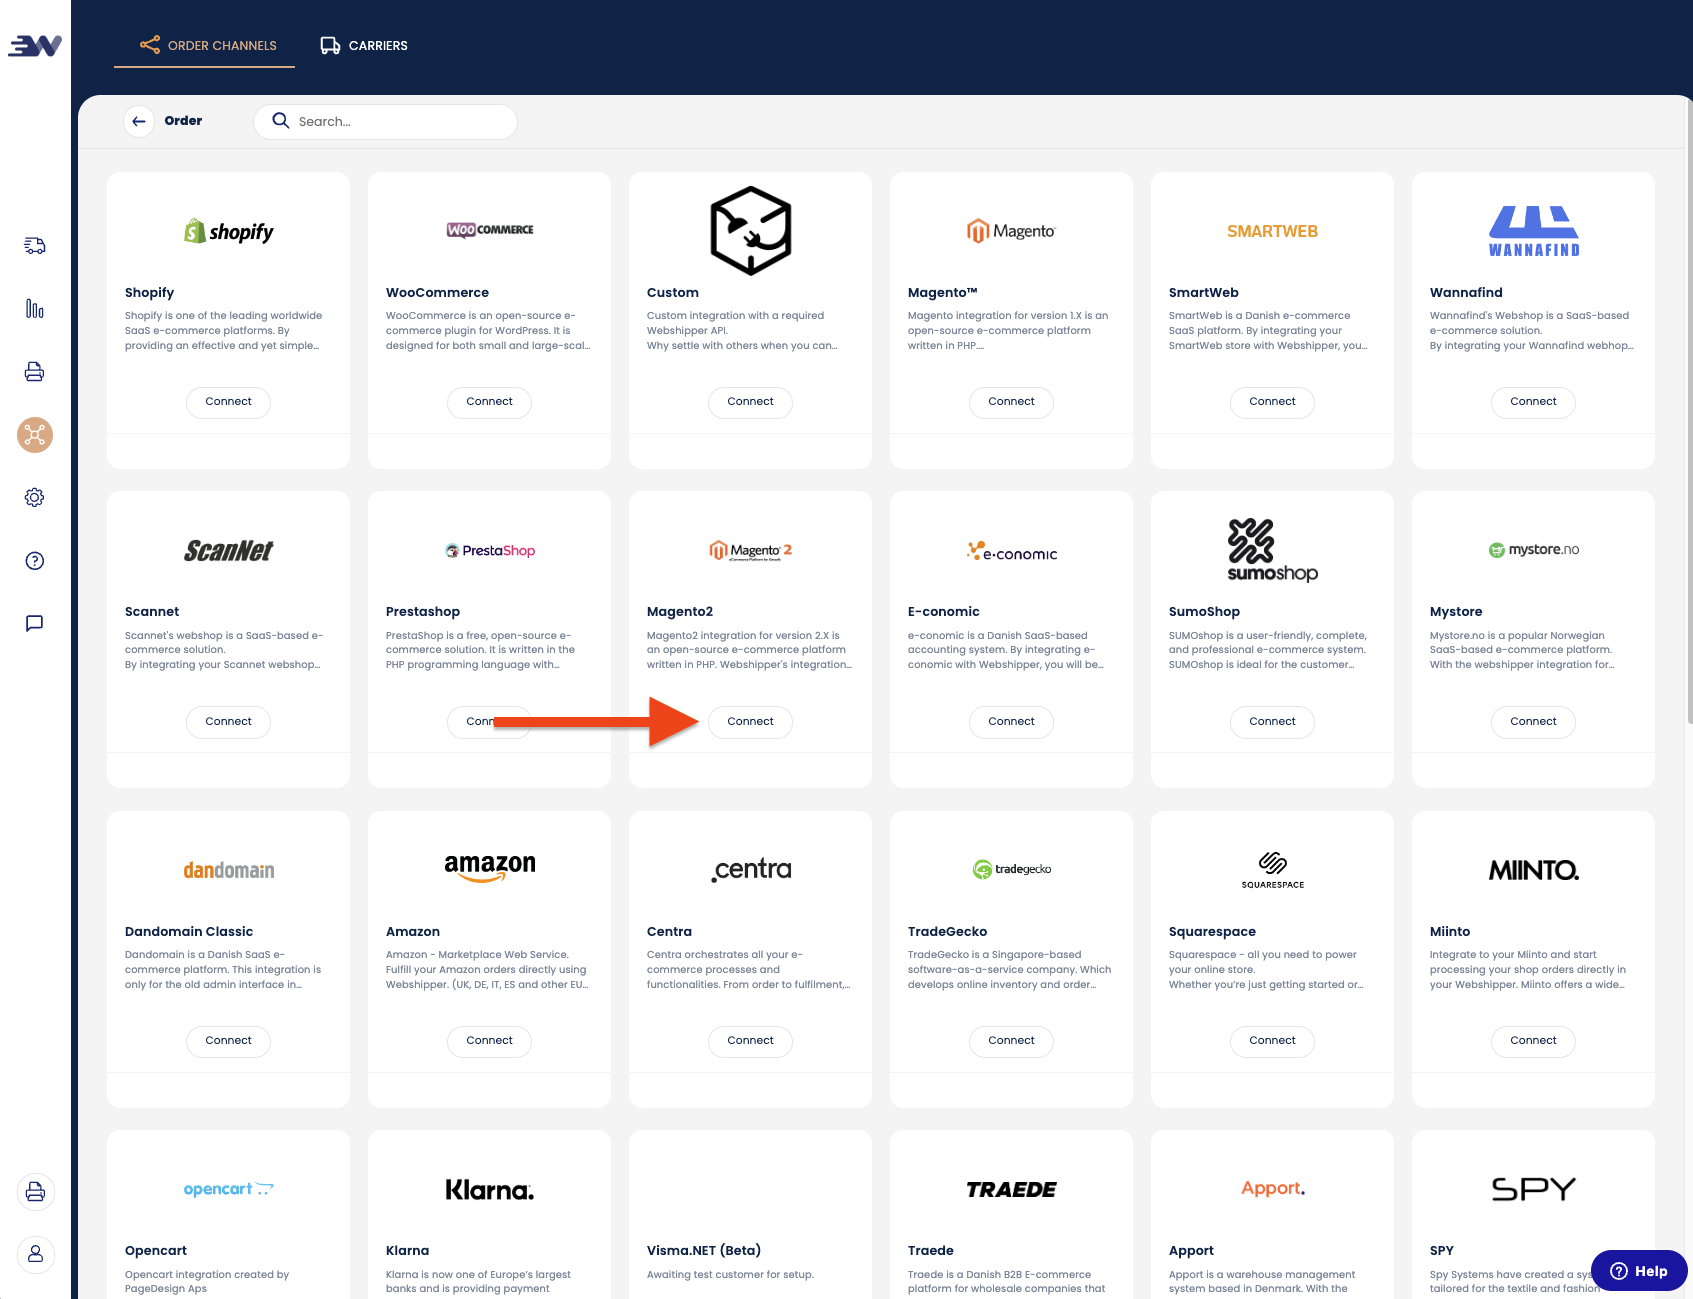
To create an order channel navigate to your Webshipper installation and click on Connect then New order channel. Select Magento 2 and click Connect
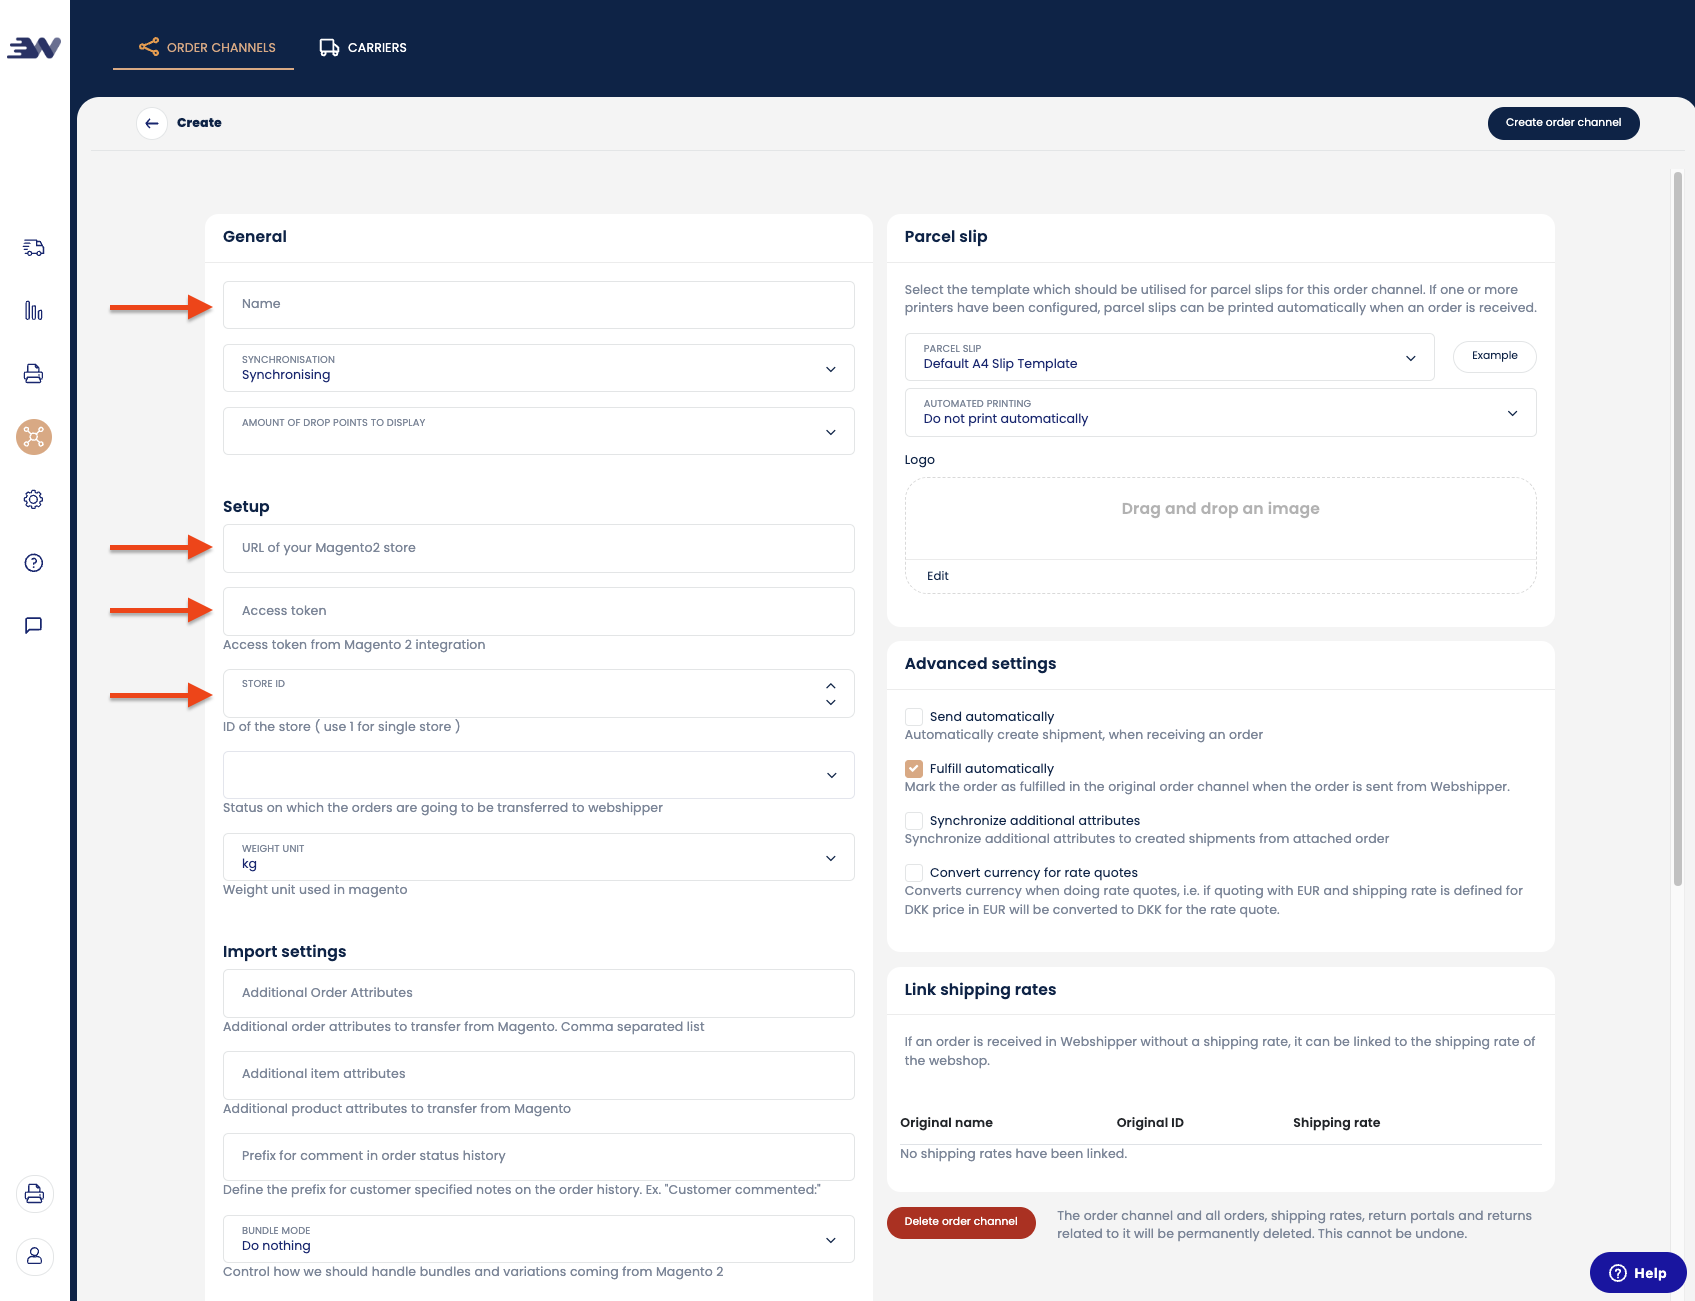
Fill out Name, Url, Access Token, Store Id as shown here:
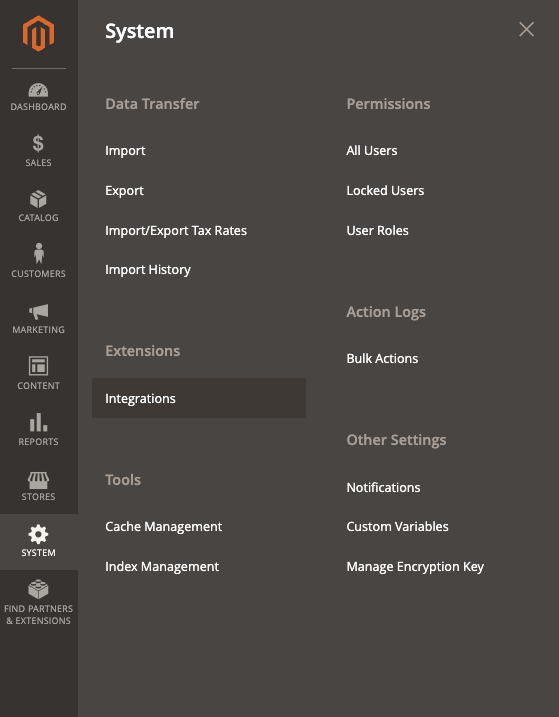
If you do not know how to get your Access Token you can generate one by going to System => Extensions => Integrations in your Magento admin panel
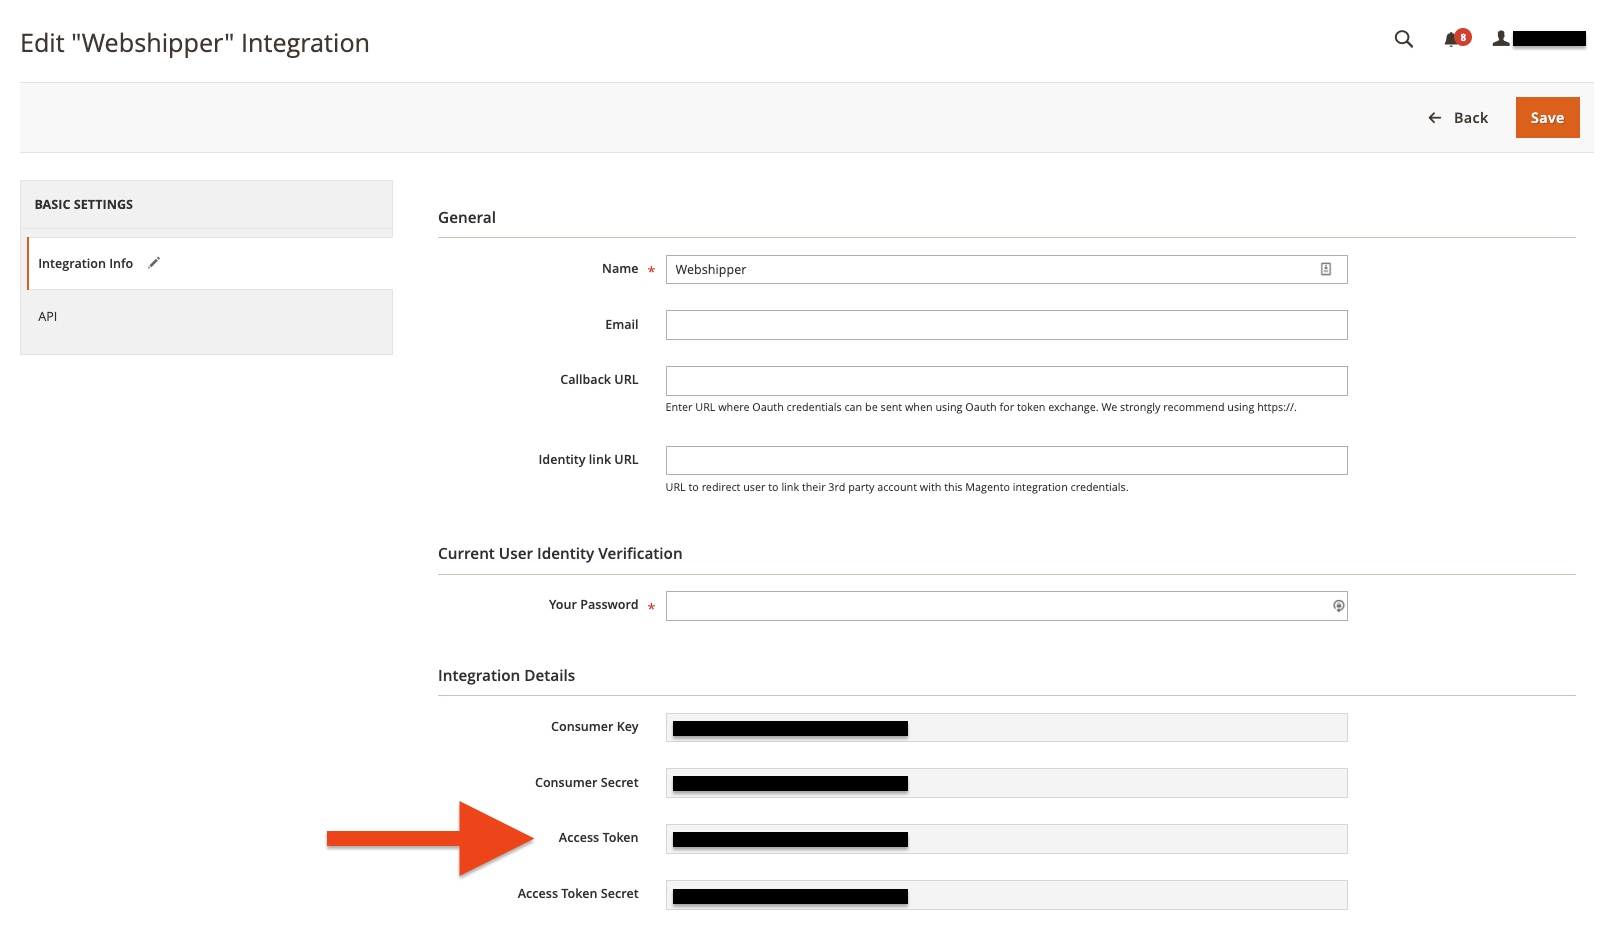
Then create a new integration named Webshipper and give it access to your system.
After creation you need to approve the new integration, afterwards it will generate a token for you. Copy the Access token and paste it into Webshippers Order Channel and click Create.
Webshipper will now attempt to communicate with Magento and if all goes well the Order Channel is now ready for use.
Setup Configuration Token
In order for Magento to communicate with Webshipper we need to setup the Configuration token in Magento.
Go to your Order Channel and copy the Configuration Token. You can find it under Connect => Select an Order Channel => Information.
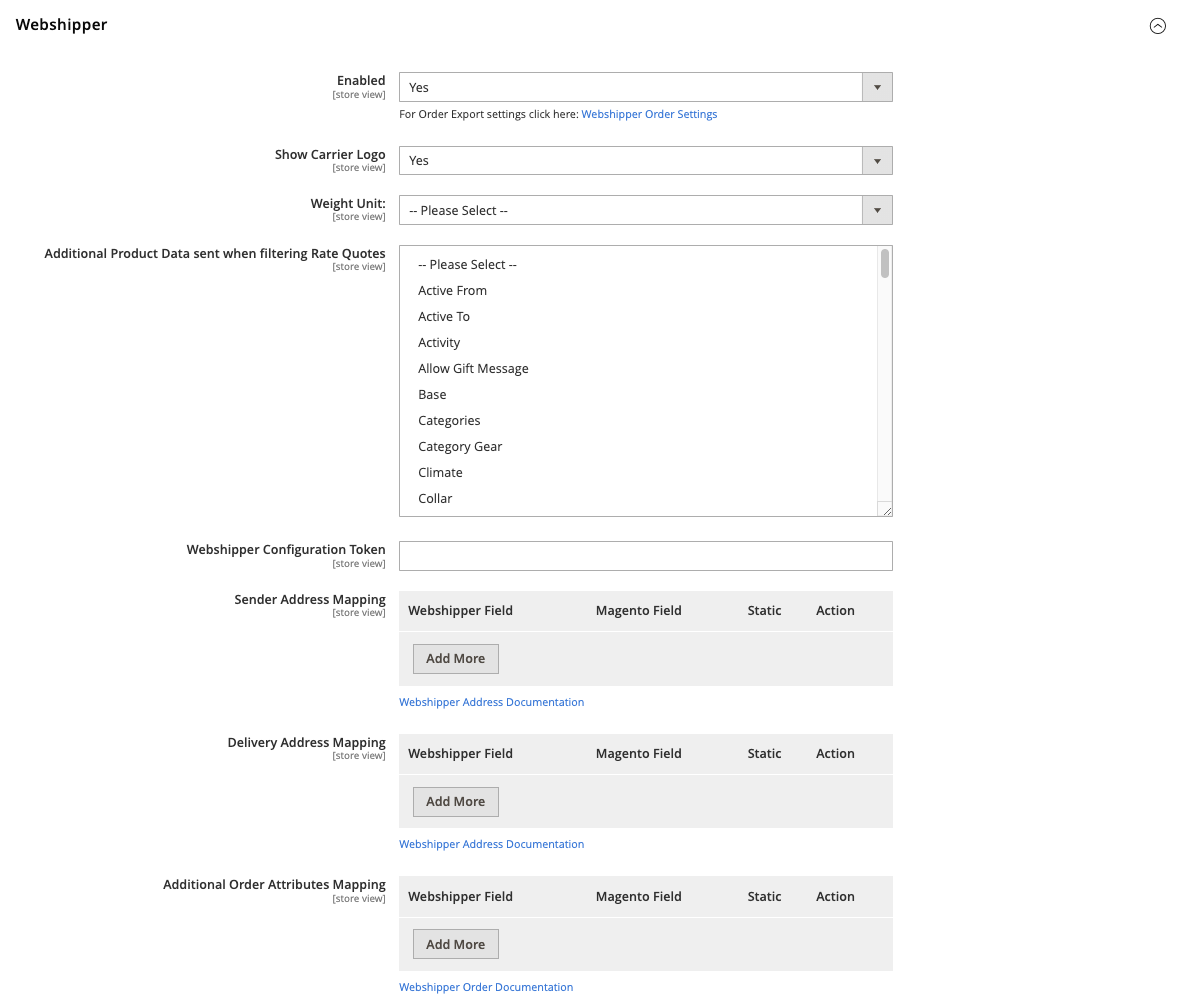
Paste the Configuration Token into your Magento Backend under Stores => Configuration => Sales => Delivery Methods => Webshipper => Webshipper Configuration Token.
Delivery Methods ( rate_quotes )
In order for webshipper to understand your Order's Shipping method we need to couple the shipping rates from Webshipper to your Magento. Once you have setup your Configuration Token it should work out of the box. However if you wish to change certain settings when requesting Delivery Methods, this is the place to do so.
Note: This will only affect shipping methods shown in checkout and backend, it is not related to Order or Order Line data within Webshipper. These are two separate functions.
Sender Address & Delivery Address
If you want to customize the data being sent to the Rate Quotes API in webshipper you can create a custom mapping. By Default we take as much information as possible and send it to Webshipper. But if you have a custom attribute you want to use to filter Delivery Methods then add them here.
Additional Data
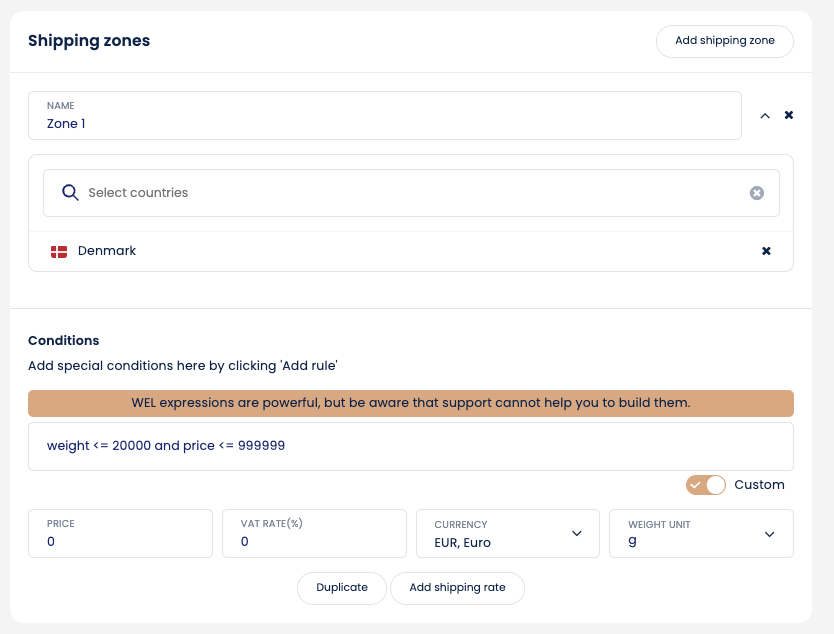
If changing the data on a Sender or Delivery Address is not enough the Rate Quotes object accepts an Additional Data field. This field can be used when using WEL conditions on your Rate Quotes in Webshipper Backend.
Order Synchronization
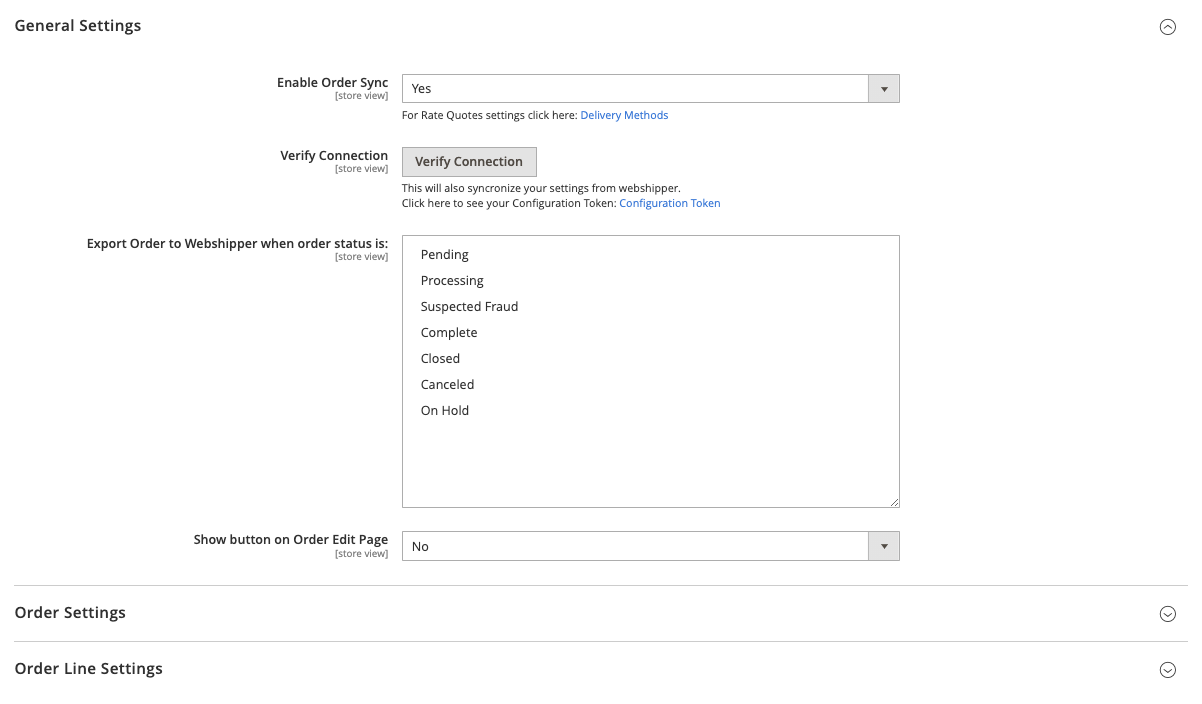
The Magento module has a feature to export the orders to Webshipper. This can be done Manually ( via button on order ) or Automatically ( based on order status ).
While this module does export the Order to Webshipper the Invoice and Shipments created in Magento are still being triggered via the Magento Rest API from Webshippers Services.
If you wish to handle this behaviour on your own ( if you have your own warehouse integration ), you can disable the automatic Invoice and Shipment creation in Webshippers Admin Panel under Connect => Order Channels => Edit Order Channel
Verify Connection
In order to ensure the connection to webshipper is setup correctly we recommend using the Verify Connection button on the settings page
This button attempts to communicate with Webshipper using the Configuration Token setup in an earlier step. It will also attempt to copy the settings setup from the Order Channel ( transfer_status, weight_unit, additional_item_attributes, additional_order_attributes )
Upon successful connection you will also see the Order Channel has a new banner:
Known issues:
-
No token - if you have not completed the
Configration Tokenstep, please do so -
Permissions, if you get a 403 HTTP Response it might be because your
Configuration Tokenneeds to be refreshed, you can refresh it from Webshippers Admin panel underConnect => Order Channel => Informationand hit the refresh button. Then insert the newConfiguration Tokenin Magento following the Step from above
Order Status
If you want the order to automatically be transfered to Webshipper when an order is created, based on the order's Status you can select the status from the multiselect.
You can select multiple values if you want the order to be exported multiple times. Do note that you can only ship/invoice an order once, if you want a Workflow in Webshipper which automatically processes the order, you need to handle this.
Order button ( Manual Transfer )
If you wish to handle the order export manually, or have an order which is not appearing in your Webshipper backend, you can use this button to debug the issue.
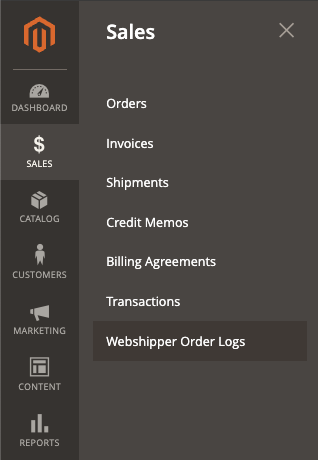
Every time the order is exported a log entry will appear in the Webshipper Log. You can also view the order status history for more details.
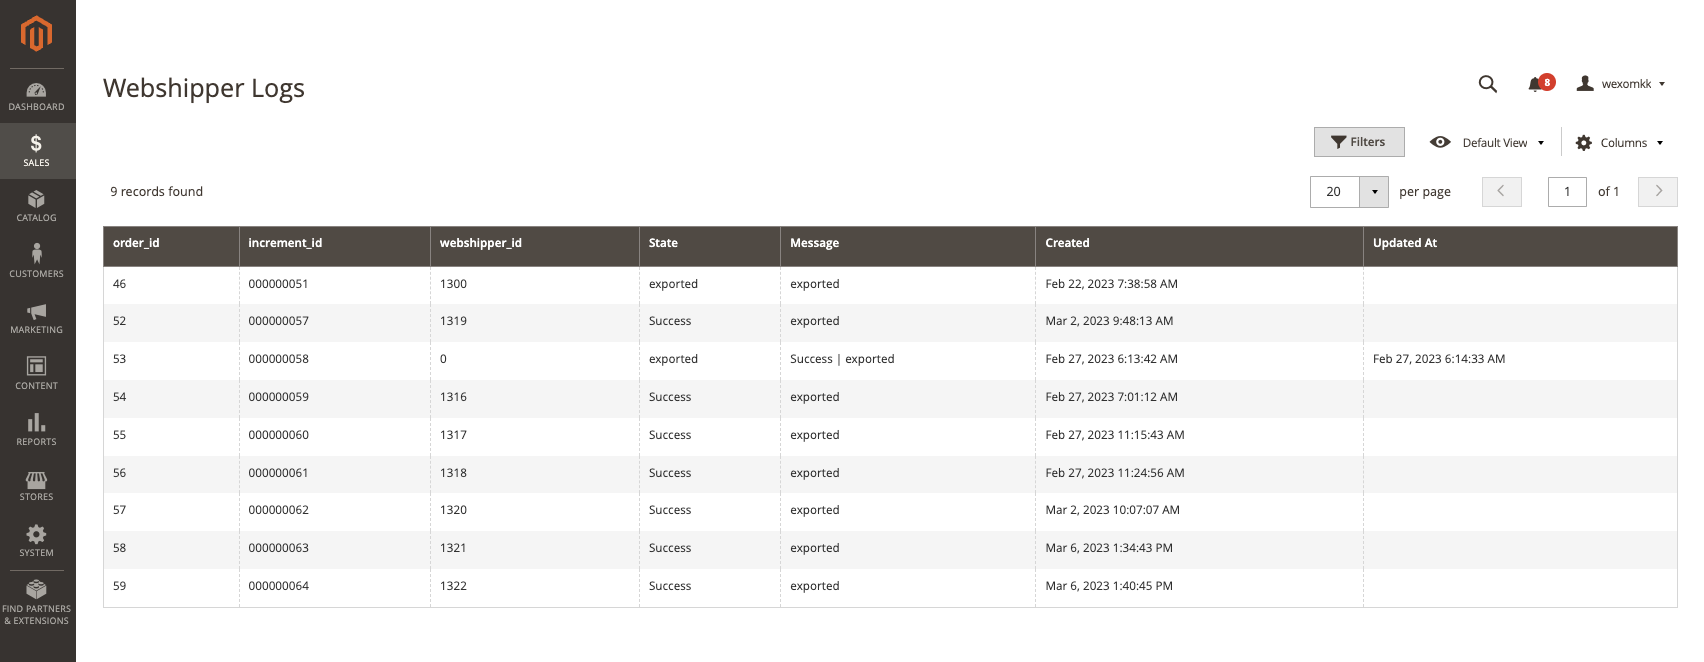
Webshipper Log
To ensure clarify between order synchronization we have provided a Log
This contains every order attempted to be sent to webshipper. The status column will append every attempt with a message
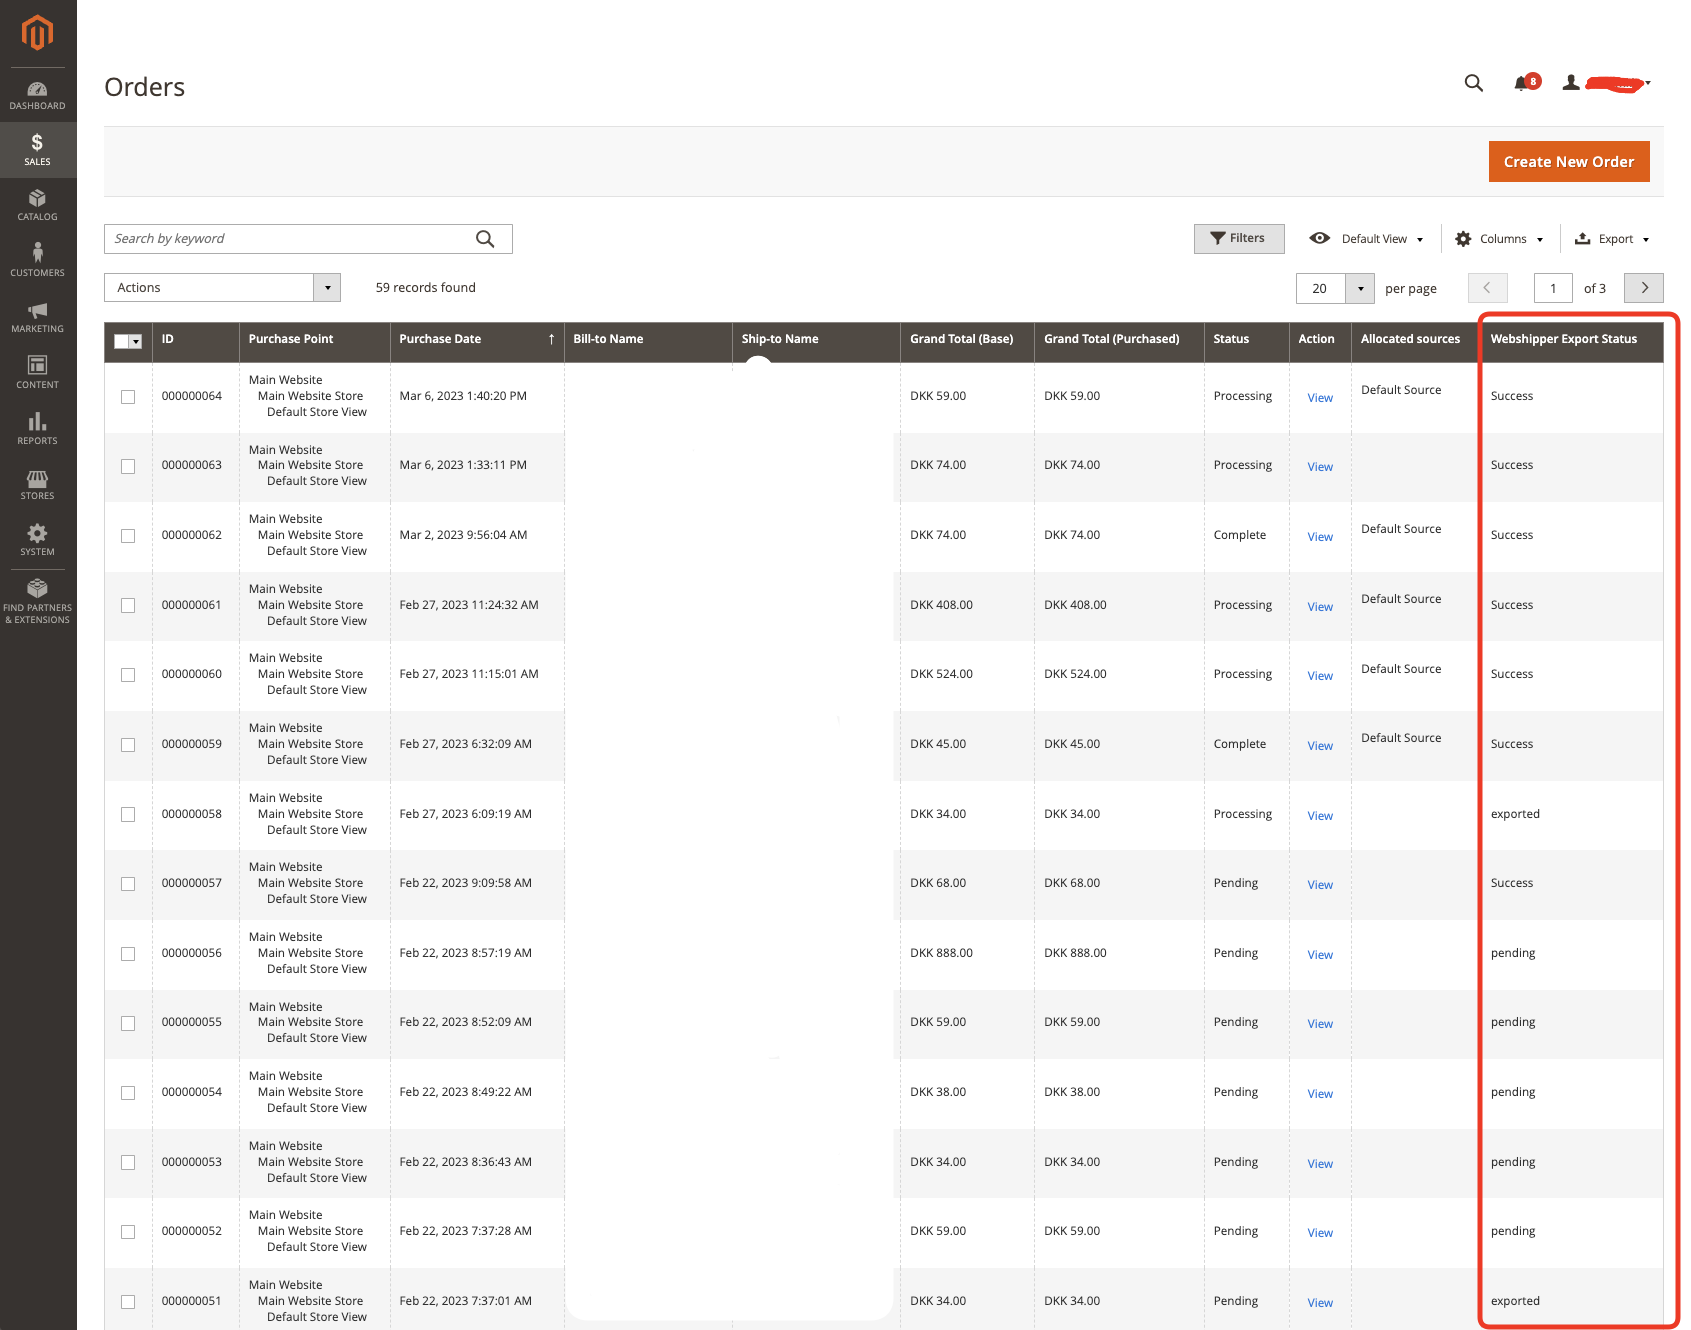
Order Grid Status
You can also view the order's export status from the order grid
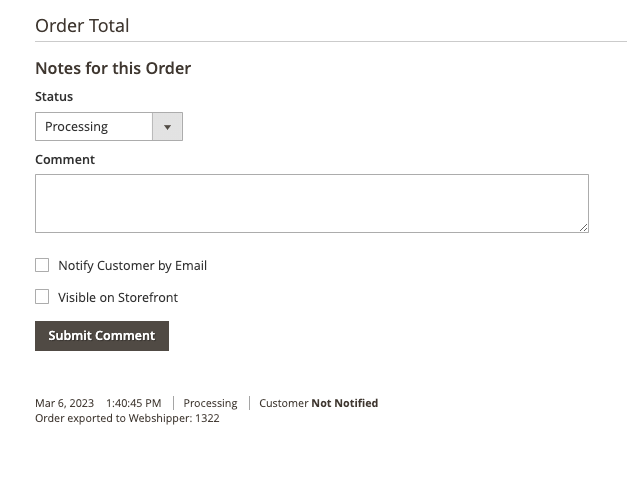
Order Status History
On the order it self we also provide a history of what has happened
If an error occurs with the export you can also find a record of it on the History
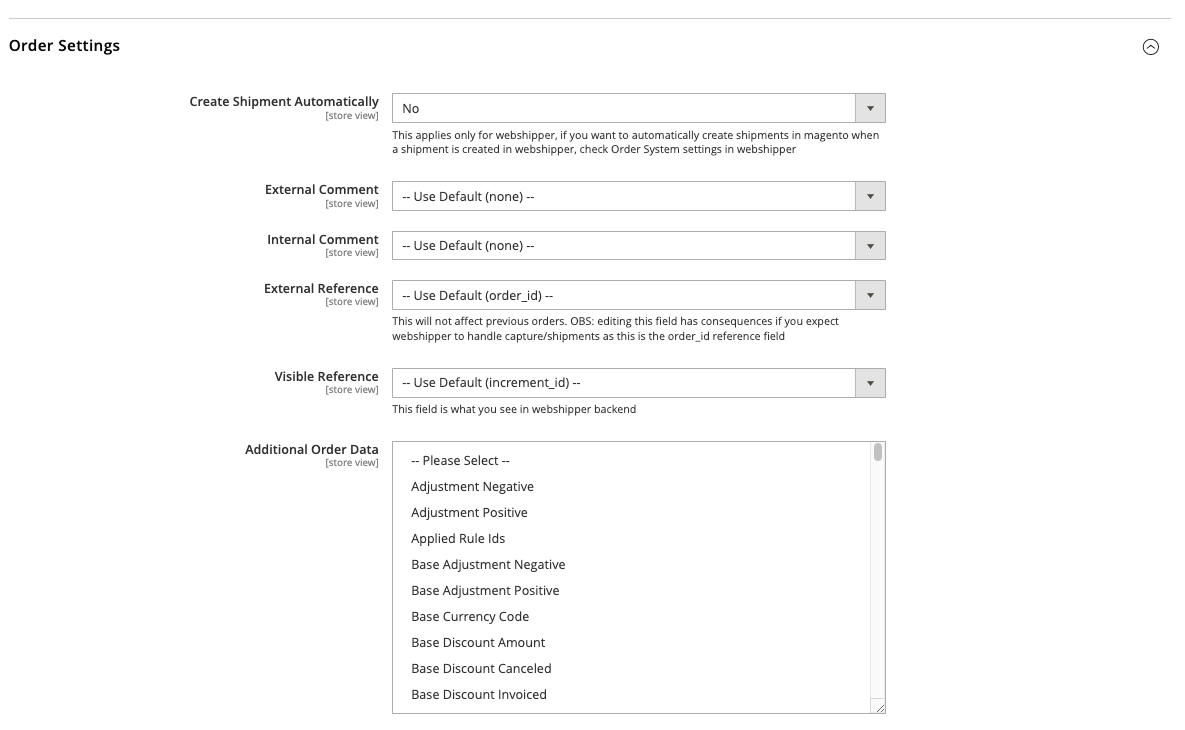
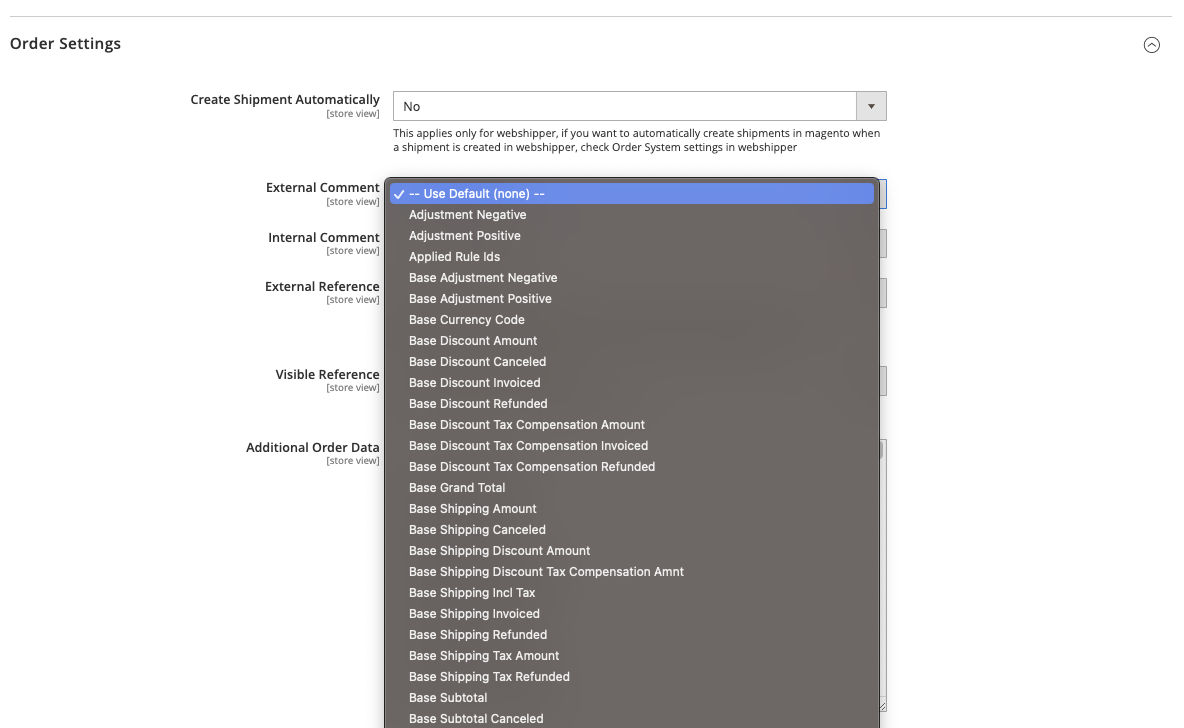
Order Settings
In order to adhere to as many setups as possible you can edit almost every aspect of the Webshipper order. The following settings will allow you to modify what data is transmitted. Do note that changing External References on orders and order_lines can have consequences on how Webshipper will be able to communicate with Magento Rest Api.
The dropdowns to select Order Attributes is each attribute we can find on the Order.
Create Shipment Automatically
This setting allows webshipper to create shipments automatically after the order is transmitted. This only applies to webshipper and is not related to a Magento Shipment.
Comments ( external_comment / internal_comment )
External Comments are comments meant for the end user, while Internal Comments are meant for internal use. You can use these fields to send messages from Magento backend to your Warehouse.
References ( external_ref / ´visible_ref´ )
External Reference is a reference used by Webshipper to contact other providers. Changing this will affect features between Magento and Webshipper communication.
Visible Reference is the visible reference to the order. This is usually the Increment Id and will be visible to anyone in Webshipper and is usually sent as a reference to third party providers like shipping companies. This setting only changes the visual reference to the order_number not internal API references
Additional Data
Incase you have some custom data you can add it to your order via Additional Attributes. The list provided at the dropdown is all available Attributes for the order. If you don't see your attribute, ensure it is correctly installed, We attempt to find any and all attributes related to the order, though we do not include custom attributes injected via Model overwrites. Either add your attribute to the order table or add it as an extension attribute.
Developer note:
The attributes are fetched using getData(<attribute_code>) so if you have a custom overwrite on the Order model for a specific attribute you might not see it reflected.
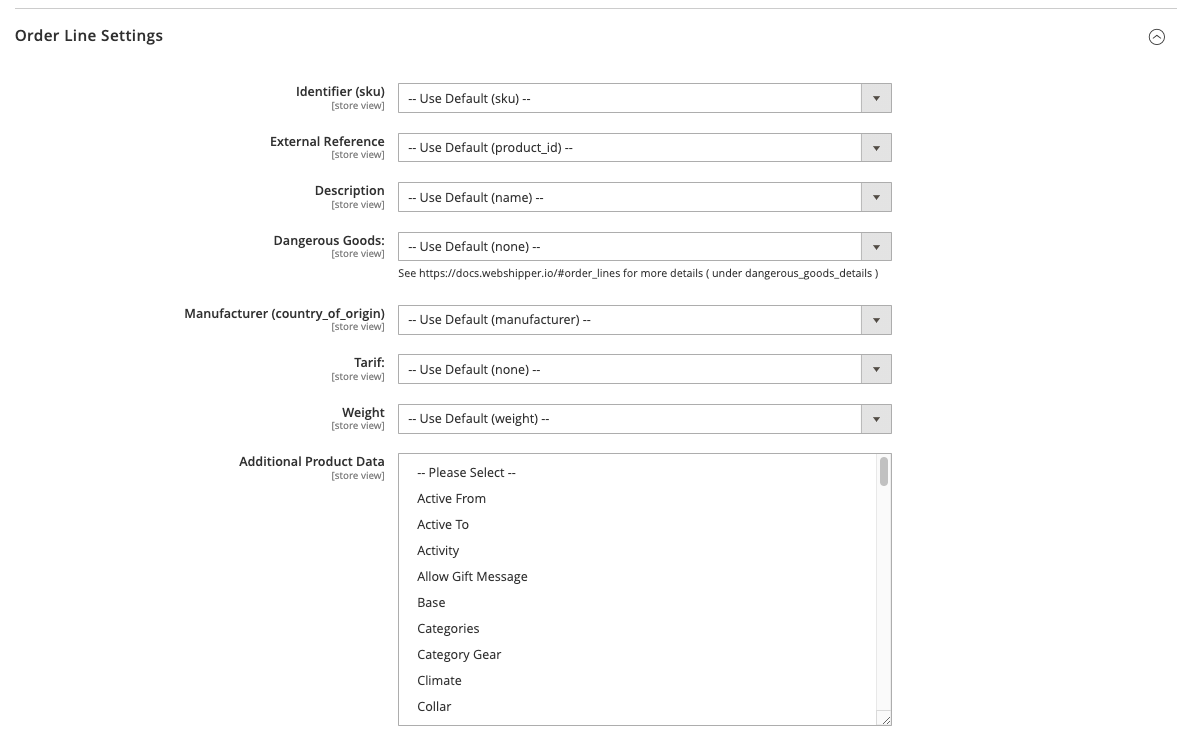
Order Line Settings
Like the Order settings you also have the ability to customize how you want each order line to look. Usually Order Lines are only treated as a reference but some providers might need a bit more information before they allow a shipment to be created. Tarif and Dangerous Goods typically used when shipping from country to country. This is handled differently be each Service Provider so ensure your product is updated with the correct information for the given provider
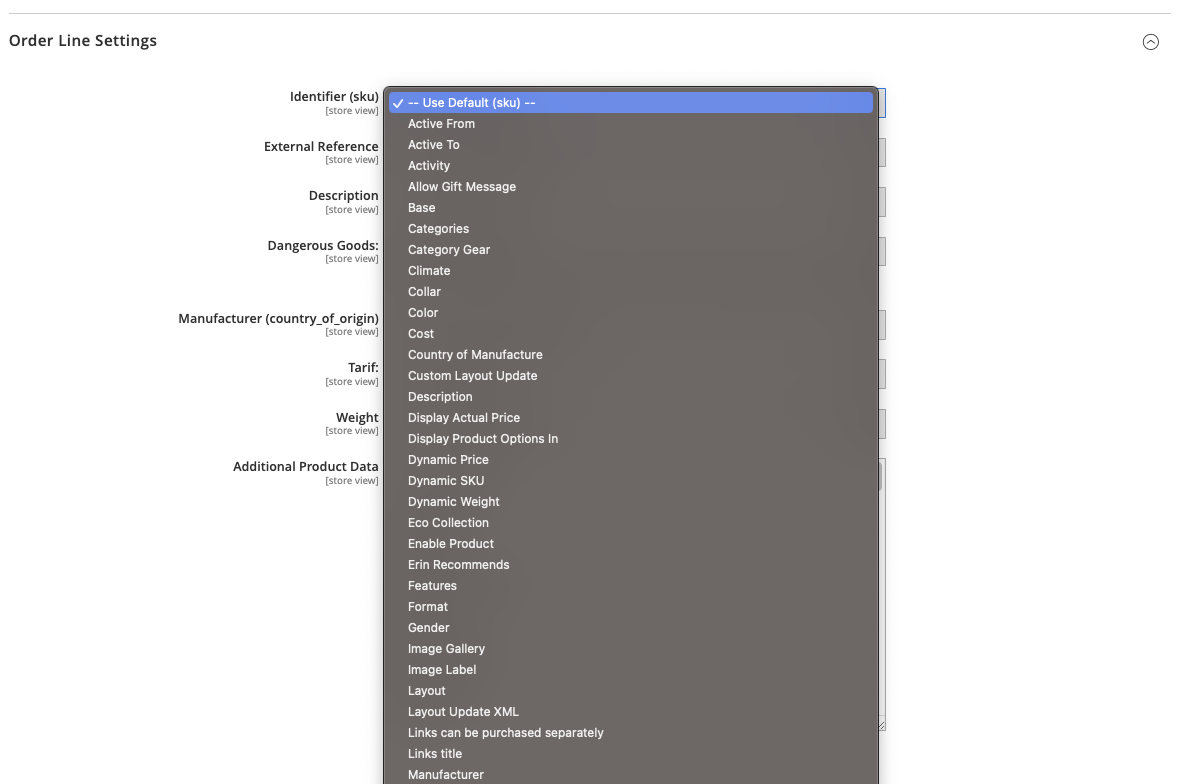
Identifier ( sku )
The identifier attribute is used to seperate each entity on the order lines, this is usually the sku of the product, but if you want to show webshipper a different identifier this is the one to change
External Reference ( item_id )
The External Reference is used by external providers incase you have a custom integration with Webshipper. This must be set to item_id in order for Webshipper to be able to create shipments in Magento.
Description ( name )
The Description field is used to visually identify the product on the order line. It is the field that customers are most likely to see and when used in combination with Tarif it can show border control what kind of product it is.
Manufacturer ( country_of_manufacture )
Some providers require a Country of Origin to be passed along, usually as part of a Tarif Magento has a built in country_of_manufacture attribute by default if you are curious as to how it should be setup.
Tarif & Dangerous Goods
When shipping from country to country you need to be aware of the different taxes applied to each product type. Most countries have an established protocol to identify each product type based on a Tarif number. You can use this attribute add a tarif number to your order_line
Dangerous Goods is sometimes required and is a little more complex than a Tarif number.
From the Webshipper API Documentation:
dangerous_goods_details object
Optional object of key value pairs used for providing information of dangerous goods.
For use with DGOffice, use keys: article_no, package_type_id and packaging_instruction_type.
We recommend you store a JSON object on your product with the required information
Weight ( weight )
Weight is used by different service providers to determine wether or not they can deliver a package or not. It is also used as part of Taxes and Customs.
Depending on your agreement with your shipping provider you need to send over Weight in their determined Weight Unit. We use the Weight Unit configured on the Sales => Delivery Methods => Webshipper.
Additional Data
Like the Order each Order Line also has the ability to send custom data via the Additional Data attribute.
Developer note:
The attributes are fetched using getData(<attribute_code>) so if you have a custom overwrite on the Product model for a specific attribute you might not see it reflected.

