sylvainjule / annotator
Place pins / define zones on an image synced with a structure field
Maintainers
Package info
github.com/sylvainjule/kirby-annotator
Language:Vue
Type:kirby-plugin
pkg:composer/sylvainjule/annotator
Requires
- getkirby/cms: ^5.0.0
- getkirby/composer-installer: ^1.2.1
README
This plugin allows you to add notes to images by pinning them to specific coordinates / areas.
Compatible with Kirby 5 (latest release) as well as Kirby 3 and 4 (use v1.0.6 of this plugin). If you are looking to use this field with Kirby 2, please switch to the
kirby-2branch.
Overview
This plugin is completely free and published under the MIT license. However, if you are using it in a commercial project and want to help me keep up with maintenance, you can consider making a donation of your choice.
- 1. Installation
- 2. Blueprint usage
- 3. Options
- 4. Template usage
- 5. Known issues
- 6. License
- 7. Crédits
TLDR – Just get me started 👀
1. Installation
Download and copy this repository to /site/plugins/annotator
Alternatively, you can install it with composer: composer require sylvainjule/annotator
2. Blueprint usage
The annotator is a section which doesn't store any information itself. It provides an interface to manipulate content from other fields. Here's a basic setup of the plugin within your blueprint:
2.1. Basic example
columns:
  - width: 2/3
    sections:
      annotator:
        type: annotator
        storage:
          src: src
          markers: markers

  - width: 1/3
    sections:
      myfields:
        type: fields
        fields:
          src:
            type: files
            max: 1
          markers:
            type: structure
            fields:
              (...)
2.2. Complete example
With all the default options explicitely set:
columns:
  - width: 2/3
    sections:
      annotator:
        type: annotator
        tools:
          - pin
          - rect
          - circle
        colors:
          - orange
          - yellow
          - green
          - blue
          - purple
          - pink
        theme: light
        debug: false
        max: false
        storage:
          color: color
          src: src
          markers: markers

  - width: 1/3
    sections:
      myfields:
        type: fields
        fields:
          color:
            type: text
          src:
            type: files
            max: 1
          markers:
            type: structure
            fields:
              (...)
Note that if you set your color storage field to
disabled: trueas was previously shown in this example, the value won't be updated anymore with Kirby 3.5+. You'll need to disable it from within a custom panel CSS (opacity: .35; pointer-events: none;for example).
2.3. Usage within a file page
You can use this plugin within a file page by setting it like stated above, but skipping the src option within the storage settings. The plugin will automatically detect the image of the given page.
3. Options
3.1. Display options
See to the complete example above to see how to use them.
• Tools
type:
array, default: all tools listed above
You have 3 tools available : pin, rectand circle. All of them are visible by default, at least one should be provided.
• Colors
type:
array, default: all colors listed above
You have 6 predefined colors available to choose from. All of them are visible by default, at least one should be provided. If there's no color storage specified, the first color of the list will be used on load.
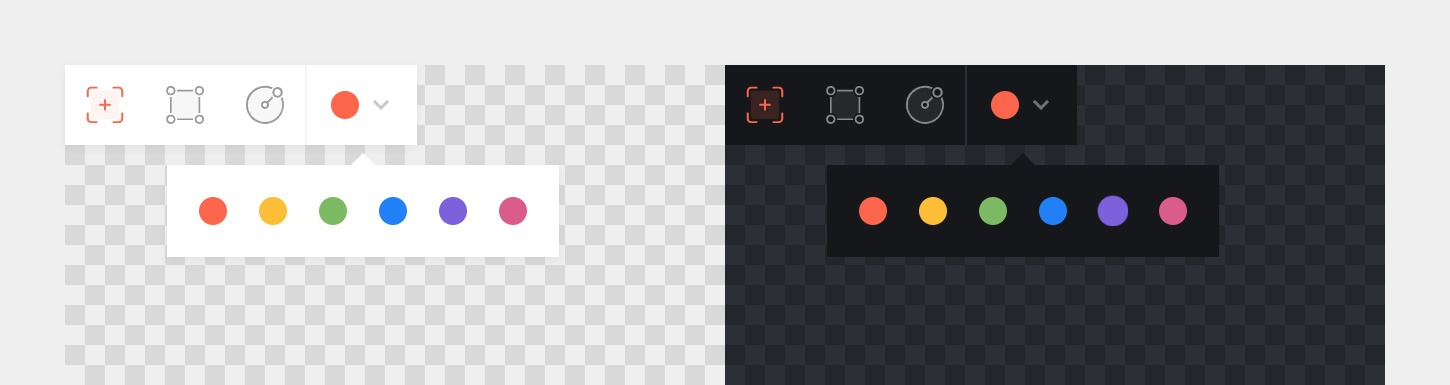
• Theme
type:
string, default:light
You have two themes available, a dark and a light one.
• Zoom
type:
boolean, default:false
When set to true, a Zoom button will show in the toolbar. On click, it will toggle the full size of the image, allowing you to set the marker even more precisely (desktop only).
• Double-click
type:
boolean, default:false
When set to true, pins will only be added when double-clicking on the image, to prevent adding a pin accidentally. Note that this option will only be work when using the pin tool.
• Debug
type:
boolean, default:false
When set to true, mouse coordinates will be shown in real-time in the toolbar. Not needed unless you're trying to extend some functionality.

3.2. Storage options
• Image file
1. From blueprint
The section can be synced with a field on the same page / tab, returning an image url to work with.
In theory, using a select field might work, but I strongly recommend using a files field and limiting it to a single file. Not only does it look nicer, but most importantly it returns an absolute url of the file:
# annotator section
storage:
  src: src

# fields section
src:
  type: files
  max: 1
Note: You don’t need to explicitly set a
maxvalue, though it may look clearer. When confronted to a files field containing multiple files, the plugin will always use the first one.
2. From query
You can also use Kirby's built-in query language or an absolute url to an image. When using a query, make sure it returns either an absolute url or a $file object.
storage:
  src: page.fieldname.toFile
  src: page.parent.fieldname.toFile
  src: page.images.first
  src: page('page://...').fieldname.toFile
  src: https://your.website/path/to/image.jpg
  src: ...
• Markers structure
The plugin needs an associated structure field to store the markers informations. It has 5 reserved fields that shouldn't be used for any other purpose: type, x, y,w and h. Those will be automatically set and don't need to be explicitely specified unless you want to show them within the panel:
# annotator section
storage:
  markers: markers

# fields section
markers:
  type: structure
  fields:
    type:
      label: 'Type'
      type: text
    x:
      label: 'x'
      type: number
    y:
      label: 'y'
      type: number
    w:
      label: 'w'
      type: number
    h:
      label: 'h'
      type: number
Otherwise, you can directly start adding fields you'd like to sync content with:
# annotator section
storage:
  markers: markers

# fields section
markers:
  type: structure
  fields:
    mynote:
      label: 'Note'
      type: text
• Min / Max
You can limit the number of markers by setting the max option in the annotator section's options.
If you want to set a minimum number of markers, set the min option directly within the structure field's options.
sections:
  annotator:
    type: annotator
    max: 4

...

fields:
  markers:
    type: structure
    min: 2
• Translate
If you don't want to be able to move pins on translated pages, you can use the translate option. Note that your associated structure field will still be editable, unless you set its own translate option.
sections:
  annotator:
    type: annotator
    translate: false
• Color
Without any associated color field, the plugin won't remember the last color used within the editor, and will always fallback to the first one when loading the component. Setting a color storage is pretty straightforward:
# annotator section
storage:
  color: color

# fields section
color:
  type: text
  disabled: true
Note that the plugin needs to have access to the field element within the panel view to update the color on the fly, therefore it cannot be of
type: hidden. If you want to hide it visually, you'll have to work your way there with a custom panel css.
• Structure field CSS
If you want to ensure that the structure field will only contain markers, you can hide the Add + button of the field. This way, there will be no alternative to populate it other than the annotator section.
Add this in a custom panel.css:
.k-field-mymarkersfield .k-field-header button {
    display: none;
}
4. Template usage
Markers are stored in a structure field, which means we need to create a collection with the toStructure() method. I will refer to a variable named $marker in the examples below, this is how we get it:
foreach($page->markers()->toStructure() as $marker) {
    // now we have a $marker variable
}
4.1. How are the informations stored?
Each marker has a set of coordinates, proportional to the image.
These coordinates are limited to 4 decimals, and return a value between 0 and 1. Kirby might return them as strings, so remember to always make sure that you're getting a number before working with them :
echo $marker->x()->toFloat()
Each marker also has its type specified as a string, either pin, rect or circle.
• Pin
This is the kind of output to expect:
type: 'pin'
x: 0.50 #(if 50% from the left)
y: 0.50 #(if 50% from the top)
w: 0
y: 0
• Rectangles
This is the kind of output to expect:
type: 'rect'
x: 0.50 #(if 50% from the left)
y: 0.50 #(if 50% from the top)
w: 0.25 #(if 25% of the width)
y: 0.25 #(if 25% of the height)
• Circles
Please note two things:
-
the
xandycoordinates are the ones of the circle's center. This means you'll have to move the marker element with:transform: translate(-50%, -50%);
-
wandhare calculated for the ellipse to be a perfect circle. This means that they will match if the image is squared, but will differ if it is not, in order to compensate for the proportional difference between width and height. Therefore you can set on the element:border-radius: 50%;
This is the kind of output to expect:
type: 'circle'
x: 0.50 #(center is 50% from the left)
y: 0.50 #(center is 50% from the top)
w: 0.25 #(diameter is 25% of the width)
y: 0.3275 #(diameter is still the same, but adjusted to match the image ratio)
4.2. Methods and functions
• Check the marker's type
// Check if the marker is a [pin / rect / circle].
// Returns true or false.
$marker->type()->isPin()
$marker->type()->isRect()
$marker->type()->isCircle()

// Check if the marker is not a [pin / rect / circle].
// Returns true or false.
$marker->type()->isNotPin()
$marker->type()->isNotRect()
$marker->type()->isNotCircle()
• Working with percentages
// Convert the value to a float and multiply it by 100.
// Returns a number.
$marker->x()->toPercent() // returns 50

// Convert the value to a float, multiply it by 100 and append a '%'.
// Returns a string.
$marker->x()->toPercentString() // returns '50%'
• Formated inline styles
Returns a properly formated inline style, according to the marker's type.
echo markerStyle($marker);

// if $marker is a pin
returns 'left:50%; top:50%;'
// if $marker is a rectangle
returns 'left:50%; top:50%; width:25%; height:25%;'
// if $marker is a circle
returns 'left:50%; top:50%; width:25%; height:32.75%; border-radius:50%; transform:translate(-50%, -50%);'
4.3. Basic usage example
<?php if($image = $page->src()->toFile()): ?>
<div>
    <?php foreach($page->markers()->toStructure() as $marker): ?>
        <div class="marker" style="<?php echo markerStyle($marker); ?>"></div>
    <?php endforeach; ?>
    <img src="<?php echo $image->url() ?>">
</div>
<?php endif; ?>
In your CSS:
.marker {
    position: absolute;
}
5. Known issues
.svgfiles should have explicit dimensions in order to be displayed correctly (see #18)
6. License
MIT
7. Credits
- The fields synchronization has been taken from @rasteiner's map section. 🙏