scandipwa / menu-organizer
Scandiweb Menu Organizer for ScandiPWA
Maintainers
Package info
github.com/scandipwa/menu-organizer
Type:magento2-module
pkg:composer/scandipwa/menu-organizer
Requires
- magento/framework: *
- magento/module-backend: *
- magento/module-captcha: *
- magento/module-catalog: *
- magento/module-cms: *
- magento/module-media-storage: *
- magento/module-store: *
- magento/module-ui: *
- scandiweb/module-core: ~0.1.2
README
This repository is a module for Magento 2. This module is used to create customized navigation.
Menu
- Supported features
- Installation
- How to use
3.1. Creating first menu
3.2. Adding menu items
3.3. Structure for ScandiPWA
3.4. How to enable/disable menu per store - For development
4.1. DB structure
4.2. GraphQl structure
4.3. Quick file access
1. Supported features
- Multilevel structured menu
- Magento categories
- Magento CMS pages
- Custom URLs
- Icons for menu items
- Custom CSS classes
2. Installation
Installation via composer:
composer require scandipwa/menu-organizer
3. How to use
3.1. Creating first menu
- Open admin panel
- Locate
admin/scandipwa_menuorganizer/menuvia URL or by using side panel menu:Scandiweb -> Navigation -> MenuManager - Find
Add New Menubutton in the right top corner, click it. - Fill out form fields:
- Required:
- Title
- Menu identifier (used in graphql requests)
- Menu status (enabled / disabled)
- Optional:
- Custom Menu CSS Class
- Store (to which store-view this menu is assigned to)
- Required:
- Click
Save.

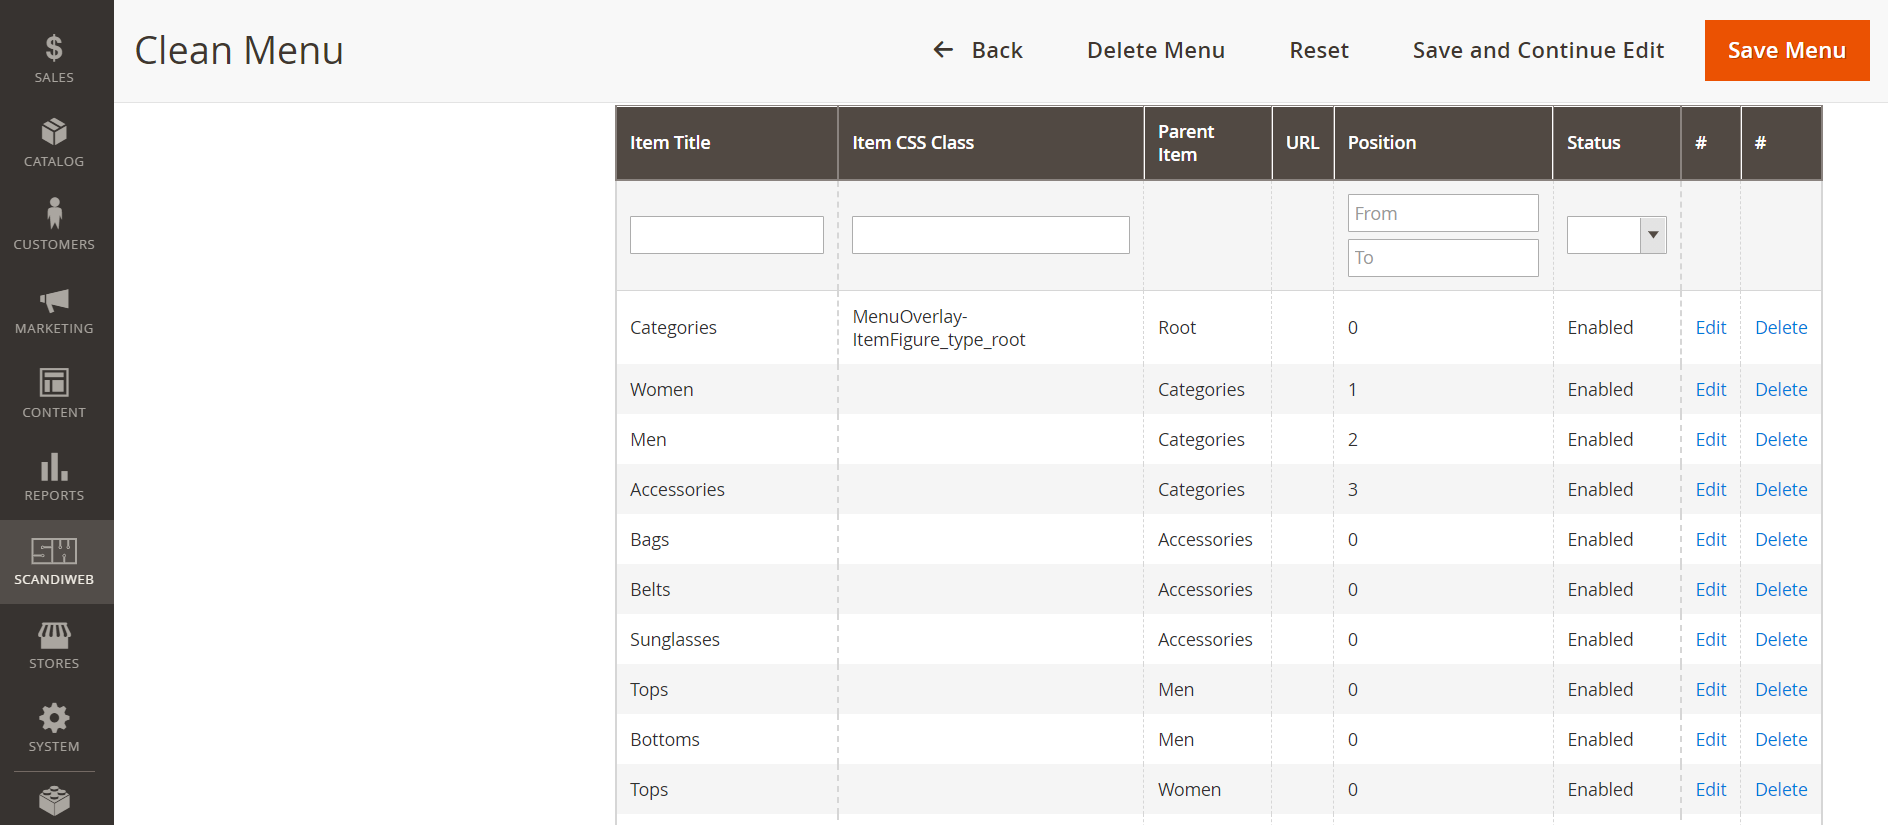
3.2. Adding menu items
- Open menu.
- Find the
Assigned Menu Itemsin the navigation on the left. click it. - Click
Add itemin the top right corner. - Fill out form fields:
- Required:
- Menu Item Title
- URL Type (Custom URL / Category / CMS page)
- URL Type specific field: Custom URL | Category | CMS Page
- Parent (Parent menu item)
- Menu Item Status (enabled / disabled)
- Optional:
- Menu Item CSS Class
- URL Attributes
- Icon
- Icon Alt Text
- Menu Item Sort Order (Item with lowest number will be on top)
- Required:
- Click
Save.

3.3. Structure for ScandiPWA
By default ScandiPWA will only render yellow elements (check image) and ignore the red ones.
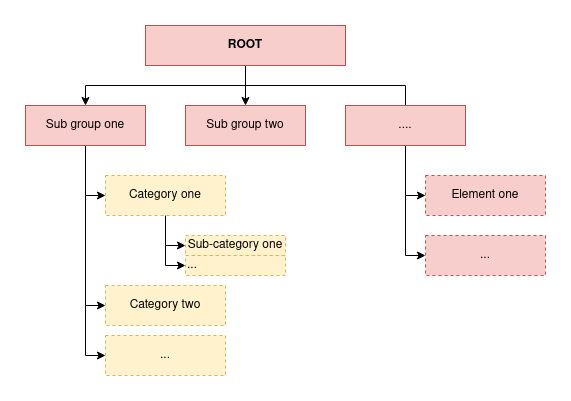
The example below would result in a menu with the options Women, Men and Accessories and their respective sub-items (such as Bags and Tops).
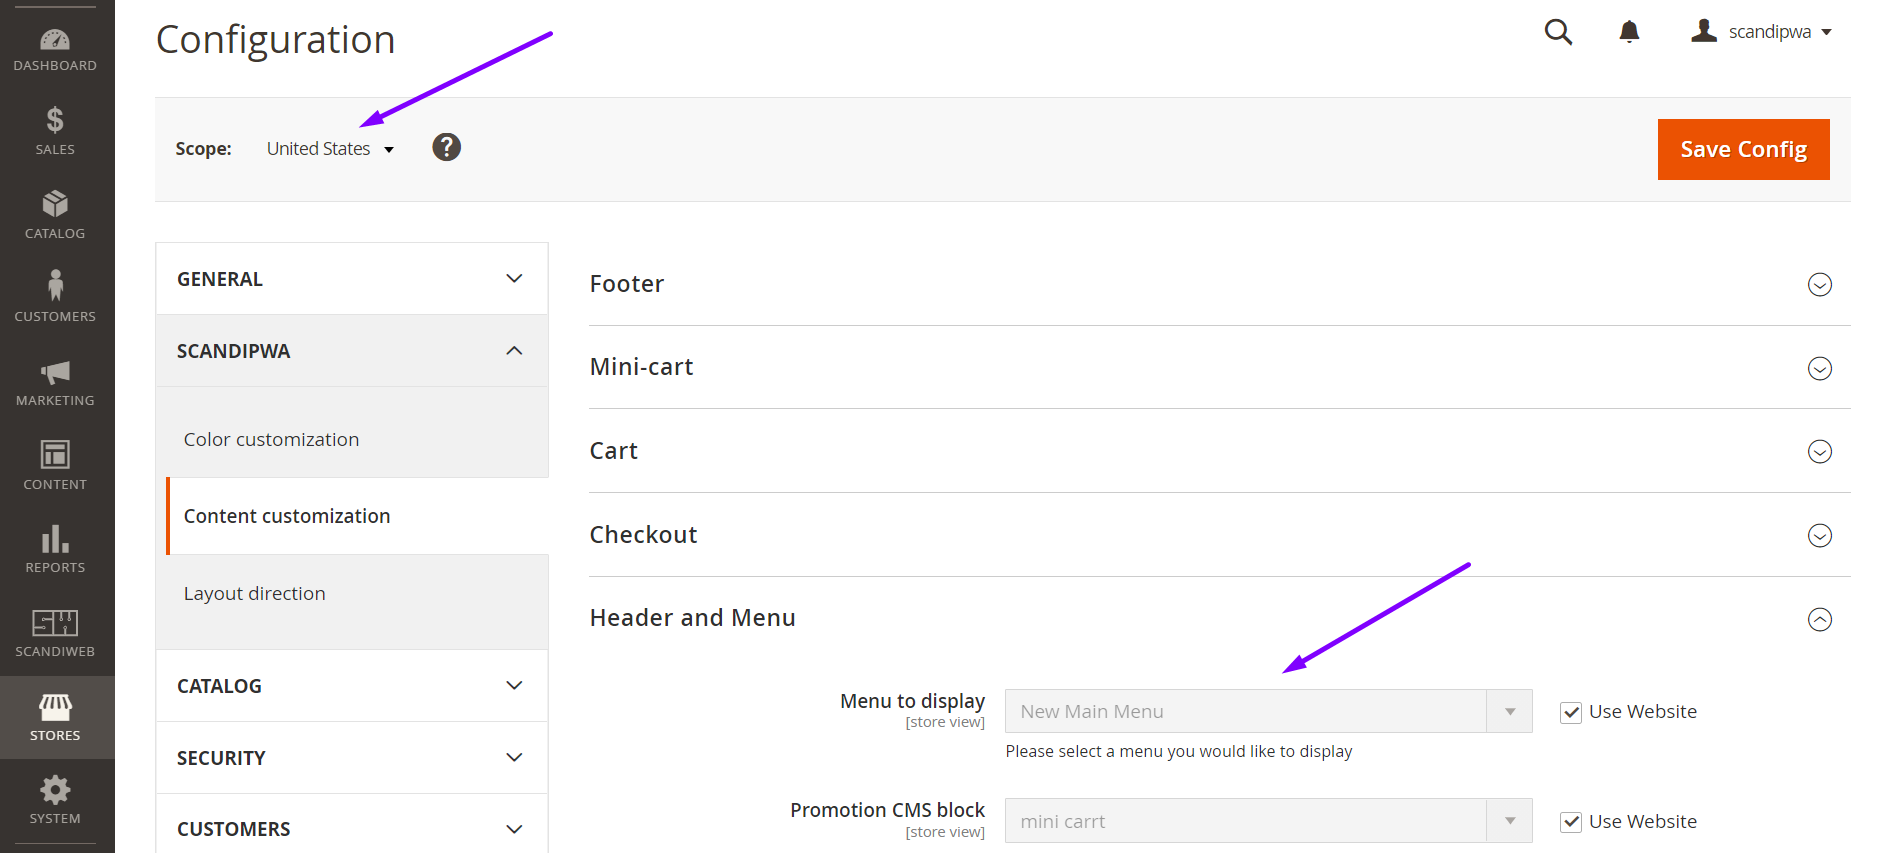
3.4. How to enable/disable menu per store
To enable a menu for a specific store, make sure you have selected the store in the menu configuration on step 3.1.4.ii.
Then, select the correct menu id in the configuration:
- Open admin panel
- Using the side panel menu, go to:
Stores -> Settings -> Configuration - Find
Scopeand select the desired store view. - Using the menu dropdown, go to:
ScandiPWA -> Content Customization -> Header and Menu - Uncheck the checkbox
Use Website - Select the desired menu in
Menu to display - Tap
Save Config - Flush Cache Storage
4. For development
4.1. DB structure

4.2. GraphQl structure
type Query {
    scandiwebMenu(identifier: String!): Menu @resolver(class: "ScandiPWA\\MenuOrganizer\\Model\\Resolver\\Menu")
}

type Menu {
    menu_id: ID
    title: String
    is_active: Boolean
    css_class: String
    items: [Item]
}

type Item  {
    item_id: ID
    icon: String
    title: String
    item_class: String @doc(description: "CSS class of the item")
    parent_id: Int
    url: String
    url_type: Int @doc(description: "0 - regular link, 1 - cms page, 2 - category")
    position: Int
    is_active: Boolean
    cms_page_identifier: String
    is_promo: Int @doc(description: "Boolean if category is promotional category")
    promo_image: String @doc(description: "Promo category image background")
    category_id: Int @doc(description: "Category id")
}
Or check: schema.graphqls
4.3. Quick file access:
- Form for creating menu: General.php
- Form for creating item: Form.php
- Menu model: Item.php | ResourceModel/Item.php
- Item model: Menu.php | ResourceModel/Item.php
- Menu resolver: Menu.php
- DB schema: db_schema.xml