internetgalerie / ig-mfa-frontend
MFA for Frontend
Installs: 377
Dependents: 0
Suggesters: 0
Security: 0
Stars: 0
Watchers: 1
Forks: 1
Open Issues: 1
Type:typo3-cms-extension
pkg:composer/internetgalerie/ig-mfa-frontend
Requires
- typo3/cms-core: ^13.4 || ^14
Replaces
- typo3-ter/ig-mfa-frontend: v0.9.3
README
The extension enables Multi Factor Authentication (MFA) for frontend user.
1. What does it do?
The extension extends the login mechanism with MFA. MFA is done in a separate step with its own template. There is also a controller with which frontend users can set up MFA. All installed MFA providers are supported by default; this can be restricted using TypoScript.
2. Usage
1) Installation
The recommended way to install the extension is by using Composer. In your Composer based TYPO3 project root, just do composer require internetgalerie/ig-mfa-frontend.
2) TypoScript
| property | Description | Default |
|---|---|---|
| recommendedMfaProvider | Recommended Provider (marked) | totp |
| allowedProviders | Allowed Provider (leave empty for all) | |
| cssFileBase | Path to the Css Base file from TYPO3 backend | EXT:ig_mfa_frontend/Resources/Public/Css/base.css |
| cssFile | Path to the Css file used | EXT:ig_mfa_frontend/Resources/Public/Css/configuration.css |
| jsFile | Path to the Js file used | EXT:ig_mfa_frontend/Resources/Public/JavaScript/ig-mfa-frontend.js |
- base.css includes styles from TYPO3 backend, including Bootstrap, making it bulky and ugly for the frontend. TODO: Clean up and optimize, possibly add and call provider frontend setup if available (to get better html)
3) Providers
tested providers:
| Provider ID | Description | Extension | Example |
|---|---|---|---|
| totp | Time-based One-time Password (TOTP) | Core | Google Authenticator |
| recovery-codes | One-Time-Password (OTP) | Core | Transaction Authentication Number (TAN) |
| webauthn-platform | Built-in Authenticators (FIDO2) | bnf/mfa-webauthn | Incorporated fingerprint scanner |
| webauthn | Security Keys (needs https) | bnf/mfa-webauthn | hardware devices containing cryptographic keys |
| yubikey | YubiKey OTP MFA authentication | derhansen/mfa_yubikey | YubiKey |
4) Extension Setup
| Setup | Description |
|---|---|
| requireMfa | is MFA required for login (users without MFA cannot log in) |
| requireMfaForFrontendUsergroup | if requireMfa is active, MFA is only mandatory for this frontend usergroup |
3. Core Changes
Changes to show and delete MFA Providers for frontend users in Backend (not required for frontend functionality)
TCA
MfaInfoElement.php
File: vendor/typo3/cms-backend/Classes/Form/Element/MfaInfoElement.php at line 69 add
$targetUser->checkPid = false;
looks like:
        // Initialize a user based on the current table name
        $targetUser = $tableName === 'be_users'
            ? GeneralUtility::makeInstance(BackendUserAuthentication::class)
            : GeneralUtility::makeInstance(FrontendUserAuthentication::class);

        $userId = (int)($this->data['databaseRow'][$targetUser->userid_column] ?? 0);
        $targetUser->enablecolumns = ['deleted' => true];
        // CHANGES BEGIN
        $targetUser->checkPid = false;
        // CHANGES END
        $targetUser->setBeUserByUid($userId);
MfaAjaxController.php
File vendor/typo3/cms-backend/Classes/Controller/MfaAjaxController.php at line 152
$user->checkPid = false;
looks like:
        $user->enablecolumns = ['deleted' => true];
        // CHANGES BEGIN
        $user->checkPid = false;
        // CHANGES END
        $user->setBeUserByUid($userId);
Middleware
FrontendUserAuthenticator.php
Currently, we are overriding the FrontendUserAuthenticator middleware in this extension. We have added the handling of the MfaRequiredException exception and subsequently dispatching an event. So no changes are required.
4. Screenshots
MFA Setup
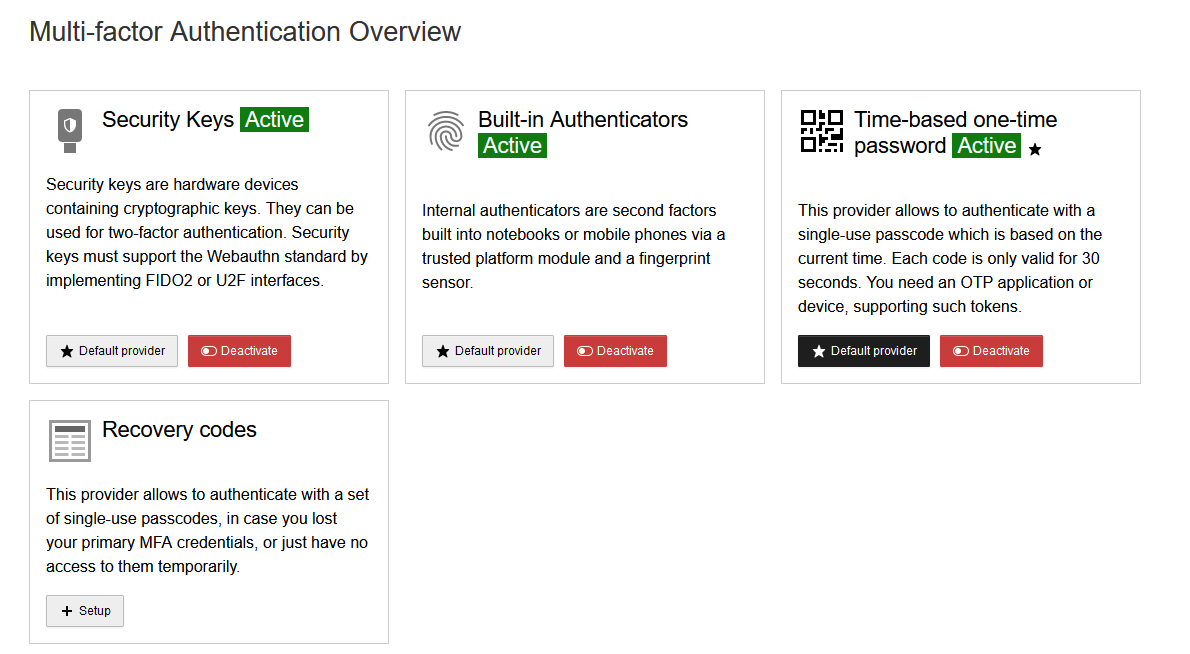
Overview of Available MFA Providers
The Setup plugin starts with an overview of the available MFA providers for logged-in users. Users can select and activate their preferred methods.
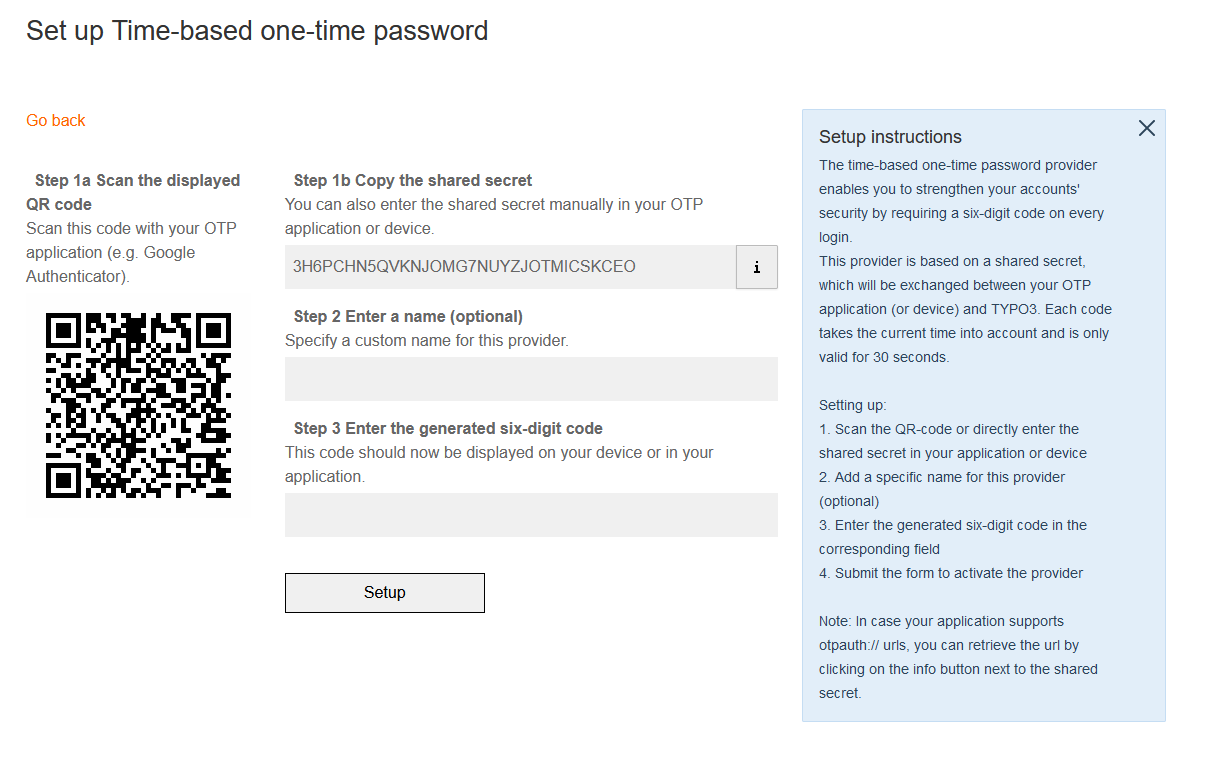
Example: Setting up Time-based One-Time Password
This image demonstrates the setup process for a Time-based One-Time Password MFA method. Users can follow these steps to configure their MFA device.
Login Process
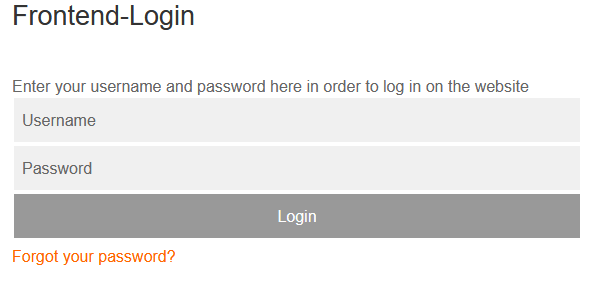
Step 1: felogin Login Form
Users start by filling out the login form provided by felogin extension.
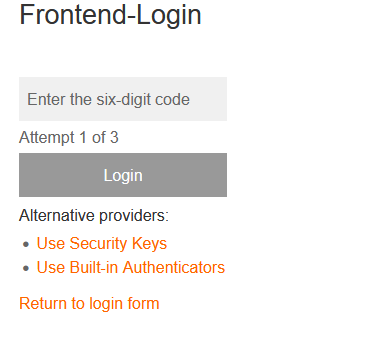
Step 2: MFA Login Form
After successful authentication with the username and password, users are prompted with the MFA (Multi-Factor Authentication) login form.
default template is EXT:ig_mfa_frontend/Resources/Private/Extensions/felogin/Templates/Login/Mfa.html


