codiiv / laravel-taxonomies
Taxonomies for Laravel (Similar to Wordpress)
Maintainers
Package info
github.com/codiiv/laravel-taxonomies
Language:JavaScript
pkg:composer/codiiv/laravel-taxonomies
Requires
- codiiv/extrameta: >=1.1
- laravel/framework: ^6.0 || ^7.0 || ^8.0 || ^9.0 || ^10.0 || ^11.0
Requires (Dev)
- codiiv/extrameta: >=1.1
- laravel/laravel: ^6.0 || ^7.0 || ^8.0 || ^9.0 || ^10.0 || ^11.0
This package is auto-updated.
Last update: 2026-07-20 19:02:56 UTC
README
I =================== INSTALLATION =======================
Background: This package arises from the necessity to create taxonomies in various projects I create for my clients. It can be used in any other project. It comes with minimal CSS so that it can be adjustable as needed
-
Include the package in your project
composer require "codiiv/laravel-taxonomies" -
Add the service provider to your
config/app.phpproviders array:If you're installing on Laravel 5.5+ skip this step
Codiiv\Taxonomies\TaxonomiesServiceProvider::class, -
Now that we have published a few new files to our application we need to reload them with the following command:
composer dump-autoload -
Publish the Vendor Assets files by running:
php artisan vendor:publish --provider="Codiiv\Taxonomies\TaxonomiesServiceProvider"This will create a taxonomies folder in the public assets. It will also create a configuration file in the config/taxonomies.php
To set up the taxonomies path, edit the file accordingly.
-
Run Your migrations:
php artisan migrateQuick tip: Make sure that you've created a database and added your database credentials in your
.envfile. -
Lastly, CONFIGURE SUPER ADMIN account.
Run this command
php artisan taxonomies:superadmin someemail@somedomain.tldreplacing someemail@somedomain.tld by the email of the user you want to set as super admin. Note that you can only have one super admin. -
CONFIGURE TAXONOMY Paths
After running the vendor:publish --force command
Now, visit your site.com/dashboard/taxonomies and you should see your new forum admin once logged in!
II ======================= UPGRADING =======================
Coming soon
III ======================= USAGE =======================
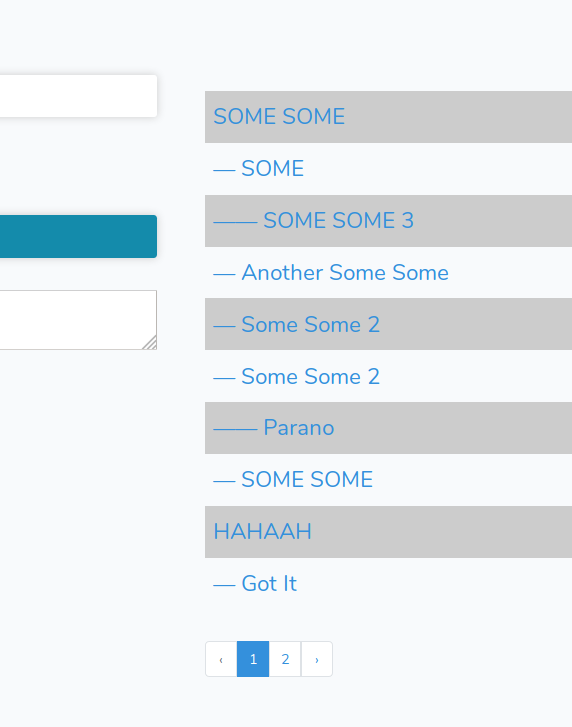
1.$paginatedTerms global is a list of paginated terms of a particular taxonomy. Useful if you want to create a list of the items in a paginated way. It is set in the Service Provider and takes the taxonomy from the URL ?taxonomy=XYZ or takes the defgault, which is category e.g
         <ul class="the-items">
           @foreach($paginatedTerms as $key => $term )
           <li data-value="{{ $term->id }}" class="level-{{ $term->level }}">
                <a href="{{ url(Config::get('taxonomies.taxonomy_path')).'?taxonomy='.$taxonomy.'&term_id='.$term->id }}">
                    {{ $term->pointer.' '.$term->name }}
                </a>
           </li>
           @endforeach
         </ul>
         <div class="pagination-container">
           {{ $paginatedTerms->links() }}
         </div>
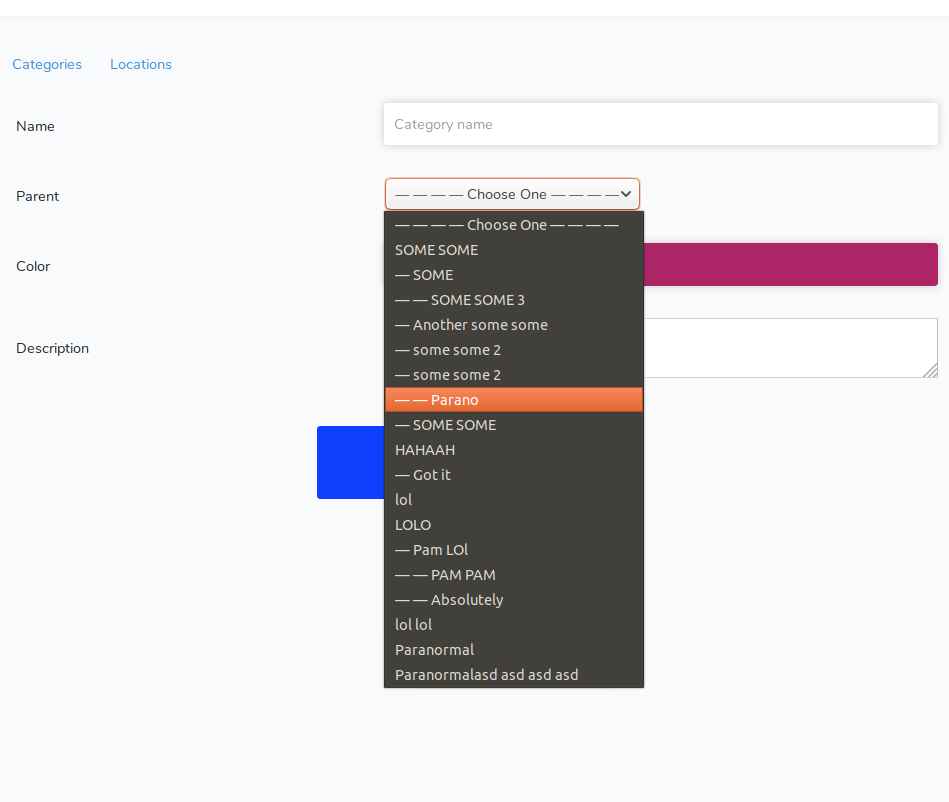
DROPDOWN
$Taxonomy and $taxonomy are set globally via the service provider. $Taxonomy is the DB object while the $taxonomy is set by the taxonomy query string parameter or lack thereof, in which case the default taxonomy is picked up
<?php $terms = $Taxonomy::sortedTerms($taxonomy, null, 0, []); ?>
    <select class="parent" name="parent">
       <option value=""> — — — — {{ __("Choose One") }} — — — — </option>
       @foreach($terms as $key => $term)
          <option value="{{ $term->id }}" class="level-{{ $term->level }}">{{ $term->pointer.' '.$term->name }}</option>
       @endforeach
    </select>
-
Configure Default Values
Once you have run the
php artisan vendor:publish --provider="Codiiv\Taxonomies\TaxonomiesServiceProvider"that command will copy the taxonomies.php toconfig/taxonomies.php. You can change the vaiables as needed
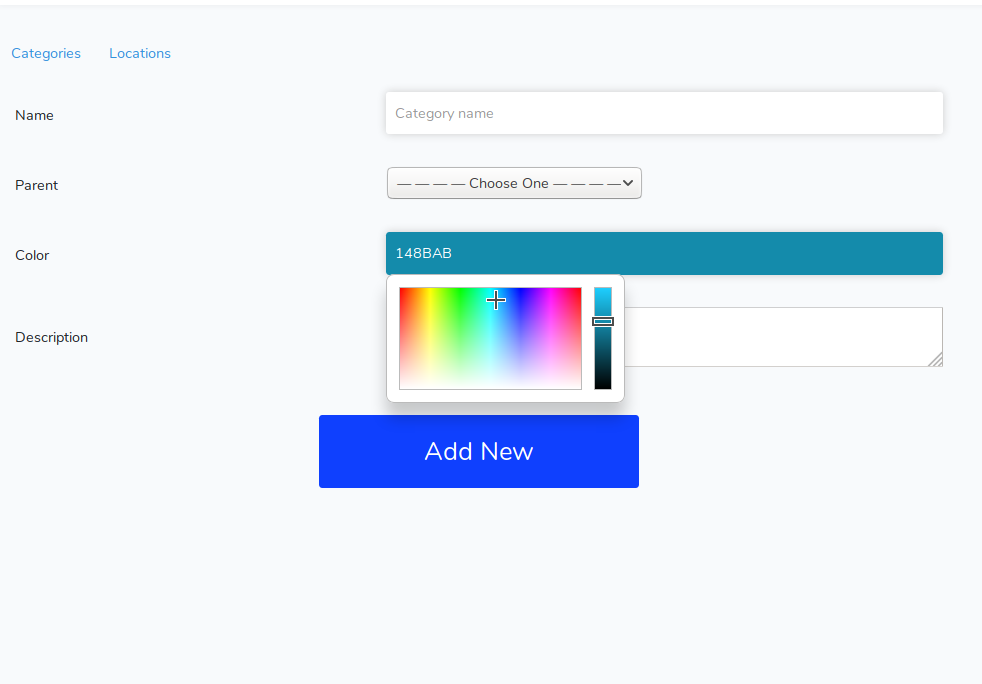
IV ======================= SCREENSHOTS =======================