bright-cloud-studio / constant-contact-integration
Establish a connection between Contao and Constant Contact. Set up forms to automatically create Contacts and add them to Lists
Maintainers
Package info
github.com/bright-cloud-studio/constant-contact-integration
Type:contao-module
pkg:composer/bright-cloud-studio/constant-contact-integration
Requires
- php: ^8.0
- contao/core-bundle: ^4.13
- phpfui/constantcontact: V22.12.0
Requires (Dev)
- contao/manager-plugin: ^2.0
README
This package will establish a connection to the Constant Contact API from Contao, allow you to link a Contao Form to a Constant Contact List and Contao Form Fields to Constant Contact Fields. You can either check an option for a form with implied permission, like a simple form with just an email field and a submit button, or express permission by adding a checkbox to your form. Follow the directions below to get started.
NOTE: To keep your OAuth2 connection alive you will need to disable the default Contao Cron system in the Settings page by checking the "Disable the command scheduler" option and manually set up a cron call using the Web URL on your server. For more information check the Contao Manual here: https://docs.contao.org/dev/framework/cron/#web-url
First, activate the "Disable the command scheduler" option in Contao's Settings page

Then, manually set up a Cron job to Contao's cron URl and have it trigger minutely. Your OAuth2 keys will refresh hourly.

Setup Directions
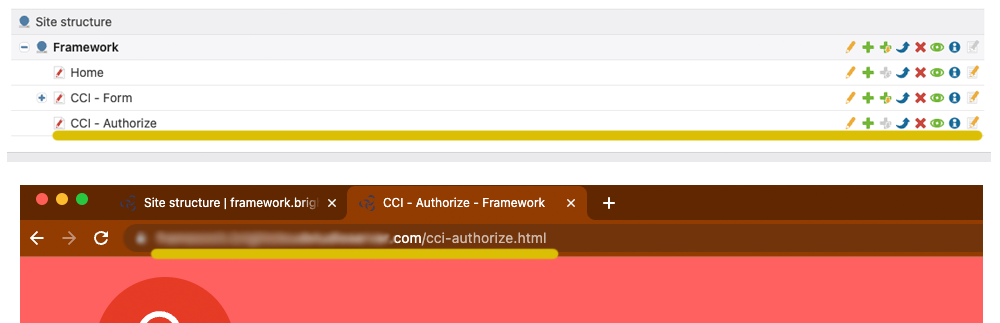
- Step One: First things first, you will need to establish a connection with Constant Contact. To do this you will need to set up a page specifically for authorizing the connection. On Contao, set up a page for this purpose and copy its' unique URL. This will be our Redirect URL.
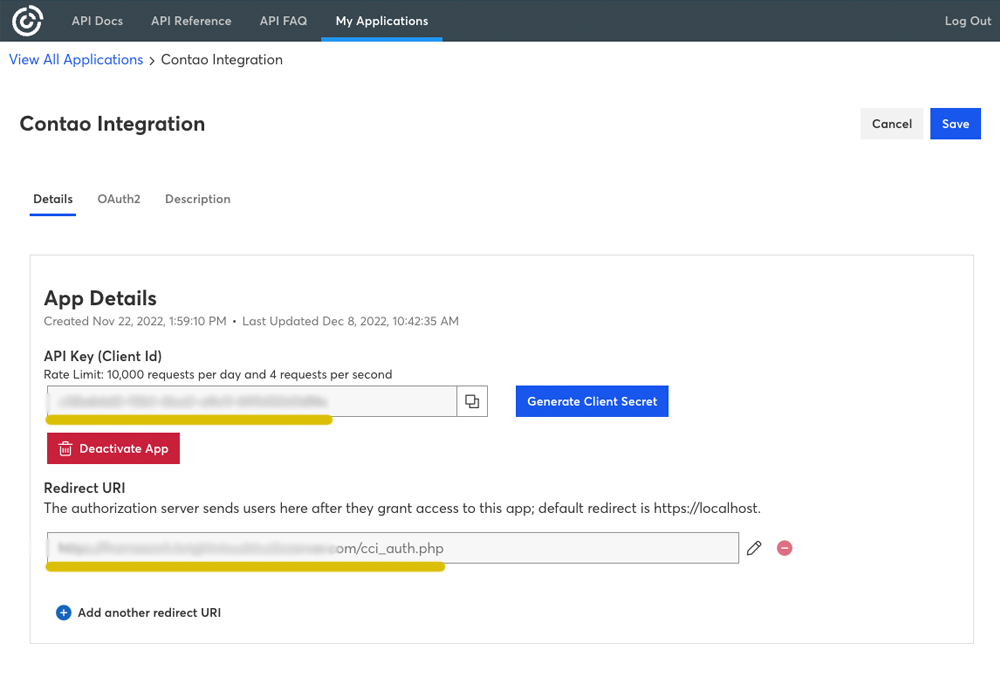
- Step Two: After creating a developer account for Constant Contact, we need to set up our Application. Create a new app, for "Application OAuth2 Settings" select the option "Authorization Code Flow and Implicit Flow" and for refresh token type choose "Rotating Refresh Token". Use the Redirect URL we got from Step One. Copy our API Key, Secret and Redirect URL and move onto Step Three.
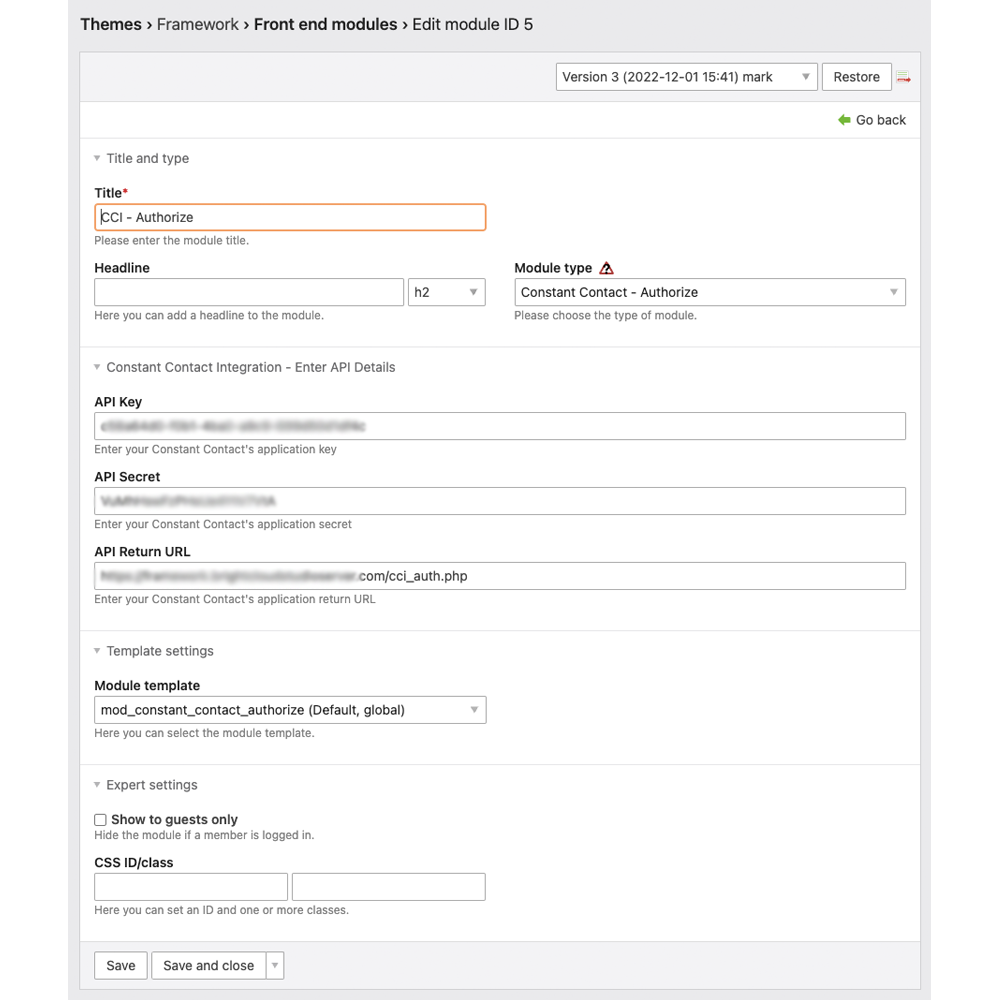
- Step Three: Within Contao, create a new "Constant Contact - Authorize" frontend module and fill in the API Key, Secret and Redirect URL.
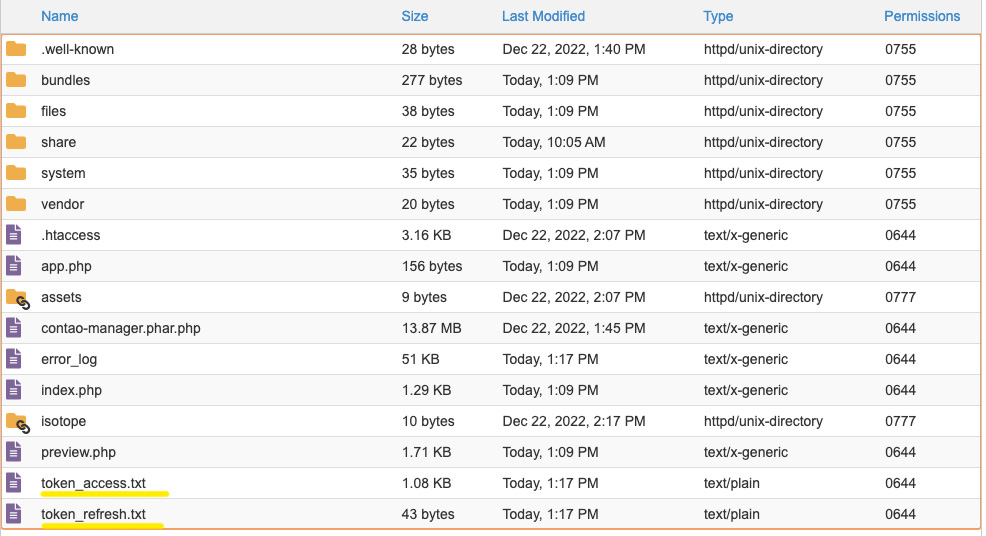
- Step Four: Add the newly created frontend module to the authorize page we set up previously, then view that page. Once you view the page a link titled "Click here to finalize connection" will show, click it. If everything went as expected a message "You have successfully established a connection with the Constant Contact API" will display. To confirm everything worked, in your servers file browser navigate to the "public_html\web" folder and you should find two newly created files "token_access.txt" and "token_refresh.txt".
Congradulations! You have successfully connected your Contao installation with the Constant Contact API.
Now that you have successfully established your connection, let me explain how to use it.
- Step One: In the Contao Backend, when viewing the Settings page for a Form you will see two new options towards the bottom of the page.
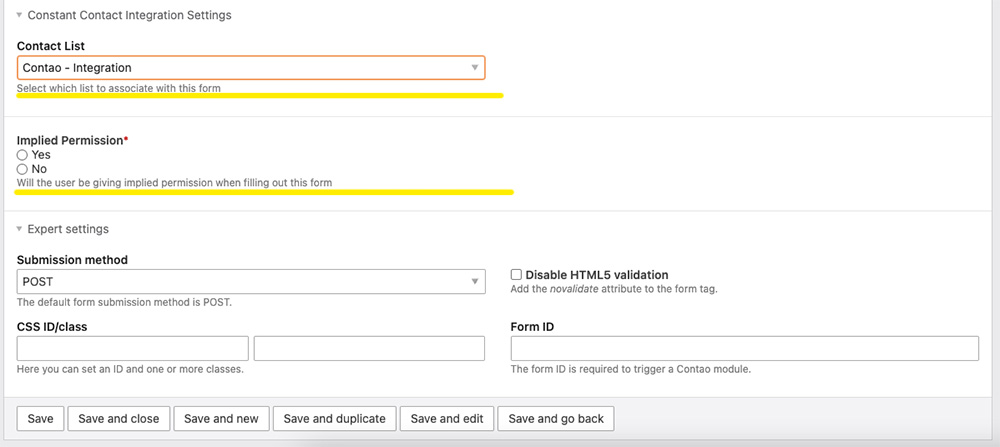
The first is "Contact List", this will select which Contact List the data will be added to. Select the list you wish to create a new contact in.
Second is "Implied Permission". This option is for forms that make it clear the user is signing up to be emailed. Select "Yes" if your form doesn't have a checkbox for the user to choose to be added to a mailing list.
- Step Two: Now, when viewing a Settings page for a Form Field you will find a new option "Linked Field"

This will link the form field to a Constant Contact field. Whichever field you select, that is where this form field's data will be entered within Constant Contact.
- Step Four (Optional): In the event you selected "No" for the "Implied Permission" option, you will need to add a checkbox so the user can give you express permission to be added to a mailing list. So, when you add a Checkbox form field a new option "Express Permission" will be shown. Activate the option if you do not have implied permission on your form.

That is all for now. View your form on the front end and submit it, then check Constant Contact to make sure your data came over. This is the first release and things aren't as clean or neat as I would like. I will be updating this until it is clean and stable, the code and the directions. For now, get started and have fun.