amasty / module-import-export-core
Import Export Core by Amasty
Maintainers
Package info
github.com/AmastyLtd/module-import-export-core
Type:magento2-module
pkg:composer/amasty/module-import-export-core
Requires
- php: >=7.3
README
Note: This free solution version is offered to let you evaluate our code quality. However, it does not include ready-made entities such as products, orders, and customers, which are necessary for using the import/export functionality. To perform any data migration, you will need to either create the mentioned entities yourself if you have the relevant expertise or purchase the full solution version on our website.
Explore a free version of the import and export solution for Magento 2. Install together with the Export Core and Import Core to see the interface and full scope of data transfer features. This package has the same code and architecture as the original paid Import and Export for Magento 2 extension but includes core functionality only suitable for manual data transfer. See the full scope of automatization features and entities available in the paid version in this demo or book a live demo with the Amasty team to get a consultation in real-time.
The paid version is available in Lite, Pro and Premium packages. Visit our webstore to choose the pricing plan. A free package is the Lite version of the full Import and Export for Magento 2 extension, but without ready-made entities for migration.
What is the Core package for?
Import & Export Core is a universal tool for data migration to or from Magento 2. The solution has a unique architecture and code structure without any intersections with the native import/export functionality developed by Magento. Even though a free package does not include any ready-made entities for migration, you can create compatibility with any entity you need. Import and Export Core is highly flexible and adaptive to any data presented in Magento and 3rd-party resources so that you could build integrations with the most complicated systems.
Free version features
With the help of this package you can:
- Perform manual one-time import or export of any entity: the built-in interface lets you migrate the data you need, but does not include automatization options. It means that each data transfer is supposed to be configured separately.
- Choose import behavior: it is possible to add, update, delete data or add/update simultaneously.
- Use 2 file formats: a free package includes CSV and XML formats support.
- Use 2 sources for data output and storage: upload or download files and use local directories.
- Configure the file for export: add header row, customize entity keys and set suitable field names in export files.
- Match file settings with Magento during import: add field names provided in a file to the configuration to import data correctly.
- Automatically modify the values: use text, numeric, date or custom modifiers to change the values before importing or exporting (for example, round prices or capitalize product names).
- Apply filters: import or export only relevant data by setting suitable for filtering parameters.
- Configure performance settings: adjust the number of parallel processes according to your server capabilities.
Installation
To install the package, run the following commands:
composer require amasty/module-import-export-corephp bin/magento setup:upgradephp bin/magento setup:di:compile php bin/magento setup:static-content:deploy (your locale)See more details in the Composer User Guide.
Import/Export Configuration & Flow
To run data migration, you need to create the required entity or entities (e.g. products, orders, customers) first. Let’s see how it works in the free version of the Magento 2 Order Import and Export module.
Export Configuration
Open the Export tab. Here you can choose the entity to export. As an example, we will export order items.
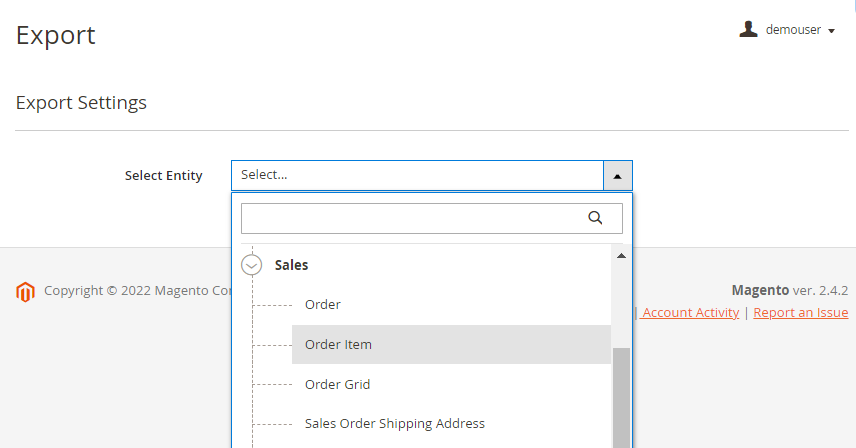
When the required entity is chosen, you can start Magento 2 export configuration.
Step 1. Configure the file type
It is possible to export files from Magento in an XML or CSV format.

If you choose a CSV file, you can also add:
- a header row;
- merge rows into one;
- duplicate parent entity data;
- set delimiters for fields and entity keys;
- define enclosure characters.
In other words, make your file structure suitable for the platform you are migrating data to.
Step 2. Set the file name
Provide the title of the file. Keep in mind that you can set a regular expression to fill in the date automatically.

Step 3. Define the destination
When the configuration is finished, you’ll be able to download a ready file. Meanwhile, you can output the file to the local server.

Step 4. Fields configuration
In this part, you need to choose what data should be put in the file and how it should be displayed and named. File filling has a tree-structure logic, meaning that at first, you need to choose the key entities to enable, and then select the subentities required for the file.
Check the detailed instructions on each step in this guide.
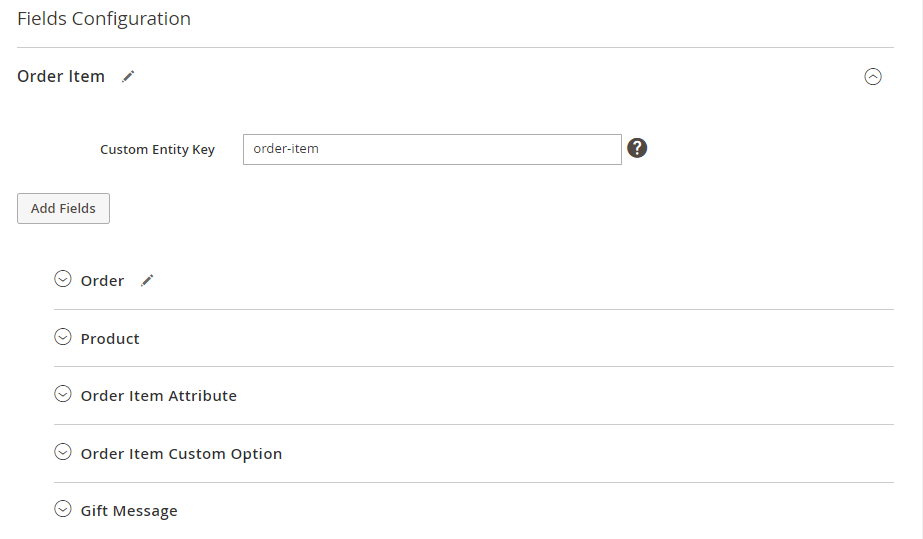
Start with the naming configuration. Customize entity keys that should be displayed in the columns.
- Custom entity key — set the key that should be placed before the title of the main entity columns.
- Output entity key — provide custom keys to replace the default ones in the subentities-related columns.

As we want to export order items, add the fields you need in the pop-up window.

You can remove the fields and reorder them by using drag-and-drop. Be aware that the file reproduces the order set during the configuration.

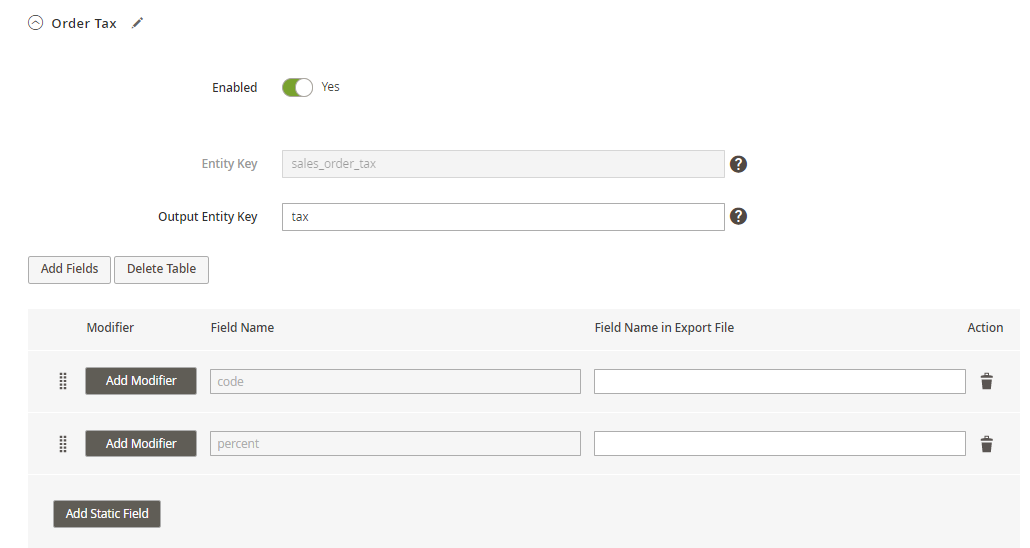
Customize column titles for each field in order to match the requirement of the platform you are integrating with.

Also, use modifiers to change the values if needed. You can modify texts, numbers, dates and some additional parameters. Learn more about each modifier in this section.

Last, choose additional entities to export, e.g. Orders / Order Tax / Shipment, etc. and configure them in the same way.
Step 5. Add filters
Select the filters to sort the data that should be placed in the file. Filter by any entity and value enabled during the fields configuration.

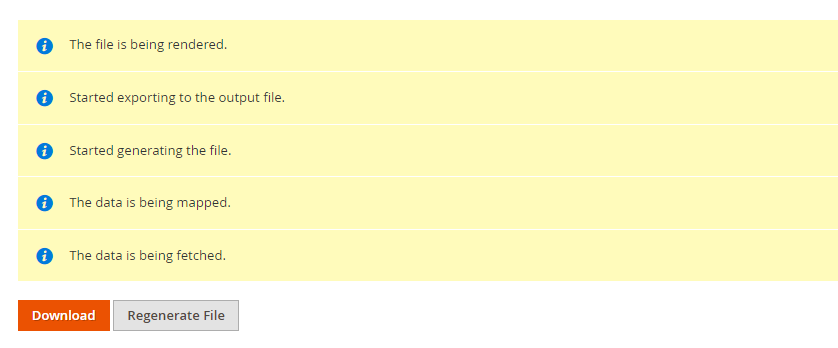
Once everything is configured, click the Continue button to generate the file.
Import Configuration
The logic of the Magento 2 import process is the same as for the export, but with some specific differences. As for the export, you need to choose the entity you want to import.

Step 1. Select import behavior
Using this interface, you can add, update or delete the data provided in the file from Magento.

Additionally, set the validation strategy: skip errors or stop the process if there are some.
Step 2. Choose file type
Similar to export, Magento 2 can import CSV and XML files.

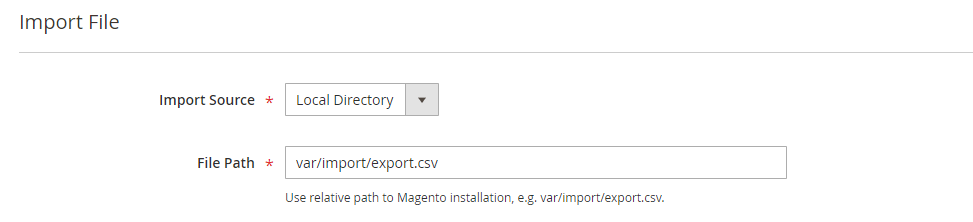
Step 3. Provide import source
Here you can upload the file manually or specify the path of the local directory.
Step 4. Configure fields mapping
If we compare it with the export, the import configuration has a reverse algorithm. Closely review the file you want to transfer — add the fields, subentities (e.g. Magento inventory import) and match column names so that Magento could extract data correctly. See the detailed description in this section of the guide.

Please, note that Magento has a number of required fields that should be added to import data. Each entity has specific obligatory fields.
Use the sample file provided in the settings if needed.

Step 5. Enable filtering
No need to import all data provided in the file — activate specific filters if you want to transfer only relevant information.

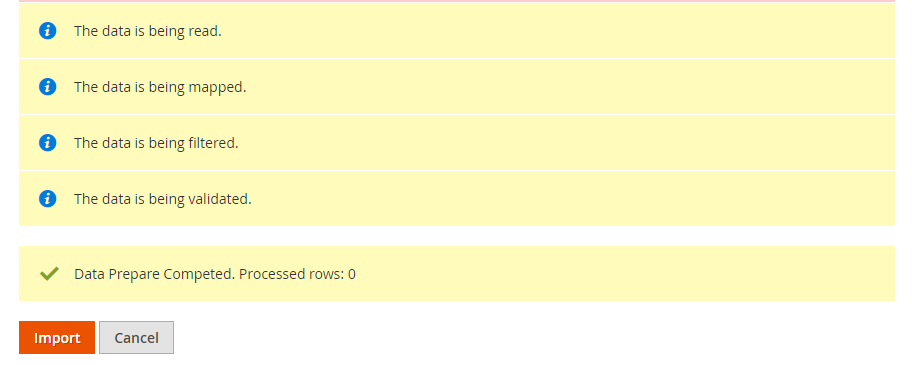
Step 5. Validate the configuration
If ready, click the Check Data button to validate the settings.

Correct the mistakes (if there are any) and retry. If the configuration is correct, you can start the importing process.
Full Version Overview & Pricing Plans
The full solution has 3 pricing plans: Lite, Pro and Premium. Unlike the free extension, full versions let you import and export Magento 2 orders, products, categories and other entities without additional development. Moreover, each entity includes a set of options to cover the most sophisticated business needs — for example, you can import products to Magento 2 in a CSV format already with images by specifying the relevant path.
Key features of each solution:
Lite
- Manual import/export tasks (has the same interface as the free version)
- 3 ready-made entities: order, product, customer
- 2 file formats: CSV, XML
- 2 sources: file upload/local directory
Pro
- One-time manual import/export tasks (has the same interface as the free version)
- Additional interface to automate import and export tasks using cron jobs
- 3 entities: order, product, customer
- 6 file formats: CSV, XML, ODS, XLSX, Template, JSON
- 9 file sources: File Upload, FTP/SFTP, Direct URL, Google Sheets, REST API Endpoint, Dropbox, Google Drive, Email for export
- Import/export history
Premium
- Fully automated data synchronization of all entities using profiles
- Automatic profiles execution
- One-time manual import/export tasks
- 9 entities: orders, products, customers, CMS blocks and pages, URL rewrites, EAV attributes, catalog price rules, cart price rules, search terms and synonyms
- Automation using cron jobs
- 6 file formats: CSV, XML, ODS, XLSX, Template, JSON
- 9 file sources: File Upload, FTP/SFTP, Direct URL, Google Sheets, REST API Endpoint, Dropbox, Google Drive, Email for export
- Import/export histories and profile running logs
If you need a specific entity, but with the automation options, you can purchase the main ones separately:
-> Import Orders
-> Export Orders
-> Import Products
-> Export Products
-> Import Customers
-> Export Customers
Troubleshooting
Have any questions? Feel free to contact us!
Want us to develop a custom integration? Find the details here..
Other Amasty extensions
-> Sales Reps and Dealers for Magento 2-> RMA for Magento 2
-> Reward Points for Magento 2
-> Request a Quote for Magento 2
-> Reindex from Admin for Magento 2
-> Recently Viewed Products Popup for Magento 2
-> Quick View for Magento 2
-> Quick Order for Magento 2
-> Push Notifications for Magento 2
-> Promo Banners for Magento 2
-> Product Tabs for Magento 2
-> Product Parts Finder for Magento 2
-> Product Labels for Magento 2
-> Product Feed for Magento 2
-> Product Feed
-> Product Attachments
-> Out of Stock Notification
-> Order Attributes