aldeebhasan / fast-bi
This package will help you to add a fully customized widgets to your project
Installs: 40
Dependents: 0
Suggesters: 0
Security: 0
Stars: 2
Watchers: 1
Forks: 0
Open Issues: 0
pkg:composer/aldeebhasan/fast-bi
Requires
- php: >=8.0
- ext-json: *
Requires (Dev)
- phpunit/phpunit: ^9.3
README
Fast-Bi is a light weight Business Intelligence dashboard manager for all php projects.
Installation
Install Fast-Bi using composer:
composer require aldeebhasan/fast-bi
Requirements
Fast-Bi require php 8.0 or later versions. it can work on any platform that use php like laravel,codeigniter,symphony and so on.
Main features and concepts
Fast-Bi enable you to add different kind of widgets to your dashboard. The main component is Widget, which can
use Dimension, Metric, or Raw arrays to fully customize the desired widget.
Dimensions
Dimension is a data container that can take any array as input, do some transformation and preparation over it in
order to obtain the desired data. The Dimension can be considered as an axis for the charts, column for the table with
predefined functionalities.
Kind of Dimensions:
- dateTime : transform the input to datetime format
- string : transform the input to strings
- number : transform the input to float format
- raw : transform the input to custom format
How to define a new dimension:
use Aldeebhasan\FastBi\Manager\Dimensions;
Dimensions::string('dimension-1',[1,2,4])->build();
Dimensions::number('dimension-2',[1,2,4])->build();
Dimensions::dateTime('dimension-3',['2023-5-5', '2024-6-6'])->build();

// to retrieve the dimension data you can use the `getData()` function.
$dimension = Dimensions::string('dimension-1',[1,2,4])->build();
print($dimension->getData())
//result = ["1","2","4"]//
The dateTime dimension accept a format($format) function to format the resulted data.
example:
$dimension = Dimensions::dateTime('dimension',['2023-5-5', '2024-6-6'])->format('Y-m')->build();
print($dimension->getData())
//result = ["2023-5","2024-6"]//
To build your custom dimension you can use the raw dimension as follow:
Transformer will be applied over each item of the input array
$dimension = Dimensions::raw('dimension', [1, 2, 3, 4])
            ->setTransformer(fn ($x) => $x - 1)
            ->build();
print($dimension->getData())
//result = [0, 1, 2, 3]//
Metrics
Metric is a data container that can take any array as input and do some operation over it in order to obtain the
desired metric. The Metric can mainly be used to show some statistics.
Kind of Metrics:
- sum : get the sum of the input data
- max : get the maximum value of the input data
- min : get the minimum value of the input data
- median : get the median value of the input data
- avg : get the average value of the input data
- raw : get custom value of the input data
How to define a new metric:
use Aldeebhasan\FastBi\Manager\Metrics;
Metrics::sum('metric-1',[1,2,3])->build();
Metrics::max('metric-2',[1,2,3])->build();
Metrics::min('metric-3',[1,2,3])->build();
Metrics::median('metric-4',[1,2,3])->build();
Metrics::avg('metric-5',[1,2,3])->build();

// to retrieve the metric data you can use the `getData()` function.
$metric = Metrics::sum('metric-1',[1,2,3])->build();
print($metric->getData())
//result = 6//
To build your custom metric you can use the raw metric as follow:
Transformer will be applied over each item of the input array
$metric = Metrics::raw('name', [1, 2, 3])
->setMeasure(fn ($data) => count($data))
->build();
print($metric->getData())
//result = 3//
Widgets
The most important component of this package is the Widgets. Many type of widgets are predefined for you.
Each Widget has three main parts:
- labels : to customize the column name for table or the axis names, ..etc
- dimensions : to define the data you want to show or plot
- metrics : to show some statistics at the bottom of each widget
Table Widgets
use Aldeebhasan\FastBi\Manager\{Metrics,Dimensions,Widgets};

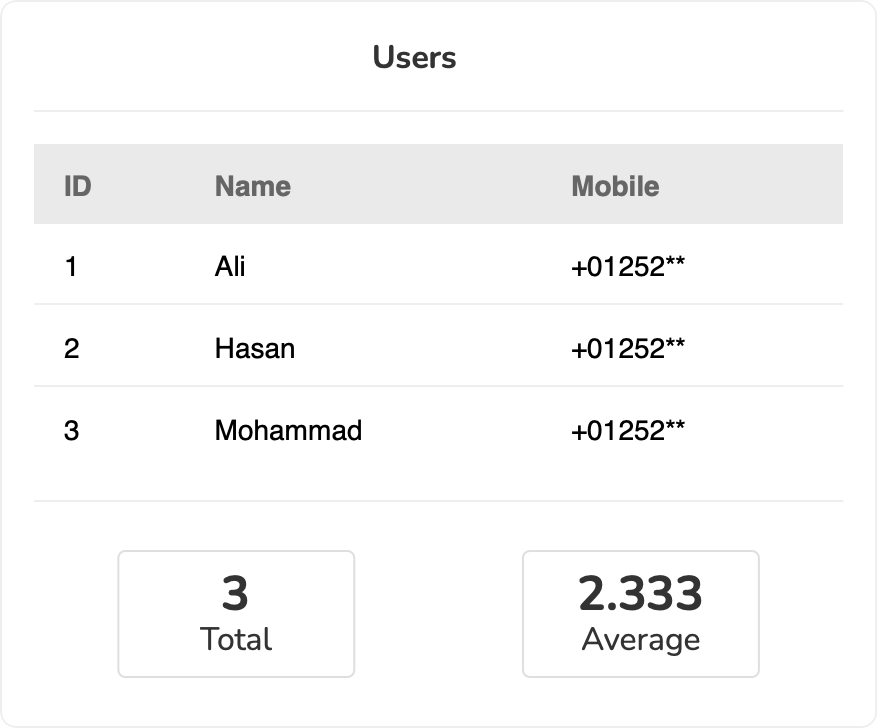
Widgets::table('users')
        ->labels(['ID', 'Name', 'mobile'])
        ->dimensions([
            Dimensions::number('ids',[1,2,3]),
            'names'=>['Ali', 'Hasan', 'Mohammad'],
            'mobile'=>Dimensions::string('mob',["+01252**","+01252**","+01252**"]),
        ])->render()
//with metrics
Widgets::table('users')
        ->labels(['ID', 'Name', 'mobile'])
        ->dimensions([
            Dimensions::number('ids',[1,2,3]),
            'names'=>['Ali', 'Hasan', 'Mohammad'],
            'mobile'=>Dimensions::string('mob',["+01252**","+01252**","+01252**"]),
        ])->metrics([
            Metrics::count('total',[1,2,4]),
            'average'=>Metrics::avg('avg',[1,2,4])
        ])->render()
| Default | With metrics |
|---|---|
 |
 |
Bar Chart Widgets
use Aldeebhasan\FastBi\Manager\{Metrics,Dimensions,Widgets};

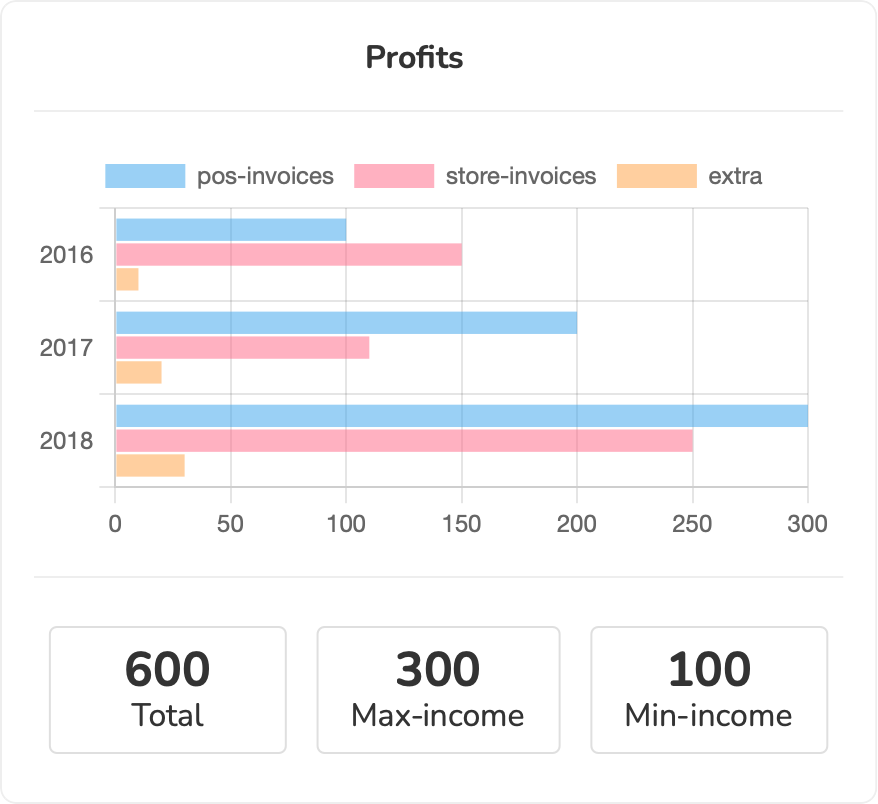
Widgets::barChart('profits')
        ->labels(['2016', '2017', '2018'])
        ->dimensions([
            Dimensions::number('pos-invoices',[100,200,300]),
            'store-invoices'=>[150,110,250],
            Dimensions::number('extra',[10,20,30]),
        ])->metrics([
            Metrics::sum('total',[100,200,300]),
            'max-income'=>Metrics::max('avg',[100,200,300]),
            'min-income'=>Metrics::min('avg',[100,200,300])
        ])->render()

//To make the bar chart horizontal, you can just add the following settings to the widget:
Widgets::barChart('profits')
        ->labels(['2016', '2017', '2018'])
        ->settings(['direction'=>'y'])   //// make the y axis as the base
        ->dimensions([
            Dimensions::number('pos-invoices',[100,200,300]),
            'store-invoices'=>[150,110,250],
            Dimensions::number('extra',[10,20,30]),
        ])->metrics([
            Metrics::sum('total',[100,200,300]),
            'max-income'=>Metrics::max('avg',[100,200,300]),
            'min-income'=>Metrics::min('avg',[100,200,300])
        ])->render()
| Vertical(default) | Horizontal |
|---|---|
 |
 |
Line Chart Widgets
use Aldeebhasan\FastBi\Manager\{Metrics,Dimensions,Widgets};

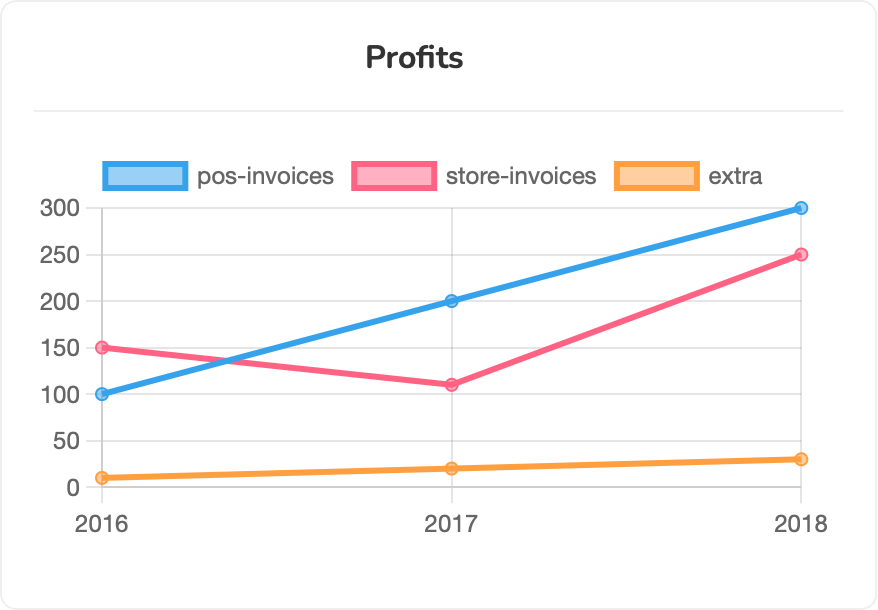
Widgets::lineChart('profits')
        ->labels(['2016', '2017', '2018'])
        ->dimensions([
            Dimensions::number('pos-invoices',[100,200,300]),
            'store-invoices'=>[150,110,250],
            Dimensions::number('extra',[10,20,30]),
        ])->render()

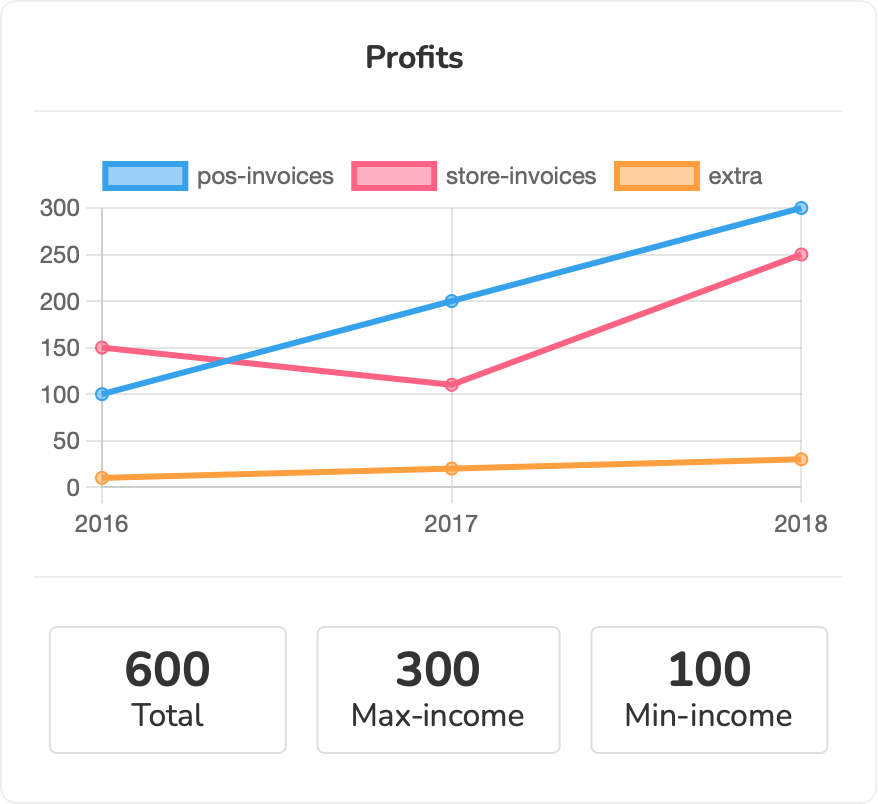
//with metrics
Widgets::lineChart('profits')
        ->labels(['2016', '2017', '2018'])
        ->dimensions([
            Dimensions::number('pos-invoices',[100,200,300]),
            'store-invoices'=>[150,110,250],
            Dimensions::number('extra',[10,20,30]),
        ])->metrics([
            Metrics::sum('total',[100,200,300]),
            'max-income'=>Metrics::max('avg',[100,200,300]),
            'min-income'=>Metrics::min('avg',[100,200,300])
        ])->render()
| Default | With metrics |
|---|---|
 |
 |
Pie Chart Widgets
use Aldeebhasan\FastBi\Manager\{Metrics,Dimensions,Widgets};

Widgets::pieChart('profits')
        ->labels(['2016', '2017', '2018'])
        ->dimensions([
            Dimensions::number('pos-invoices',[100,200,300]),
            'store-invoices'=>[150,110,250],
            Dimensions::number('extra',[10,20,30]),
        ])->render()

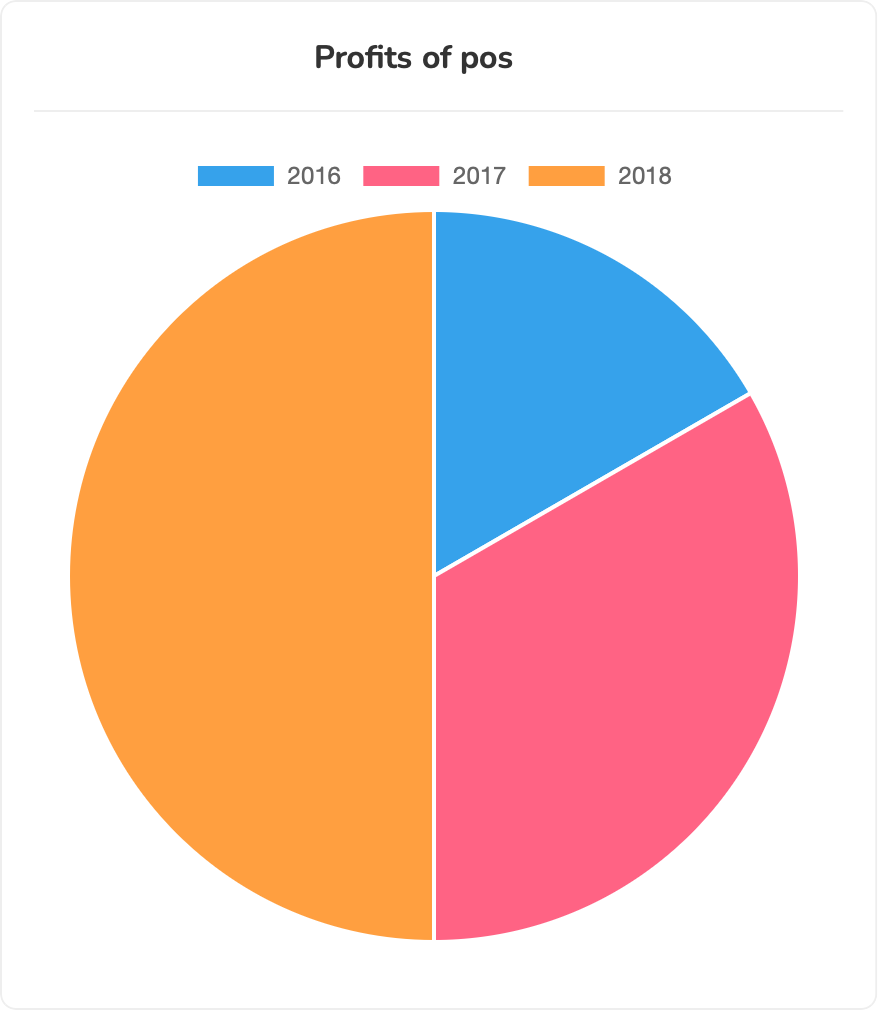
 Widgets::pieChart('profits of pos')
        ->labels(['2016', '2017', '2018'])
        ->dimensions([
            Dimensions::number('pos-invoices',[100,200,300]),
        ])->render()
| Single Dimension | Multi Dimensions |
|---|---|
 |
 |
Doughnut Chart Widgets
use Aldeebhasan\FastBi\Manager\{Metrics,Dimensions,Widgets};

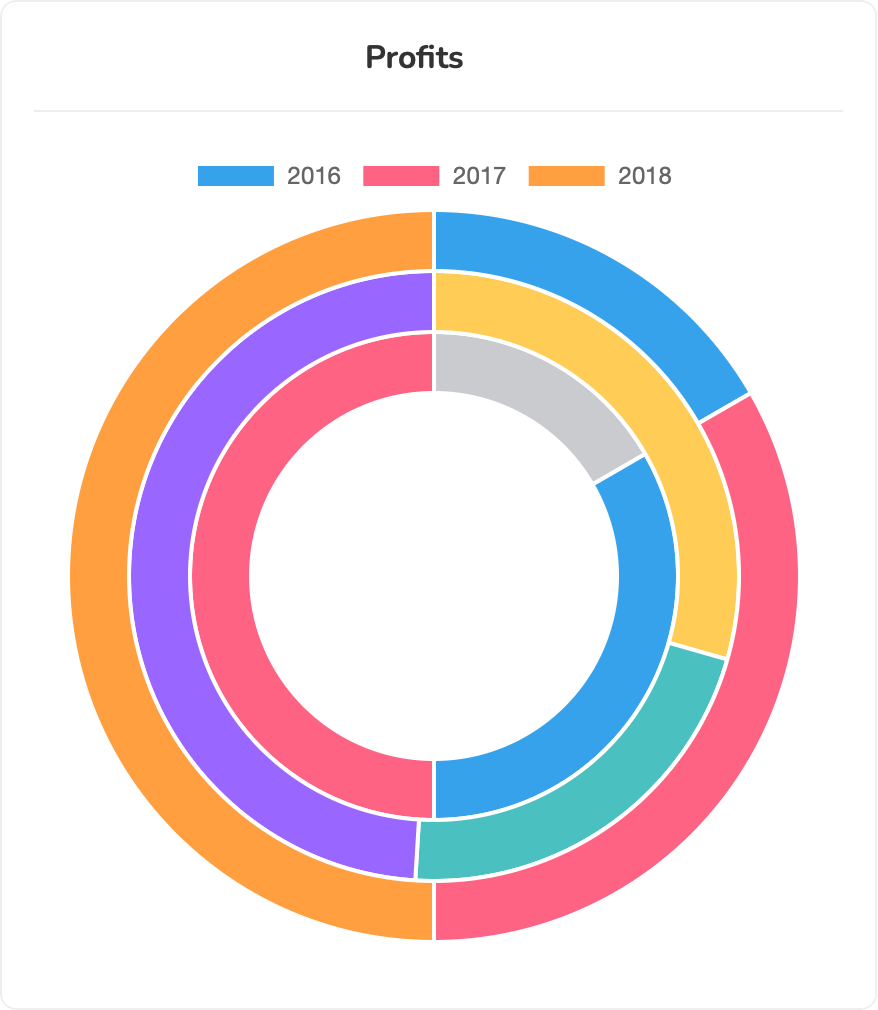
Widgets::doughnutChart('profits')
        ->labels(['2016', '2017', '2018'])
        ->dimensions([
            Dimensions::number('pos-invoices',[100,200,300]),
            'store-invoices'=>[150,110,250],
            Dimensions::number('extra',[10,20,30]),
        ])->render()

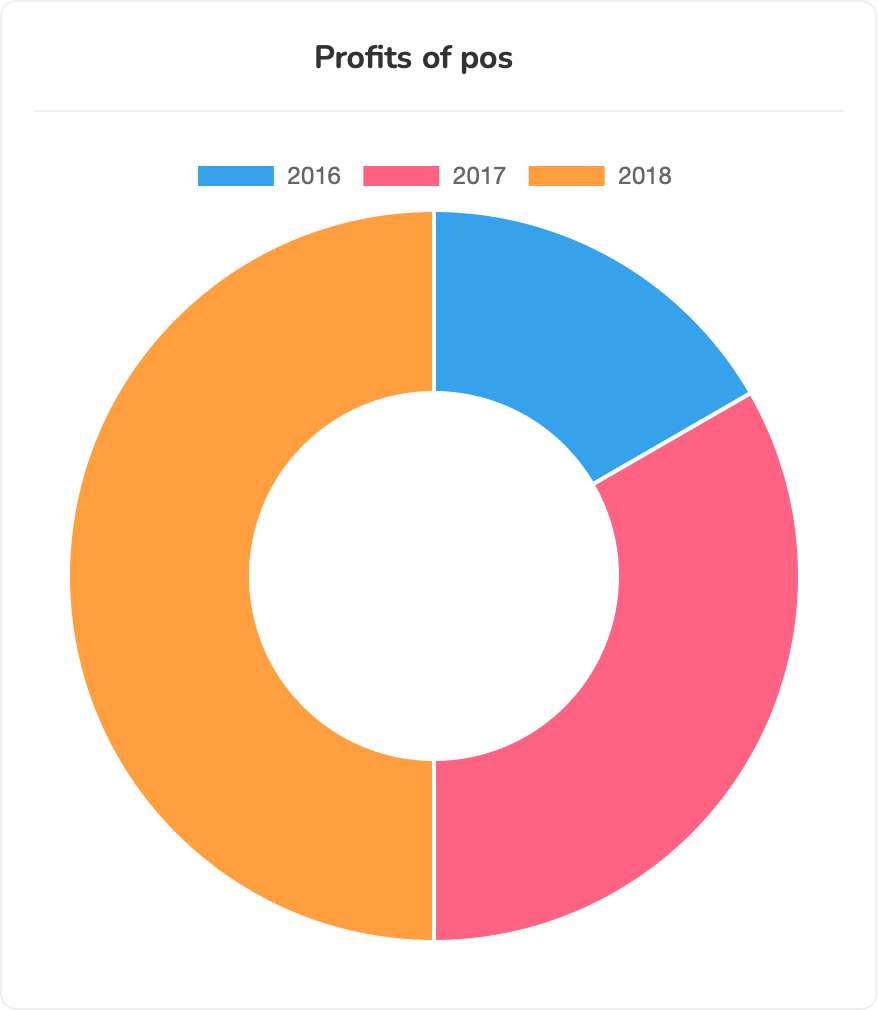
 Widgets::doughnutChart('profits of pos')
        ->labels(['2016', '2017', '2018'])
        ->dimensions([
            Dimensions::number('pos-invoices',[100,200,300]),
        ])->render()
| Single Dimension | Multi Dimensions |
|---|---|
 |
 |
Scatter Chart Widgets & Bubble Chart Widgets
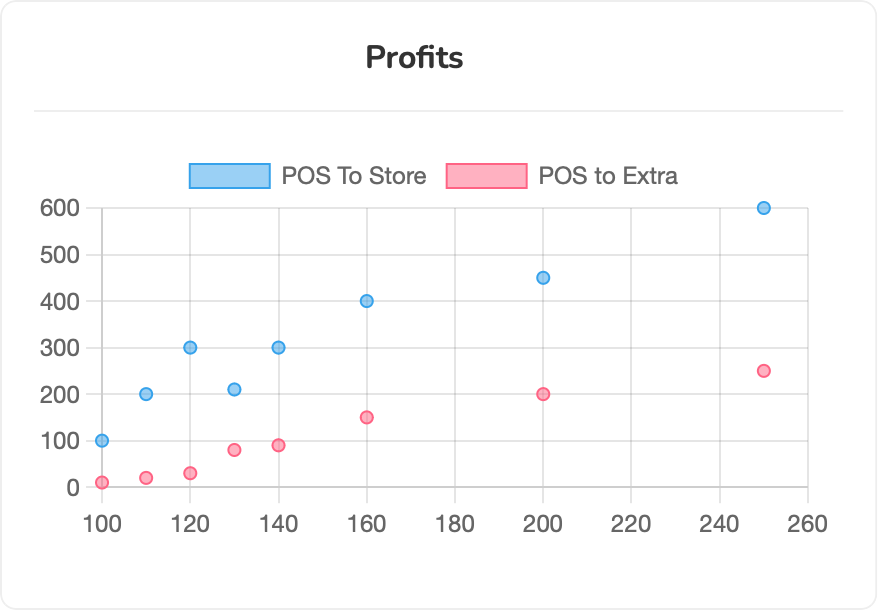
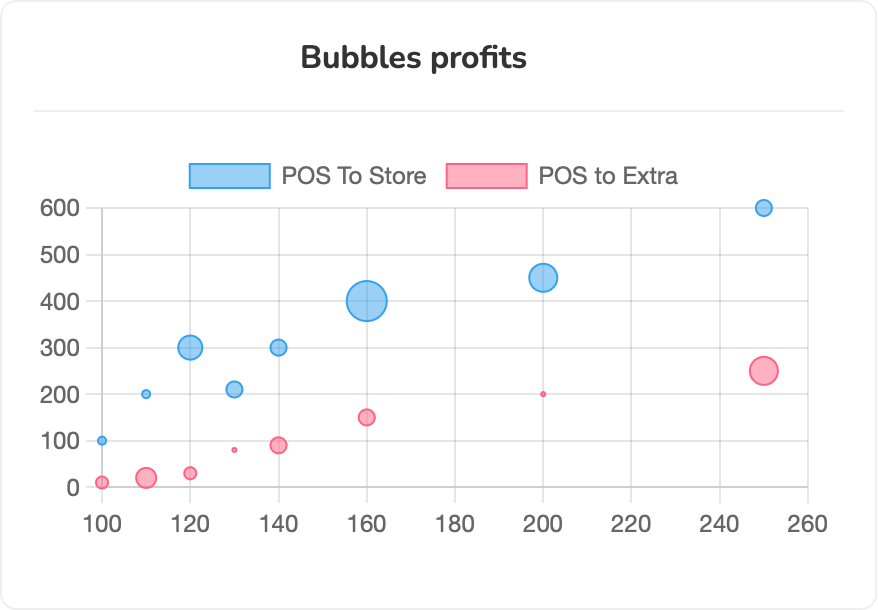
These two chart are very similar to each other. The main difference is that the bubble chart will have a different radius for each data point.
The default behaviour of these two charts is to make the first dimension is the base dimension which will be combined with all the other dimensions.
In the following example pos-invoices will be combined with store-invoices and then with extra accordingly
If the labels are not defined, the package will combine the dimensions names to make a suitable naming for each dataset.
use Aldeebhasan\FastBi\Manager\{Metrics,Dimensions,Widgets};

Widgets::scatterChart('profits')
        ->labels(['POS To Store','POS to Extra'])
        ->dimensions([
            Dimensions::number('pos-invoices',[100,110,120,130,140,160,200,250]),
            Dimensions::number('store-invoices',[100,200,300,210,300,400,450,600]),
            Dimensions::number('extra',[10,20,30,80,90,150,200,250]),
        ])->render()

Widgets::bubbleChart('bubbles profits')
        ->labels(['POS To Store','POS to Extra'])
        ->dimensions([
            Dimensions::number('pos-invoices',[100,110,120,130,140,160,200,250]),
            Dimensions::number('store-invoices',[100,200,300,210,300,400,450,600]),
            Dimensions::number('extra',[10,20,30,80,90,150,200,250]),
        ])->render()
| Scatter chart | Bubble chart |
|---|---|
 |
 |
Polar Area Chart Widgets
use Aldeebhasan\FastBi\Manager\{Metrics,Dimensions,Widgets};
//single dimension
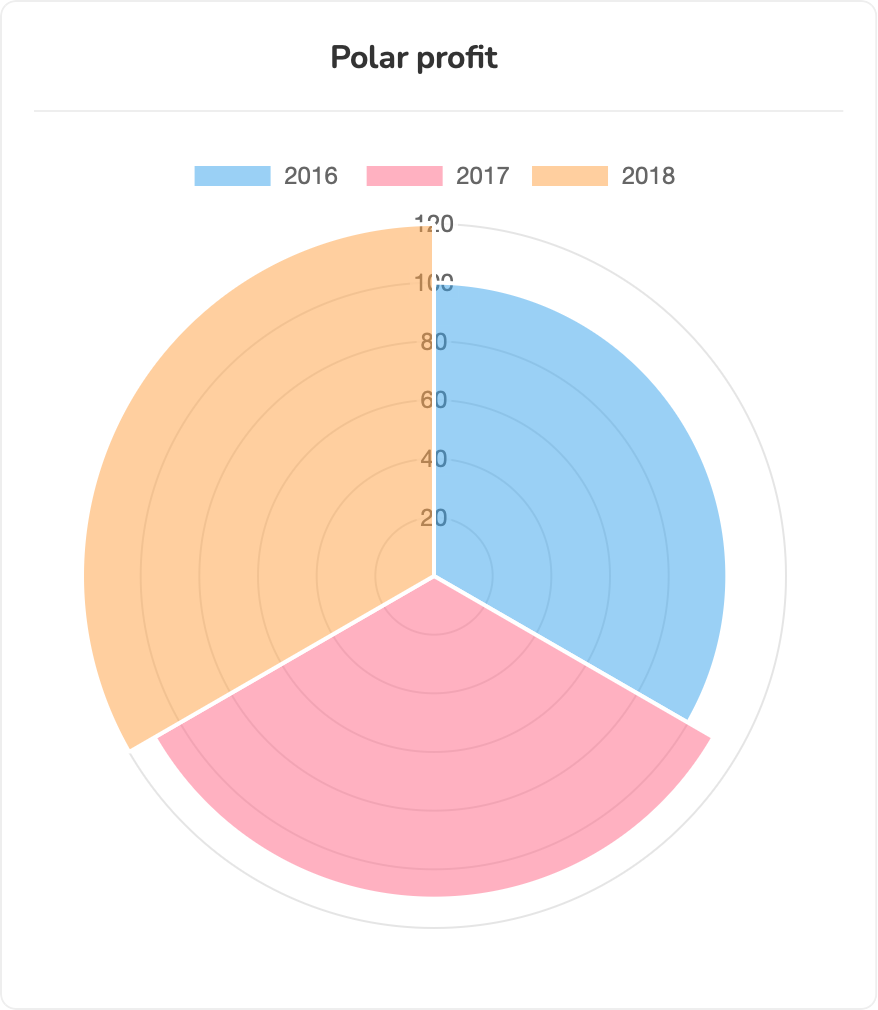
Widgets::polarAreaChart('polar profits')
        ->labels(['2016 ','2017','2018'])
        ->dimensions([
            Dimensions::number('pos-invoices',[100,110,120]),
        ])->render()
//multi dimensions
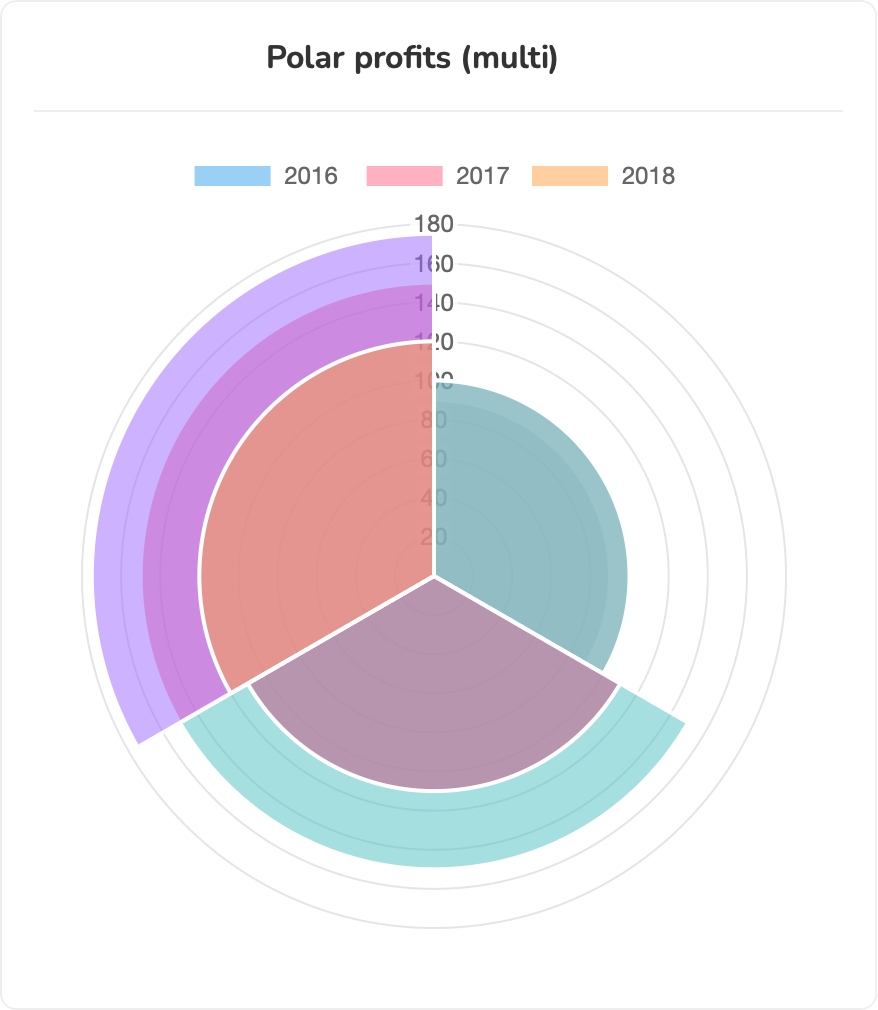
Widgets::polarAreaChart('polar profits (multi)')
         ->labels(['2016 ','2017','2018'])
        ->dimensions([
            Dimensions::number('pos-invoices',[125,110,120]),
            Dimensions::number('store-invoices',[100,150,175]),
            Dimensions::number('extra',[150,110,150]),
        ])->render()
| Single Dimension | Multi Dimensions |
|---|---|
 |
 |
Radar Chart Widgets
use Aldeebhasan\FastBi\Manager\{Metrics,Dimensions,Widgets};

//single dimension
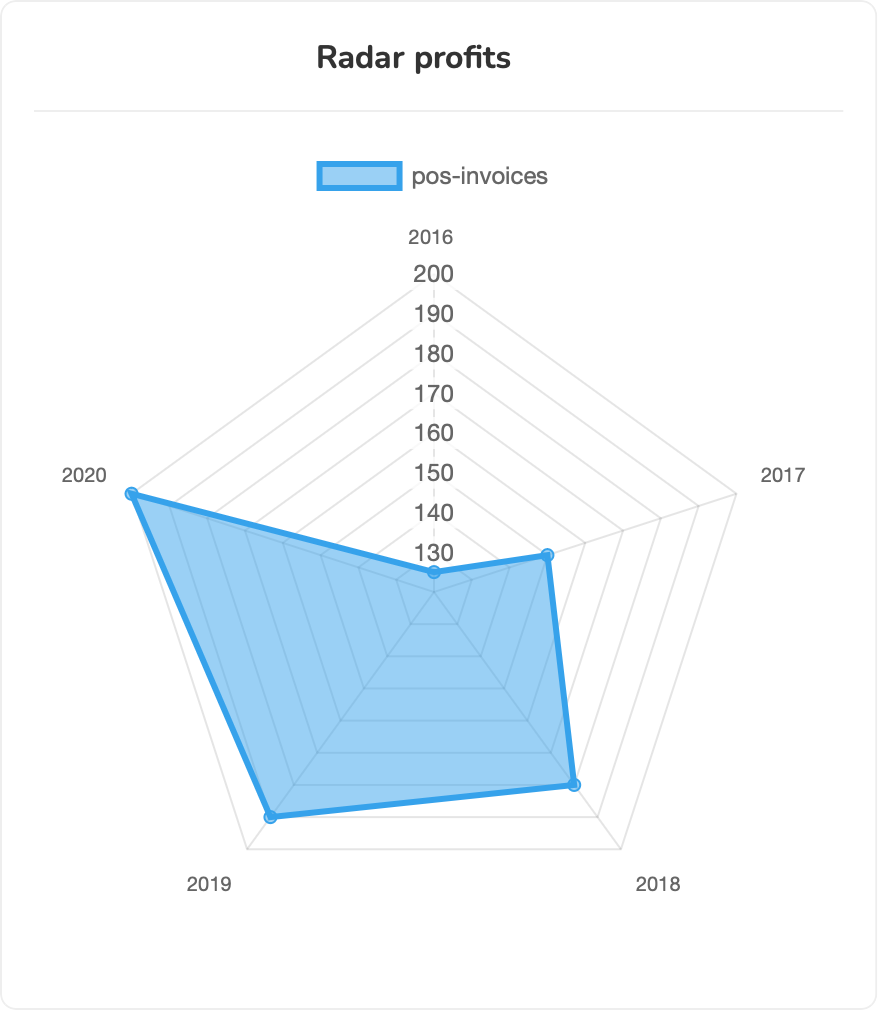
 Widgets::radarChart('radar profits')
         ->labels(['2016 ','2017','2018','2019',2020])
        ->dimensions([
            Dimensions::number('pos-invoices',[125,150,180,190,200]),
        ])->render()
//multi dimensions
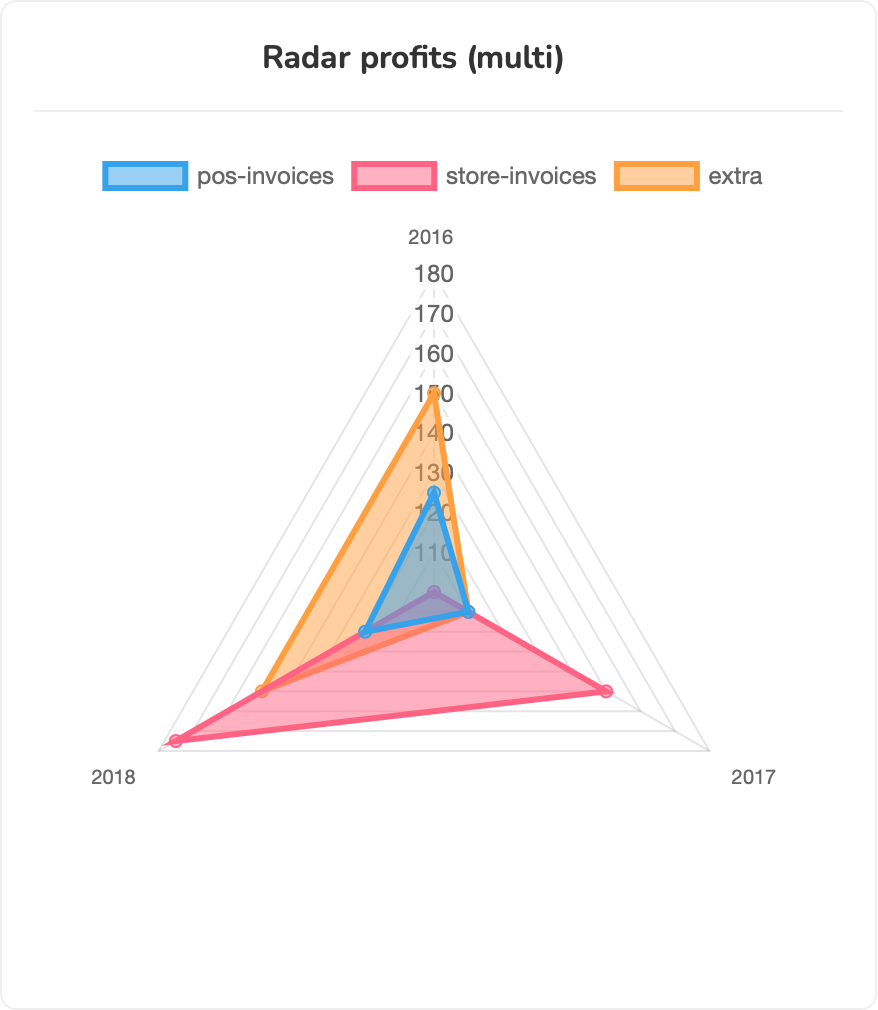
Widgets::radarChart('radar profits (multi)')
         ->labels(['2016 ','2017','2018'])
        ->dimensions([
            Dimensions::number('pos-invoices',[125,110,120]),
            Dimensions::number('store-invoices',[100,150,175]),
            Dimensions::number('extra',[150,110,150]),
        ])->render()
| Single Dimension | Multi Dimensions |
|---|---|
 |
 |
Number Widgets
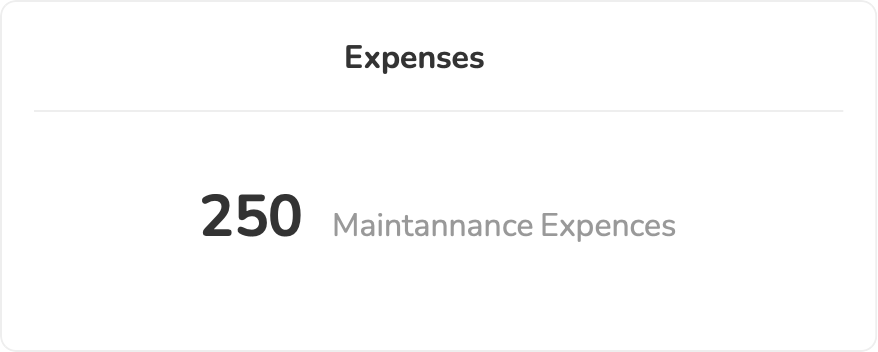
This widget is used to represent some statistic related to your dashboard.
use Aldeebhasan\FastBi\Manager\{Metrics,Dimensions,Widgets};

//single dimension
 Widgets::number('expenses')
        ->labels(['Maintenance Expenses'])
        ->dimensions([
            Dimensions::number('maintainance',[250]),
        ])->render()
//multi dimensions
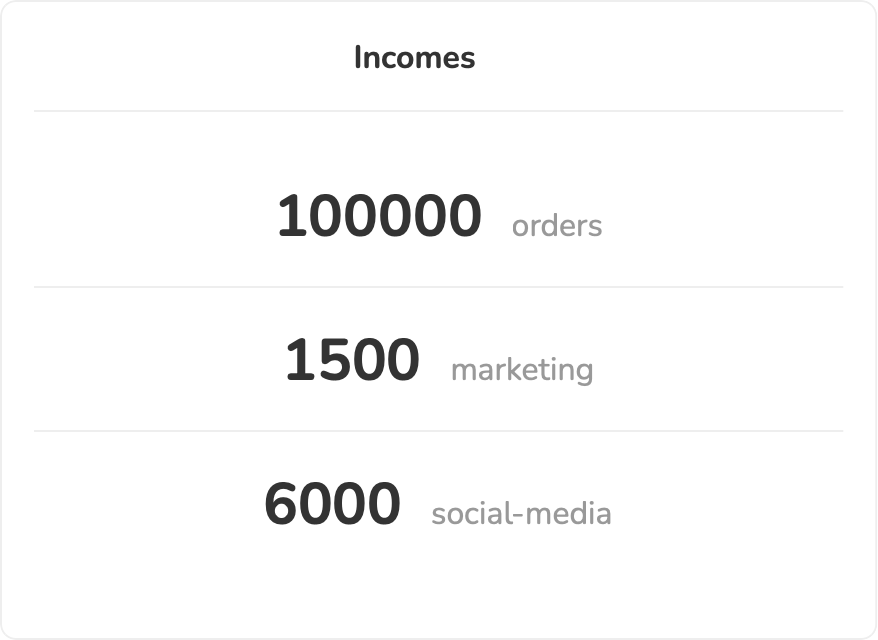
Widgets::number('incomes')
        ->dimensions([
             Dimensions::number('orders',[100000]),
             Dimensions::number('marketing',[1500]),
            'social-media' => 6000
        ])->render()
| Single | Multi |
|---|---|
 |
 |
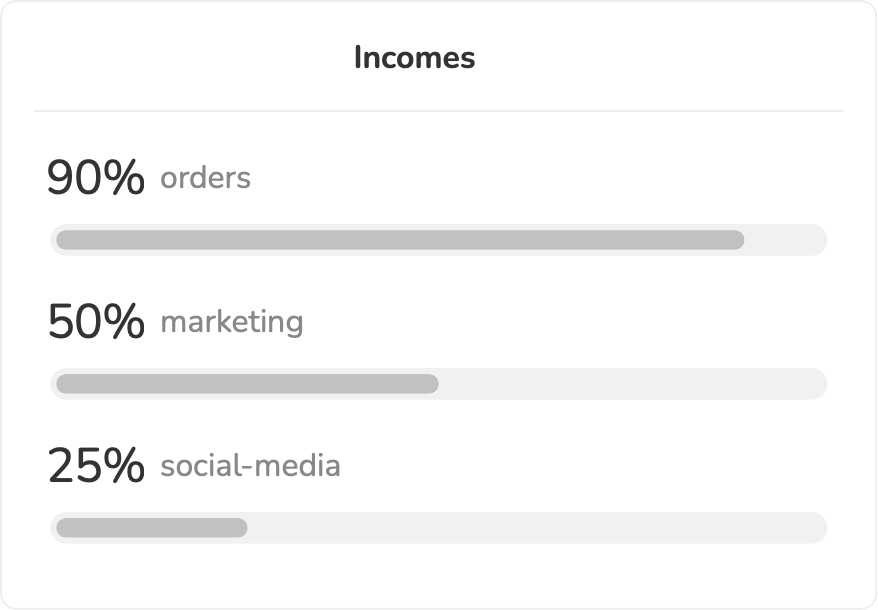
ProgressBar Widgets
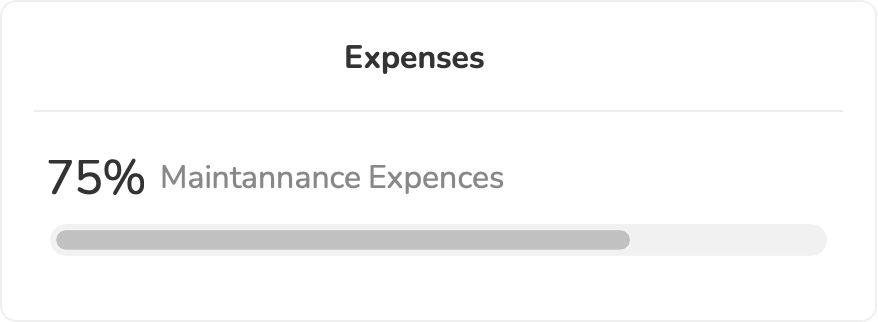
This widget is used to represent some statistic related to your dashboard. For this widget, you should specify numbers in term of percentage (max is 100 and min 0)
use Aldeebhasan\FastBi\Manager\{Metrics,Dimensions,Widgets};

//single dimension
 Widgets::progressBar('expenses')
        ->labels(['Maintenance Expenses'])
        ->dimensions([
            Dimensions::number('maintainance',[250]),
        ])->render()
//multi dimensions
Widgets::progressBar('incomes')
        ->dimensions([
             Dimensions::number('orders',[100000]),
             Dimensions::number('marketing',[1500]),
            'social-media' => 6000
        ])->render()
| Single | Multi |
|---|---|
 |
 |
Geo Map Widgets
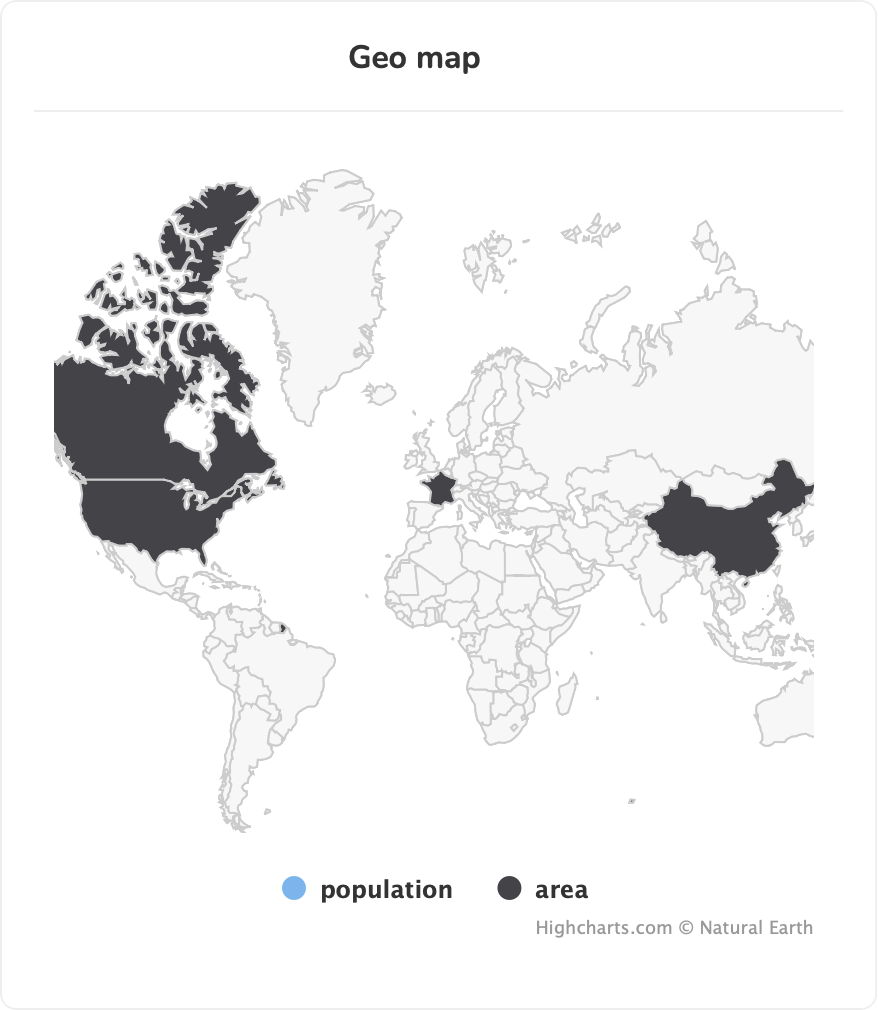
For this widget you need to specify the countries you want to show the statistics on. You can define the country using the iso2 code.
use Aldeebhasan\FastBi\Manager\{Metrics,Dimensions,Widgets};

//single dimension
 Widgets::geoMap('map')
        ->countries(['US','CA','FR','CN'])
        ->dimensions([
            Dimensions::number('population',['150','200','300','400']),
            'area'=>['1500','2000','3000','6000'],
        ])->render()
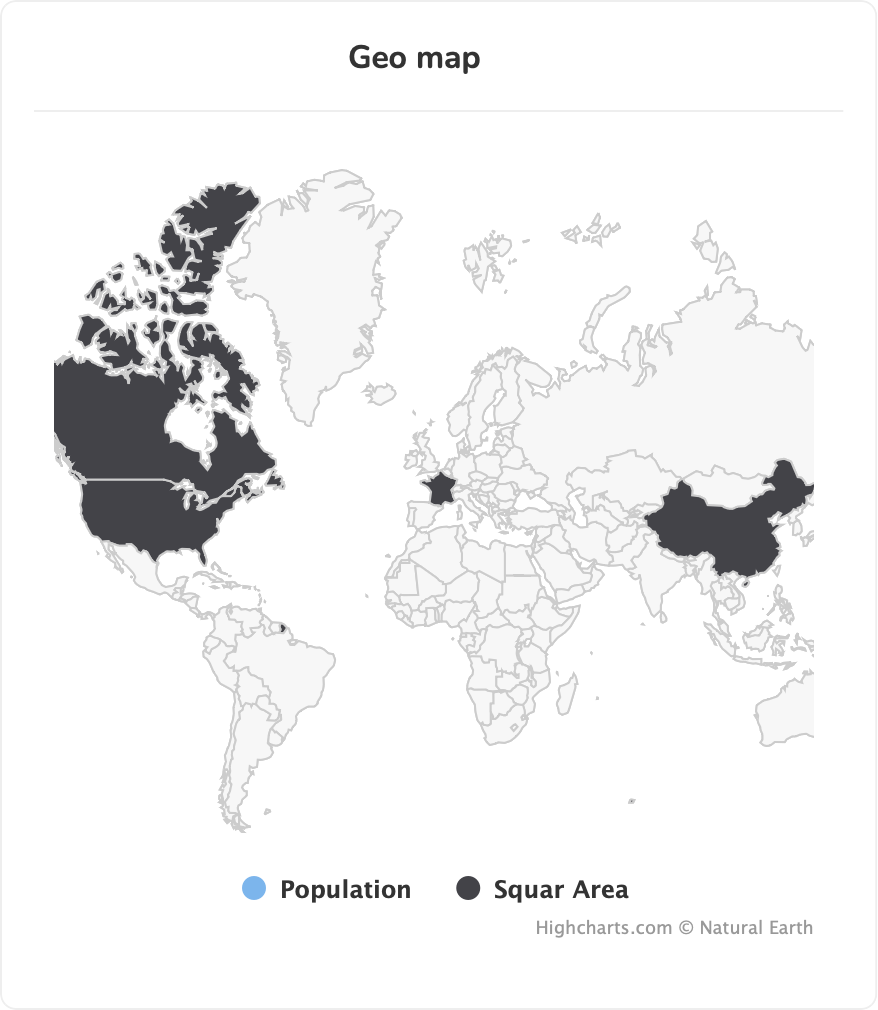
//custom names
 Widgets::geoMap('map')
        ->countries(['US','CA','FR','CN'])
         ->labels(['Population','Square Area'])
        ->dimensions([
            Dimensions::number('population',['150','200','300','400']),
            'area'=>['1500','2000','3000','6000'],
        ])->render()
| Default | Customized |
|---|---|
 |
 |
License
Fast-Bi package is licensed under The MIT License (MIT).
Security contact information
To report a security vulnerability, contact directly to the developer contact email Here.
