adswerve / google-analytics-and-adwords
This TYPO3 extension installs gtag so you can use google analytics and google ads
Maintainers
Package info
github.com/adswerve/google_analytics_and_adwords
Type:typo3-cms-extension
pkg:composer/adswerve/google-analytics-and-adwords
Requires
- typo3/cms-core: ^10.4.0
Replaces
- typo3-ter/google-analytics-and-adwords: v1.0.0
README
This Typo3 Extension provides an interface to implement Google Analytics and Google Ads by natively using gtag library. With this extension you can implement Universal Analytics, Google Analytics 4, and Google Ads together.
Code Repository: https://github.com/adswerve/google_analytics_and_adwords
Extension key: "google_analytics_and_adwords"
Contact
Requirements
- You have a Typo3 site up and running prior to extension installation
- You are using Typo3 version 10.4 - 10.9
- You have created a Google Analytics Account and created a Google Analytics Property.
- It is recommended to use the New Google Analytics (GA4) instead of the Universal Analytics property.
- To use the New Google Analytics (GA4) with this extension, follow this guide to make sure you have your Measurement ID (ex. G-XXXXXX)
- You can still use the [Universal Analytics] (https://support.google.com/analytics/answer/10269537) properties as well. You'll need to have your Tracking ID created. (ex. UA-XXXXXXX)
Compatible with
- 10.4-10.9|11.5.0
Installations
Composer
To follow this documentation, you must have TYPO3 up-and-running. Check out the [link text “Installation & upgrade guide”]: https://docs.typo3.org/m/typo3/guide-installation/master/en-us/QuickInstall/Composer/Index.html#install-via-composer for how to setup a TYPO3 installation with Composer
The system extensions extbase and fluid are required.
composer require adswerve/google-analytics-and-adwords
To install this extension by cloning the source, open the terminal and go to the directory typo3conf/ext/ and enter:
git clone https://github.com/adswerve/google_analytics_and_adwords.git .
To install this extension by downloading the source, open the url Extension Builder. There you can download a ZIP file, which you can import directly into the Extension Manager. Alternatively you copy the unpacked extension folder to the directory typo3conf/ext/. Then you can use the Extension Manager to activate the Extension Builder.
TER
- To download the extension with TER
a. Extension Manager
i. As a user with admin rights, navigate to the Extensions module.
i. In the select box, navigate to the Get Extensions sub-module.
iii. Click on "Update now“
iv. Enter the key google_analytics_and_adwords in the search field.
v. Click the cloud icon in the hit list to import and install the extension.
b. From the TYPO3 Extension Repository (https://extensions.typo3.org/)
i. Search for the key google_analytics_and_adwords
ii. Download the ZIP file.
iii. Unpack the ZIP file and move the content into the TYPO3 extension directory (typo3conf/ext/).
iv. Navigate in the TYPO3 Backend as a user with admin rights into the module Extensions.
v. Look for the extension google_analytics_and_adwords
vi. Click on the cube icon with the plus to install the extension
-
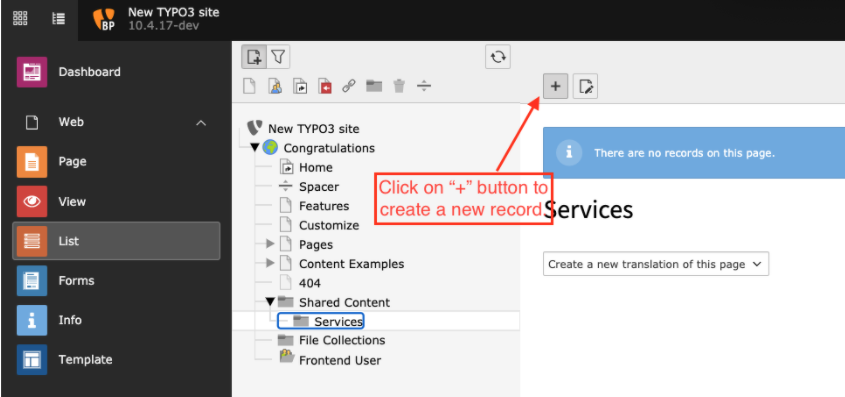
After successfully downloading the extension in step 1, go to "List" Modules within your Typo3 backend. a. Create a Sys Folder within any of your folders containing data and name it "Services"
i. I arbitrarily used my "Shared Content" folder but you could use any folder.

-
After Creating your Services folder, right click on the folder and enable it

-
To enter your Measurement ID(GA4) or Tracking ID(UA). Click the "+" icon to create a record to store your Measurement ID.
-
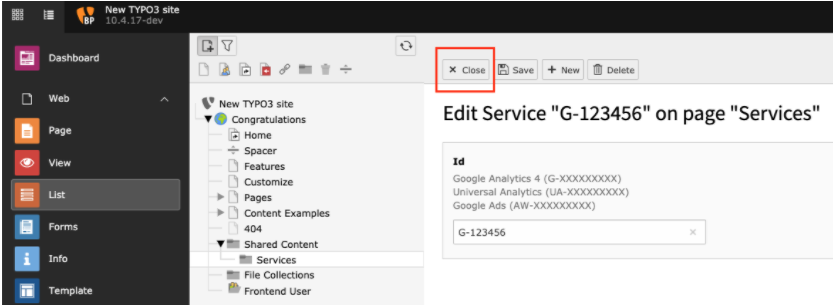
Find the "Global Site Tag (gtag.js) and click on Service.

-
Enter your ID and Click Save Depending on your service (GA4, UA, Google Ads), you'll need to make sure you enter the correct format.

-
Click Close
-
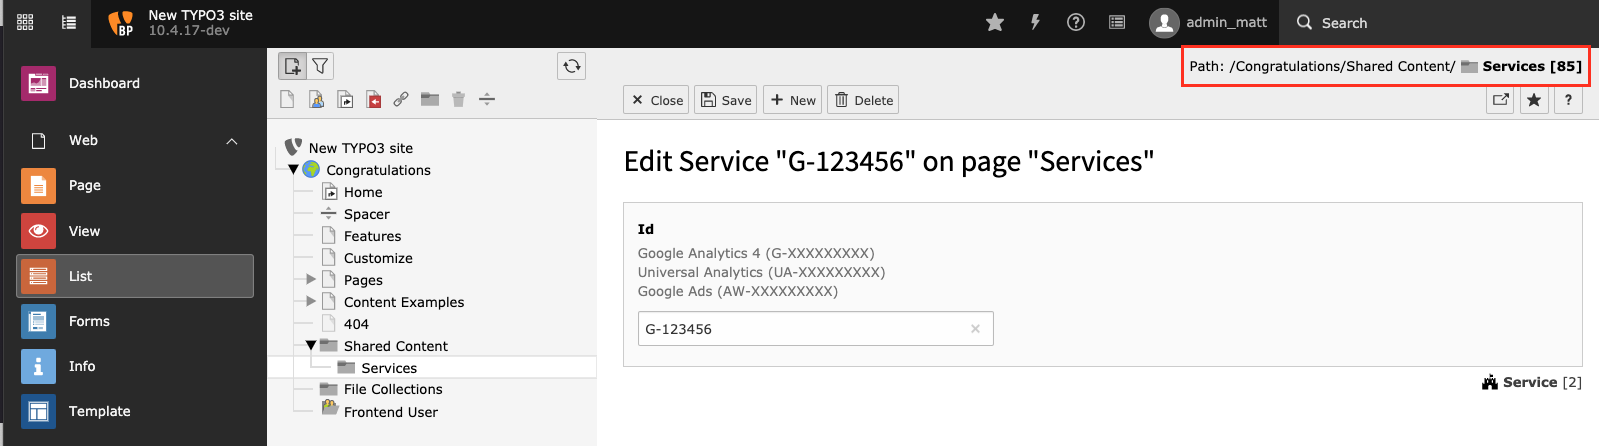
You now have stored your ID, this record is added into a relational database and will be referenced when adding the plugin to any page you want to track.
-
After activating the extension (and clearing the cache), the plugin can be inserted on a page. Don’t forget to set the sys_folder, where the services are stored as the starting point. This can be done at the end of the plugin entry form in the backend and globally in the page configuration TSConfig:
TCEFORM.tt_content.pages.PAGE_TSCONFIG_ID = 3
Note: Your PID may not be 3, you need to look at where your Services folder is by clicking into the folder and look at the top right.
You must add this plugin to all pages within your website.
Version
v1.0