a_nameless_wolf / urabe
A CRUD API for database transaction in MySQL, PostgreSQL y ORACLE
Maintainers
This package is auto-updated.
Last update: 2026-06-29 01:52:47 UTC
README
Urabe is a CRUD and database transaction manager divided in three layers, the first layer is called KanojoX acts as a connection manager, wraps the php-resources most used functions such as connect, close_connection,query, fecth_assoc and error. Currently the supported drivers are ORACLE, PG and MYSQL, each driver is associated with a KanojoX class, ORACLEKanojoX,PGKanojoX and MYSQLKanojoX. To learn more about the use of KanojoX visit the wiki[1].
The second layer is called Urabe, this layer is created from a KanojoX object and wraps most common SQL functions allowing to work transparently between database without changing our code. The function include alias for selecting data, updating, deleting, inserting or other query execution. To learn more about the use of Urabe visit the wiki[2].
The last layer is called HasamiWrapper, this layer manage the CRUD request using Urabe as the database manager and the WebServiceContent class as the request content. Currently supported verbose GET,POST,UPDATE,DELETE. To learn more about the use of Urabe visit the wiki[3].
How to use it
Create a new class that extends from HasamiWrapper, define the connection data and the table to query.
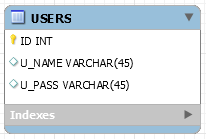
The connection data is specified at the constructor. Lets say we want to make a service that manage the table users.
include_once  "urabe/HasamiWrapper.php";

class  MyService  extends  HasamiWrapper
{
	const  TABLE_NAME  =  "users";

	public  function  __construct()
	{
		$kanojo  =  new  PGKanojoX();
		$kanojo->schema  =  'mySchema';
		$conn = (object)array(
			"host"=> 'localhost',
			"user_name"=> "postgres",
			"password"=>"postgres",
			"port"=>5432,
			"db_name"=>'mydb');
		$kanojo->init($conn);
		$full_table_name = $kanojo->schema  .  "."  .  self::TABLE_NAME
		parent::__construct($full_table_name, $connector, "id");
	}
}
In other script lets call it myServiceEndPoint.php write the following script. Remember to include path to the class file.
include_once  "MyService.php";
$service  =  new  MyService();
$result  =  $service->get_response();
echo json_encode($result, JSON_PRETTY_PRINT);
To access the table we're going to send a web request to the service endpoint, lets say is located in the path http://127.0.0.1/mySite/myServiceEndPoint.php.
Select data
Now to select data sending a GET request, simple request no parameters needed. The response depends of the configuration defined in the UrabeSettings.php file.
Example request:
curl --request GET \ --url 'http://127.0.0.1/mySite/myServiceEndPoint.php'
Example response:
{
    "message": "Selection succeed",
    "result": [
        {
            "id": 2,
            "u_name": "mike",
            "u_pass": "pass123",
        },
        {
            "id": 3,
            "u_name": "user",
            "u_pass": "ua",
        }
    ],
    "size": 2,
    "error": null,
}
To select an user that matches and Id, use the reserve name filter as GET variable to allows the response to be filtered by id.
Example request:
curl --request GET \ --url 'http://127.0.0.1/mySite/myServiceEndPoint.php?filter=3'
Example response:
{
    "message": "Selection succeed",
    "result": [
        {
            "id": 3,
            "u_name": "user",
            "u_pass": "ua",
        }
    ],
    "size": 1,
    "error": null,
}
Now to update, insert and delete, by default the wrapper has this verbose PUT, POST and DELETE blocked, to unblocked them, you can change the default_*_status parameters in the UrabeSettings.php or adding the following lines in the constructor.
$this->set_service_status("PUT", ServiceStatus::AVAILABLE);
$this->set_service_status("DELETE", ServiceStatus::AVAILABLE);
$this->set_service_status("POST", ServiceStatus::AVAILABLE);
Insert data
To insert a new user, the request has to be send as PUT and the request body has to be in JSON, and contains the structure:
"insert_values": {
    "columns": []
    "values": { }
}
Let insert a new user.
Example request:
curl --request PUT \ --url 'http://127.0.0.1/mySite/myServiceEndPoint.php' \
--header 'Content-Type: application/json' \
--data '{ "insert_values": { "columns": [ "u_name", "u_pass" ], "values": { "u_name": "addedUser", "u_pass": "1234" } } }'
Example response:
{
    "succeed": true,
    "affected_rows": 1,
    "result": [],
    "error": null,
}
Update data
To update an user, the request has to be send as POST and the request body has to be in JSON, and contains the structure:
{
  "values": { },
  "condition": value
}
By default the condition is constructed making the primary key value equals to the condition passed value.
Example request: This Example updates the user password were the user id is equals to 3.
curl --request POST \ --url 'http://127.0.0.1/mySite/myServiceEndPoint.php' \
--header 'Content-Type: application/json' \
--data '{ "values": { "u_pass": "newpass" }, "condition": 3 }
Example response:
{
    "succeed": true,
    "affected_rows": 1,
    "result": [],
    "error": null
}
Delete data
To deletes an user, the request has to be send as DELETE and the request body has to be in JSON, and contains the structure:
{
  "condition": value
}
By default the condition is constructed making the primary key value equals to the condition passed value.
Example request: This Example deletes the user were the user id is equals to 5.
curl --request DELETE \ --url 'http://127.0.0.1/mySite/myServiceEndPoint.php' \
--header 'Content-Type: application/json' \
--data '{ "condition": 3 }
Example response:
{
    "succeed": true,
    "affected_rows": 1,
    "result": [],
    "error": null
}
This concludes the easy guide to the Urabe-API for advance petitions and costume calls visit the Wiki HasamiWrapper section.